69% of renovating homeowners replace every cabinet in the kitchen, and another 27% take on a partial cabinet project, according to the 2025 Houzz US Kitchen Trends Study. Whichever group you fall into, the new boxes land on the same floors and walls the old ones sat on, and those surfaces are rarely level, plumb or square. The visible result of that mismatch is always the same: uneven door gaps, a cabinet line that waves along the wall, and a base unit that rocks when someone leans on it.
Kitchen cabinets installation is a layout problem first and a fastening problem second. Get the reference lines right, shim deliberately, and the doors hang true. Skip that and no amount of adjusting hinges will hide the error.
Table of Contents
- Standard Cabinet Sizes and Heights to Plan Around
- Site Checks to Finish Before the Crew Arrives
- Layout Steps to Mark Before Hanging Anything
- Why Cabinets Drift Out of Line and How to Fix It
- Finishing Fillers, Trim and Hardware Correctly
- Decide Whether to Hire an Installer
Standard Cabinet Sizes and Heights to Plan Around
Built-in cabinetry only became standard in the 20th century, when assembled units replaced freestanding furniture such as the Hoosier cabinet, a movable all-in-one that combined food storage, a work surface and kitchen accessories, and more than 2 million of which had sold by 1920, according to the reference history of the kitchen cabinet. That shift is why a modern install is planned like a small construction job rather than placed like furniture.
The same standardized dimensions are what let cabinets from different makers fit the same openings. A base cabinet runs about 24 inches deep and 34.5 inches high, so adding a countertop puts the finished work surface roughly 36 inches above the floor. Sizes are written width × height × depth, which means an 18 × 36 × 12-inch cabinet is 18 inches wide, 36 inches high and 12 inches deep. Read every order that way.
Standard cabinet sizes and heights
| Cabinet type | Height | Depth |
|---|---|---|
| Base cabinet | 34.5 in | 24 in |
| Countertop | about 36 in finished height | 25 in |
| Wall cabinet | 30 or 36 in | 12 in |
| Wall cabinet bottom | 54 in above the floor | 12 in |
| Tall pantry | 84 or 90 in | 24 in |
Fit a run before you pick a finish
Sketch each wall to scale, then subtract the appliance openings and window trim from the usable length. What remains gets filled with standard widths, which run in 3-inch steps from 9 to 36 inches. Where the arithmetic leaves a gap of an inch or two, plan a filler strip rather than forcing the next size up.
Wall cabinets at 12 inches deep and either 30 or 36 inches high hang with their bottoms about 54 inches above the floor, which leaves 18 inches of backsplash between the counter and the upper box. Tall pantries jump to 84 or 90 inches high by 24 inches deep and have to be ordered with the ceiling height in hand.
The toe recess is part of that 34.5-inch total, not an addition to it, so cabinet toe kick height changes how much usable storage sits above the floor line. Lock it down before ordering. When a wall, a range or an accessibility requirement breaks the standard grid, a custom box is the fix, and it is cheaper than rebuilding a wall.
Site Checks to Finish Before the Crew Arrives
Every hour an installer spends waiting on another trade is a paying hour, and it lands on your invoice. The work below needs to be finished, not scheduled, before the truck arrives.
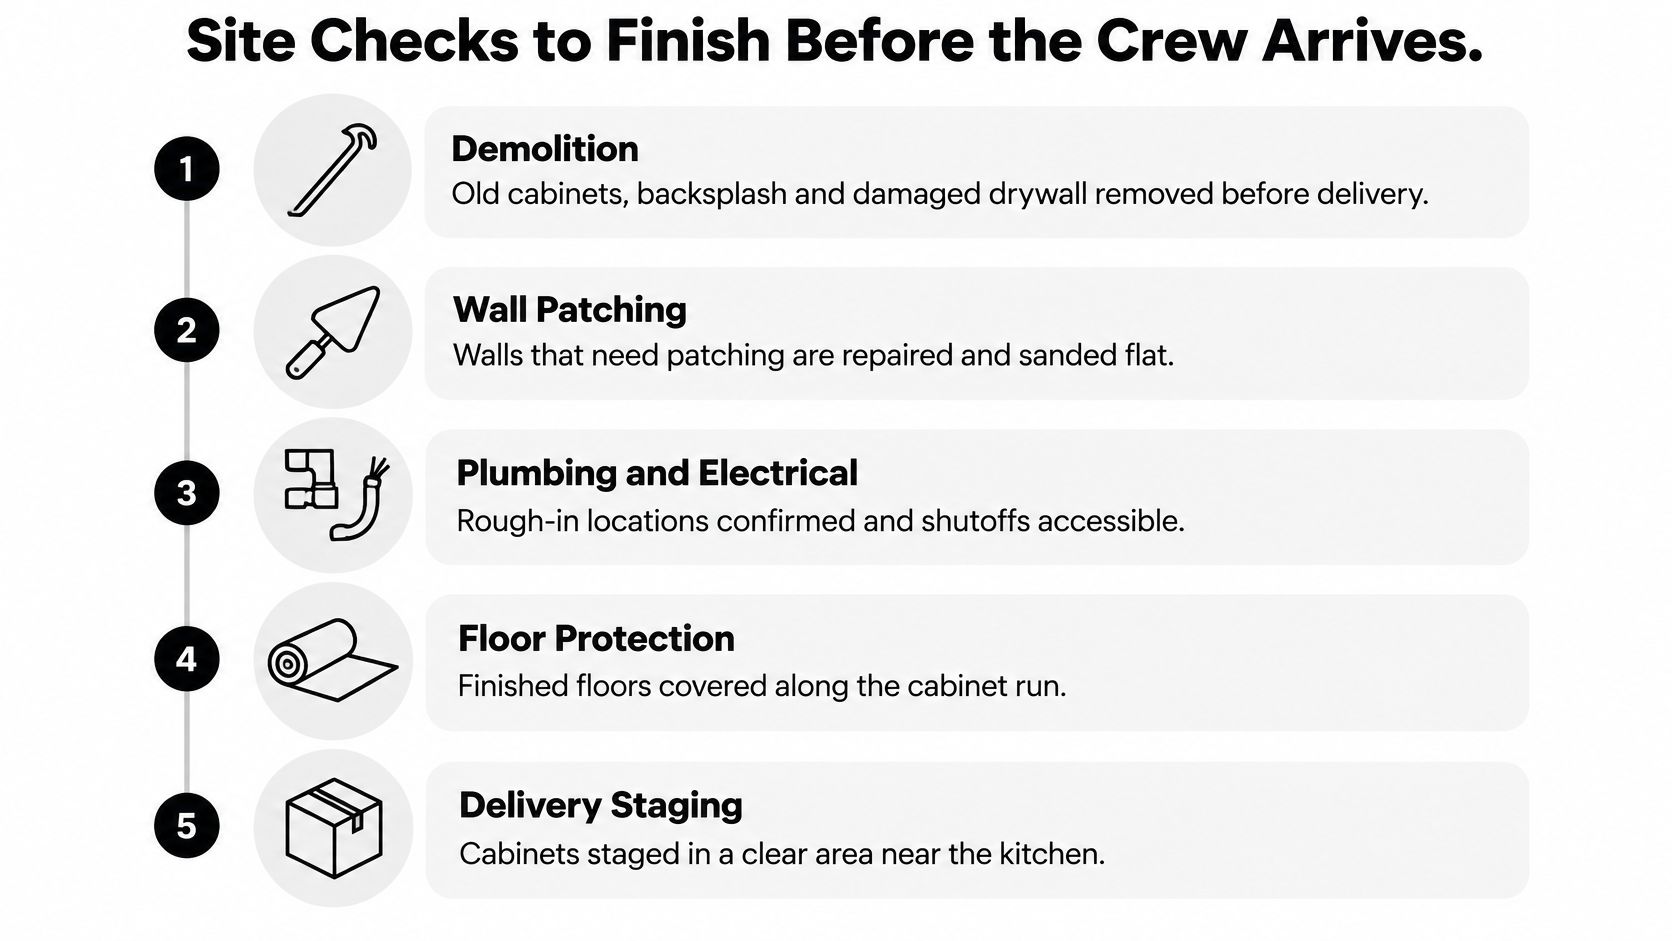
- Demolition is complete. Old cabinets, backsplash and any damaged drywall come out first. If the wall behind the uppers needs patching, blocking or a new skin of drywall, that is flagged now, because a crew standing in a half-demolished room can't hang anything.
- Rough-ins are confirmed and reachable. Sink drain and supply positions, dishwasher and range connections, backsplash outlet heights and the circuit for under-cabinet lighting all get checked against the plan. If that lighting circuit needs extending or a new switch leg, a lighting installation electrician should be on site before the drywall closes, not after the uppers are screwed to the studs.
- Appliance specs are final. Model numbers and exact openings, not "about 36 inches." A refrigerator that arrives a half inch wider than planned forces rework of the surround and the panel beside it.
- Clearances are checked against the plan. A 2025 accessibility resource manual from Rhode Island Housing specifies a 40-inch minimum clear passage between kitchen counters and a 30-inch-wide by 34-inch-high work surface with knee and toe clearance (Rhode Island Housing accessibility resource manual). Those dimensions are far easier to hit before boxes are on the wall.
- Flooring is settled. The same manual calls for extending finished flooring beneath the cabinet footprint, which keeps a future layout change from leaving a patched border where the old cabinets stood.
- A partial project gets verified. If you're keeping sound boxes instead of replacing them, confirm each one is square, plumb and firmly fixed to framing, and confirm the new doors match the existing reveal and hinge pattern before the crew starts.
Final measurements belong on this list too. Walls gain thickness from new drywall and floors gain height from new tile, so the numbers from the design phase are not the numbers the installer will find.
Re-measure wall by wall once the room is closed up. A step-by-step measuring routine for kitchen cabinets keeps that record straight and catches surprises while they're still cheap.
Layout Steps to Mark Before Hanging Anything
Start with the room's reference geometry, not with a cabinet. The sequence below follows manufacturer installation guidance such as this cabinet installation guide, which treats layout marks as the thing that makes the rest of the job repeatable.
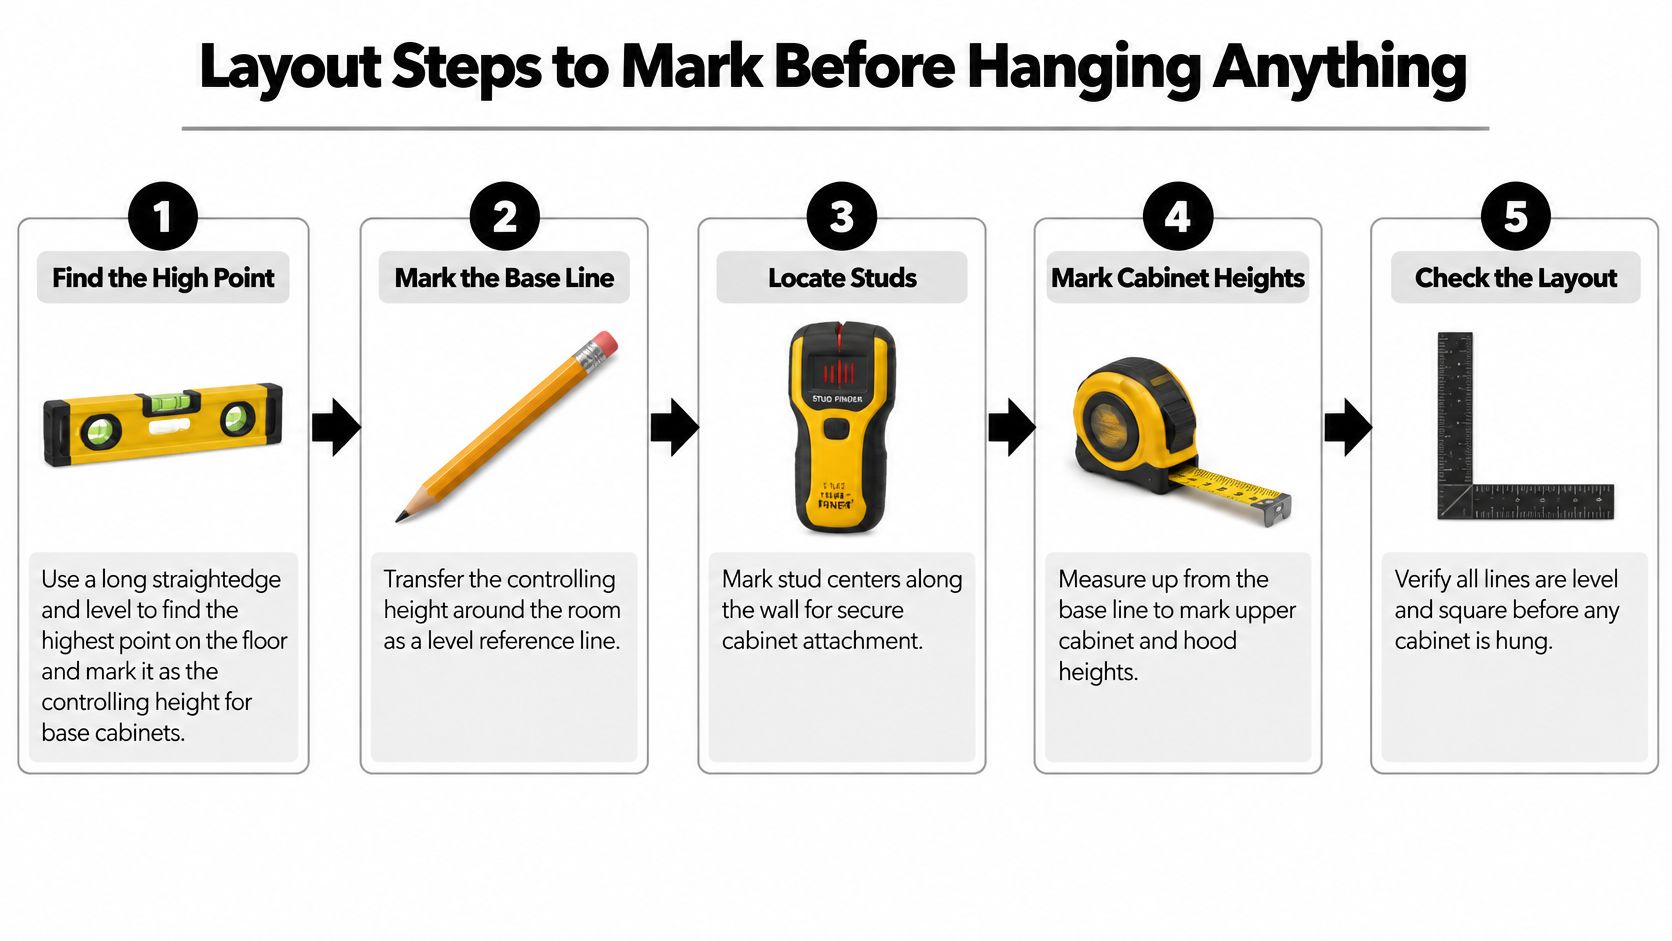
1. Find the floor's high point. Drag a long straightedge and a level across the floor in several directions and mark the highest spot. That point controls the elevation of every base cabinet, because shims and legs can raise a box but nothing lowers it below the high point without planing the floor.
2. Mark the studs and draw plumb lines. Studs in conventional framing sit about 16 inches on center. Mark the centers, then carry a vertical line up the wall from each one so screws land in wood rather than guessing behind drywall.
3. Screw a ledger to the wall at the upper cabinet bottom line. This straight, level batten carries the weight of wall cabinets while you shim and align them, and it frees both hands. It comes off at the end and the screw holes get filled.
4. Set the corner cabinet first. Shim it until it is level and plumb, then fasten it loosely through the back or hanging rail into studs. Every other cabinet in the run references this one, so a two-millimeter error here is a two-millimeter error across the whole kitchen.
5. Clamp the next cabinet to it and align the faces. Clamp or temporarily screw the face frames together, adjust until the fronts are flush and the boxes are level, plumb and coplanar, then check the pair again. Nothing gets fully tightened until the run is set.
6. Pilot drill and drive structural screws. The guidance specifies #8 × 2½-inch screws through a single layer of drywall, or #10 × 3-inch screws where the cabinet system calls for them. Pilot holes stop splitting and keep the screw pulling the box tight to the wall instead of spinning.
The rule that saves the job: shim the cabinet, never the wall. A wall that reads straight by eye can be half an inch out of plumb over eight feet, and forcing a box to follow it transfers that error into every door in the run.
The mistakes that ruin this stage are consistent. Drywall anchors alone won't hold a loaded upper. Skipping pilot holes splits stiles and leaves screws proud. Fully tightening the first cabinet before the run is checked locks distortion in place, and the last cabinet in the line ends up carrying all of it.
Where the corner lands also decides the kitchen work triangle for the life of the room, so settle that before the first screw goes in.
Why Cabinets Drift Out of Line and How to Fix It
The complaint that brings people back is a door gap that's tight at the top and wide at the bottom, or a drawer front sitting proud at one corner. The gap shows up at the door. The cause usually sits in the box. A cabinet that's out of plumb, or slightly racked out of square, twists the opening, and the door reveals it.
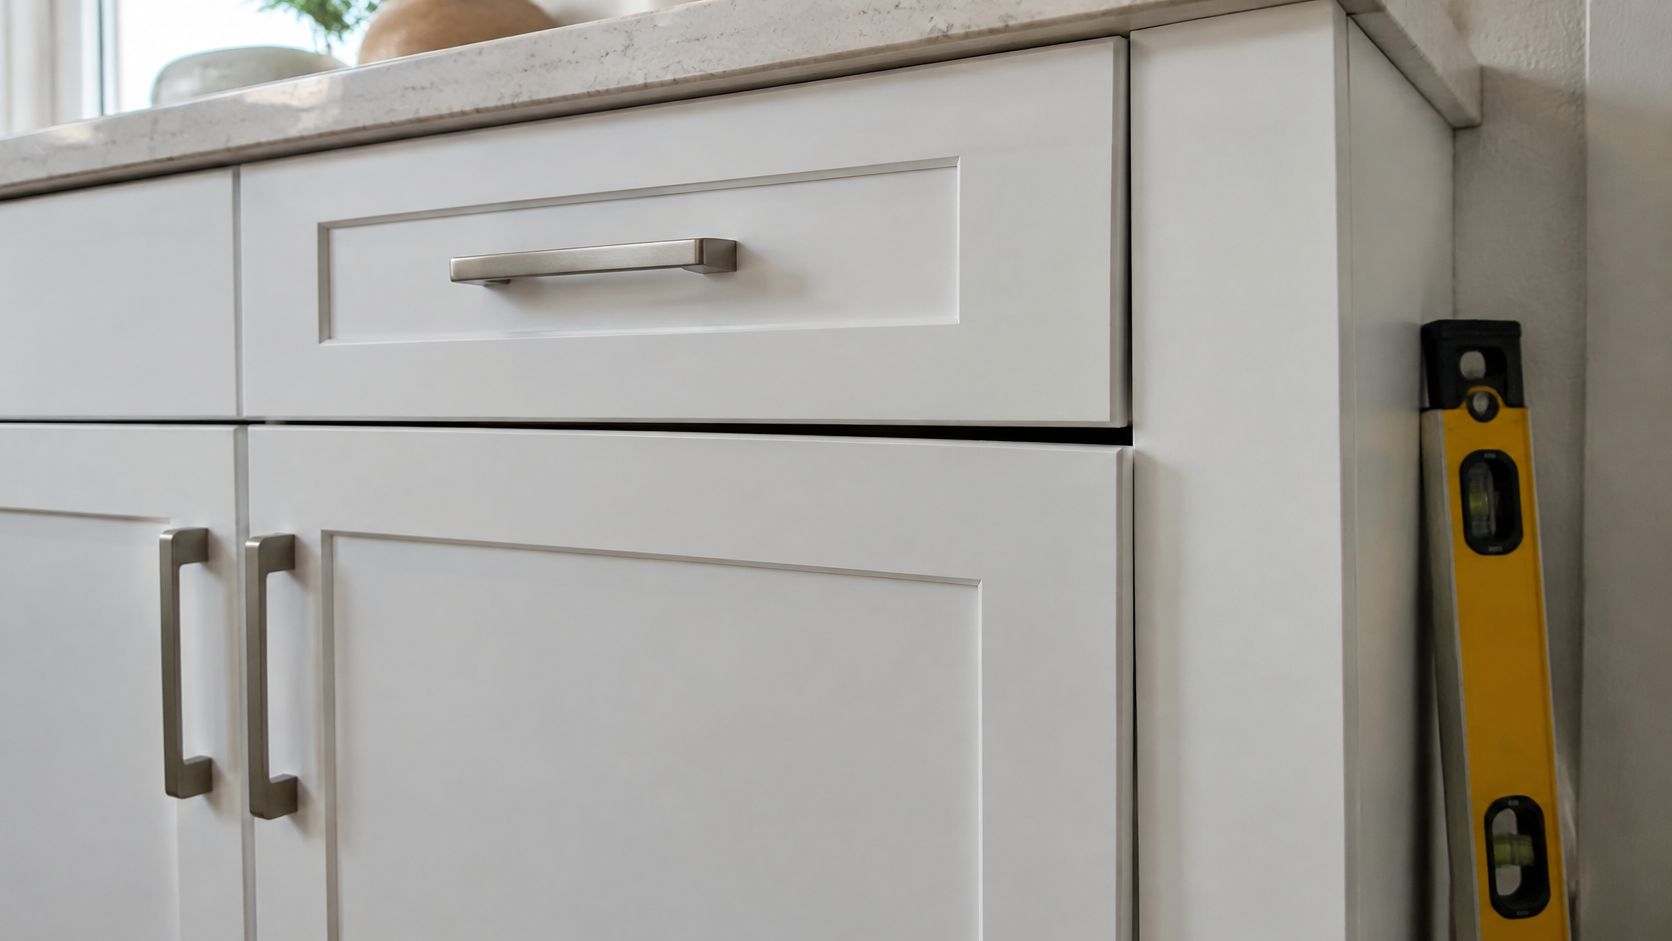
That is why the quality check has to be continuous rather than a final walkthrough. Check level, plumb and face alignment at every cabinet, not only at the two ends of the run, as a builder's cabinet installation tips in the Spokesman-Review describe. Use a 4-foot level or a longer straightedge on the fronts and the sides, left to right and front to back.
Alignment symptoms, causes and fixes
| Symptom | Likely cause | Fix |
|---|---|---|
| Uneven gaps at door and drawer edges | Box not plumb, only face frames aligned | Reset the box, reshim, recheck with a 4-foot level |
| Wavy cabinet line along the run | Stud crown or floor high spots | Remove minor high spots and shim low areas |
| Base rocks when pressed | Gap under a low spot with no shim | Add shims at the low point and refasten |
| Wall cabinet sags or pulls away | Fastened to drywall or anchors only | Remove, locate studs and drive structural screws into framing |
| Doors bind or drawers stick | Box out of square or racked | Re-square the box and check both diagonals |
| Adjoining faces not flush | Faces not clamped together while setting | Loosen, realign and retighten the pair |
Stud crown catches people who trust the layout. A crowned stud pushes a cabinet box out of plane even when the lines were marked perfectly, so the box gets shimmed and rechecked before the screws go home. The other half of the problem is aligning only the face frames while ignoring box plumb, which shows up months later once hardware is loaded on the doors.
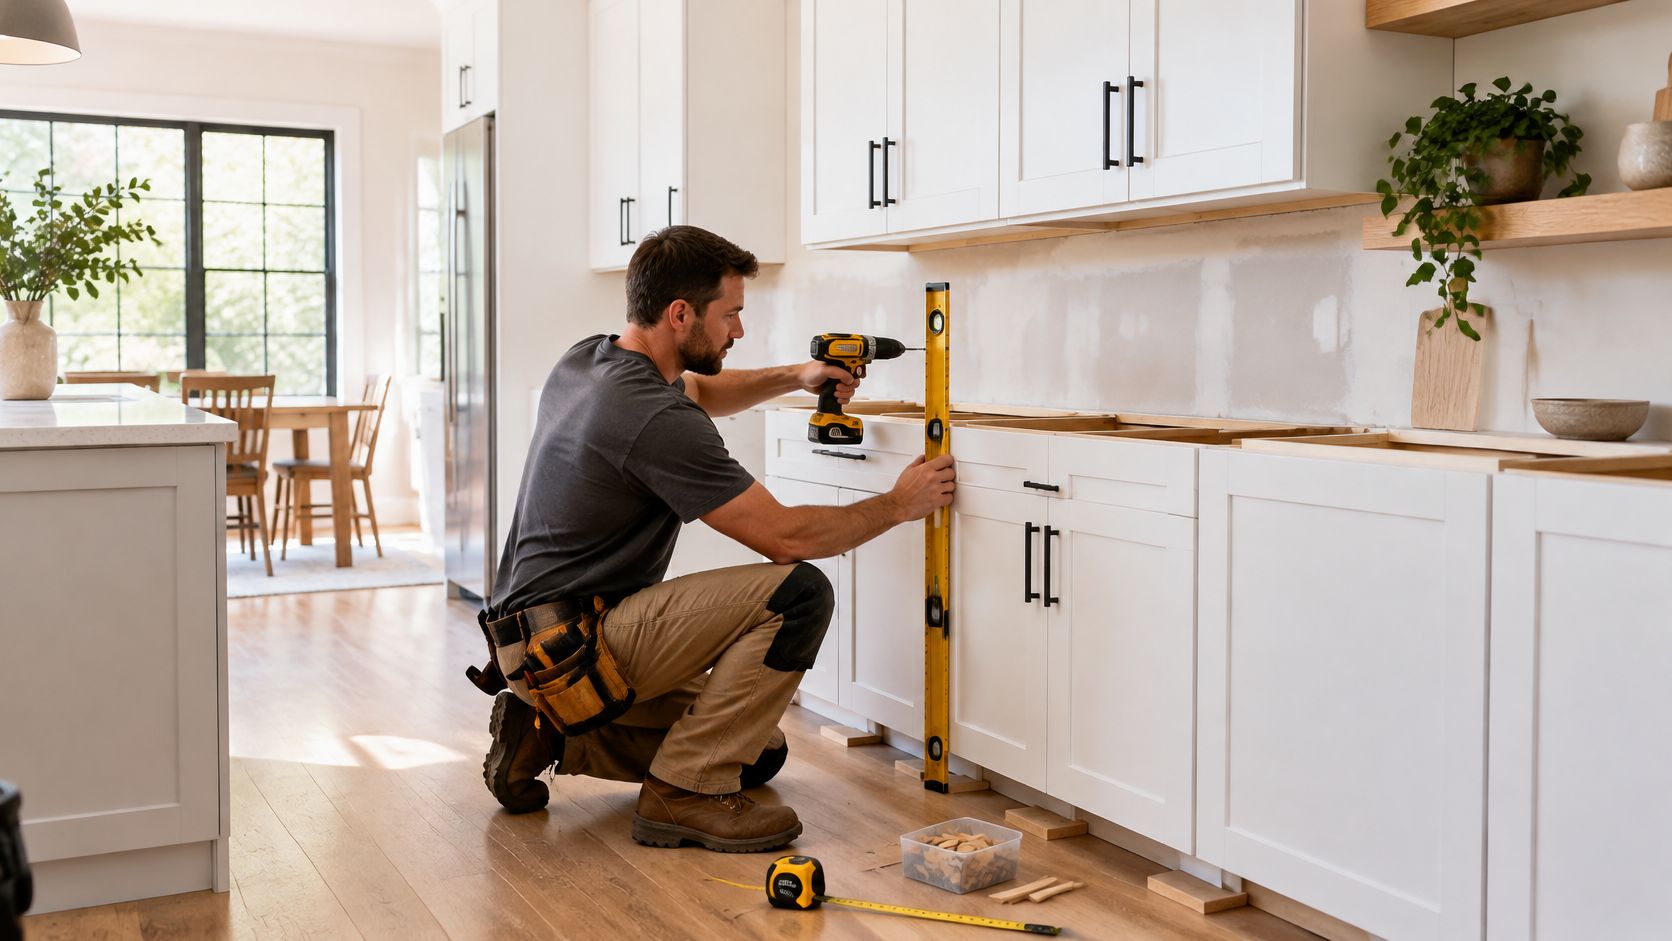
Here's the same set of checks worked through in a real install, from high point to final reveal.
Judging the finished run is straightforward. The cabinet line should be visually continuous, adjoining face frames flush, no box rocking at the base, every fastener biting into framing, and doors and drawers operating without binding anywhere in their travel. A wall cabinet that sags or pulls away is a fastening failure, not a cabinet defect, and the repair is the structural-screw method from the layout stage.
Finishing Fillers, Trim and Hardware Correctly
Finish in a fixed order, and never let trim cover a mistake. Filler strips hide the gap between an out-of-plumb wall and the last cabinet, crown covers the top line, and hardware sits on doors that are already hung and adjusted.
1. Scribe and install fillers. Push a filler strip against the wall, mark the wall's irregularity onto it, and cut to the scribe so the gap closes tight. A 3-inch filler is a common stock width, and a narrow scribe handles tight corners.
2. Attach toe kicks and check the floor transition. Toe-kick plates get fastened after the bases are final, and the plate must clear the flooring edge so it doesn't bind on tile or float above a wood floor.
3. Fit crown or a light rail last. Cut and fit crown only after confirming the upper cabinets are flush and level, because crown follows the cabinet line and exaggerates any error beneath it.
4. Hang doors, then hardware. Set an even reveal of about 1/8 inch around each door, adjust the hinges, and only then mount pulls and knobs. Use a drilling template so pull centers line up across a bank of drawers. The right sequence for installing cabinet hardware keeps you from drilling a drawer front twice.
5. Test every drawer and door. Run each drawer through its full travel and fix binding by adjusting the slides, not by shimming the front. A drawer that closes softly with the last inch doing the work is set correctly.
6. Template the countertop. Once the cabinets are locked in and level, take the template measurements. Countertops are fabricated from final cabinet positions, so a box that moves afterward becomes a counter that doesn't fit.
Note where outlets, lighting and switch legs land before the backsplash goes up, and keep the removed cabinet measurements on file. Ten years from now, that note is what makes a single damaged door or a new appliance surround a one-day job instead of a guessing game.
A finished run looks quiet. Reveals are even, no gap shows at the wall, drawers close on their own, and the cabinet line reads as one piece. When the dust settles, a proper post-renovation cleanup gets the fine drywall dust out of the hinge cups and drawer tracks, which is where it hides and where it makes new hardware feel gritty.
Decide Whether to Hire an Installer
Cabinet work dominates the budget. Cost breakdowns cited by the Kemmerer Gazette's kitchen remodel cost report put cabinetry at roughly 29% of total project spending and general installation labor at about 17%, with appliances near 14%. On a mid-range budget of $25,000 to $50,000, that implies roughly $7,250 to $14,500 for cabinets and $4,250 to $8,500 for installation-related labor, before design, demolition, plumbing, electrical, countertops or permits.
Consumer cost reporting quoted in the same report gives a cabinet-installation range of about $1,860 to $9,430, with labor frequently averaging $3,500 to $6,000. The spread is not noise. It reflects cabinet count, wall condition, access, product type, layout changes, and whether tear-out is included.
DIY makes sense in a narrow set of conditions. One straight base run, a room that's square, walls that are plumb, no uppers, and no countertop templating. In that case a homeowner with a 4-foot level, a stud finder, clamps and an impact driver can do a clean job over a weekend.
Hire when any of the following is true:
- Walls are out of plumb by more than a quarter inch over the run, especially in older homes where plaster and previous remodels have layered up.
- The layout has multiple runs and corners, where one bad corner cabinet throws off both legs of the L.
- Uppers must mount to difficult walls, such as tile, plaster over lath, or masonry.
- Countertops need templating, because the fabricator works from the installed cabinets, not the plan.
- Your schedule is tight, and a stall in the sequence costs more than the labor.
The coordination risk of running it yourself is real. A delayed template or a mis-sized appliance opening stops the crew, and the trades behind them bill for the return trip.
A design-through-install provider is one way to remove that coordination load. The Cabinet Coach handles installation after the design stage, including cabinetry installation and final hardware placement, and manages the project once design and materials are finalized by coordinating all installation work with trusted professionals. The custom cabinet process typically runs about 6 to 12 weeks from initial consultation to final installation, covering design approvals, material ordering and building the cabinets, and it varies with project complexity. Compare that against independent installer quotes, and if you want the whole scope under one contract, kitchen remodeling contractors in New Jersey can price it that way.
Pull the room measurements and appliance specs from the earlier steps, put them in one document, and send the same package to every bidder. Identical inputs produce comparable quotes.
The Cabinet Coach brings cabinetry, countertops, hardware and tile to your home as a mobile showroom, then carries the project from design through installation and final hardware placement so the measuring, ordering and shimming sit with one team instead of three. If your South Jersey kitchen has the out-of-plumb walls and settled floors that make a self-install risky, start with a conversation about the layout and let the measurements drive the plan. Visit The Cabinet Coach to book a consultation and see how the process fits your timeline.