

You’ve probably got the new knobs or pulls sitting on the counter right now. They look great in the package, and you can already picture how much cleaner the kitchen or bath will feel once they’re on. Then you look at those smooth cabinet doors and realize the next step is drilling holes in finished wood.
That’s the part that commonly causes hesitation.
The good news is that how to install cabinet hardware isn’t hard because the tools are complicated. It gets hard when people rush, eyeball placement, or trust a tape measure more than a template. In South Jersey homes, that matters even more. A newer kitchen in Voorhees might have tidy, predictable fronts, while an older home in Cherry Hill or Winslow often has slab doors, overlay doors, or drawer fronts that aren’t as uniform as they first appear.
If you’re updating hardware as part of refreshing old kitchen cabinets, this is one of the fastest ways to change the look of the room without taking on a full replacement. If you’re still deciding on finish, shape, and placement style, it also helps to browse current kitchen cabinet hardware trends before you drill anything permanent.
Table of Contents
- Your Guide to a Flawless Cabinet Upgrade
- Gathering Your Tools and Prepping the Space
- The Measure and Mark Method for Perfect Placement
- Drilling and Fastening Your New Hardware
- Troubleshooting Common Installation Issues
- Final Checks and When to Call a South Jersey Pro
Your Guide to a Flawless Cabinet Upgrade
A cabinet hardware swap feels simple until the first hole is about to be drilled. That hesitation is healthy. Once the bit touches the door, you’re past the point of “maybe I’ll move it a little.”
Most bad installs come from one of two mistakes. The first is guessing the placement because it “looks about right.” The second is treating every cabinet front like it’s identical when it isn’t. That’s how you end up with one pull a little high, one knob a little off-center, and a room that feels wrong even if nobody can explain why.
Practical rule: Hardware doesn’t have to be fancy to look expensive. It has to be consistent.
A good install starts with a decision before any drilling happens. Are you using knobs on doors and pulls on drawers? Are you keeping a classic centered look, or does your cabinet style call for a more modern placement? In South Jersey, I see plenty of homes where older slab fronts need a different approach than newer shaker cabinets. The hardware can work on both, but the layout can’t be copied blindly from one style to the next.
Keep your mindset simple. You’re not just attaching metal to wood. You’re creating a repeated pattern across the room. If one piece is off, your eye catches it immediately. If every piece is aligned, the whole kitchen looks calmer and more finished.
Here’s what works:
- Choose the full layout first. Don’t install one handle and decide the rest later.
- Test on a sample spot. Hold the hardware in place and open the door or drawer to make sure the location feels natural in your hand.
- Treat symmetry as part of the design. Even a budget hardware set looks sharp when the spacing is dead consistent.
That’s the standard you want. Not “good enough from across the room.” Clean, straight, and repeatable.
Gathering Your Tools and Prepping the Space
The smoothest installs start before the drill comes out. A lot of frustration disappears when the tools are laid out, the cabinets are clean, and the room has enough light to see your marks clearly.
If this hardware update is happening during a larger renovation, it helps to think through sequencing the same way you would with any bigger project. A simple planning checklist like this guide on how to plan a kitchen remodel can save you from installing hardware before paint touch-ups, backsplash work, or final punch-list items are finished.
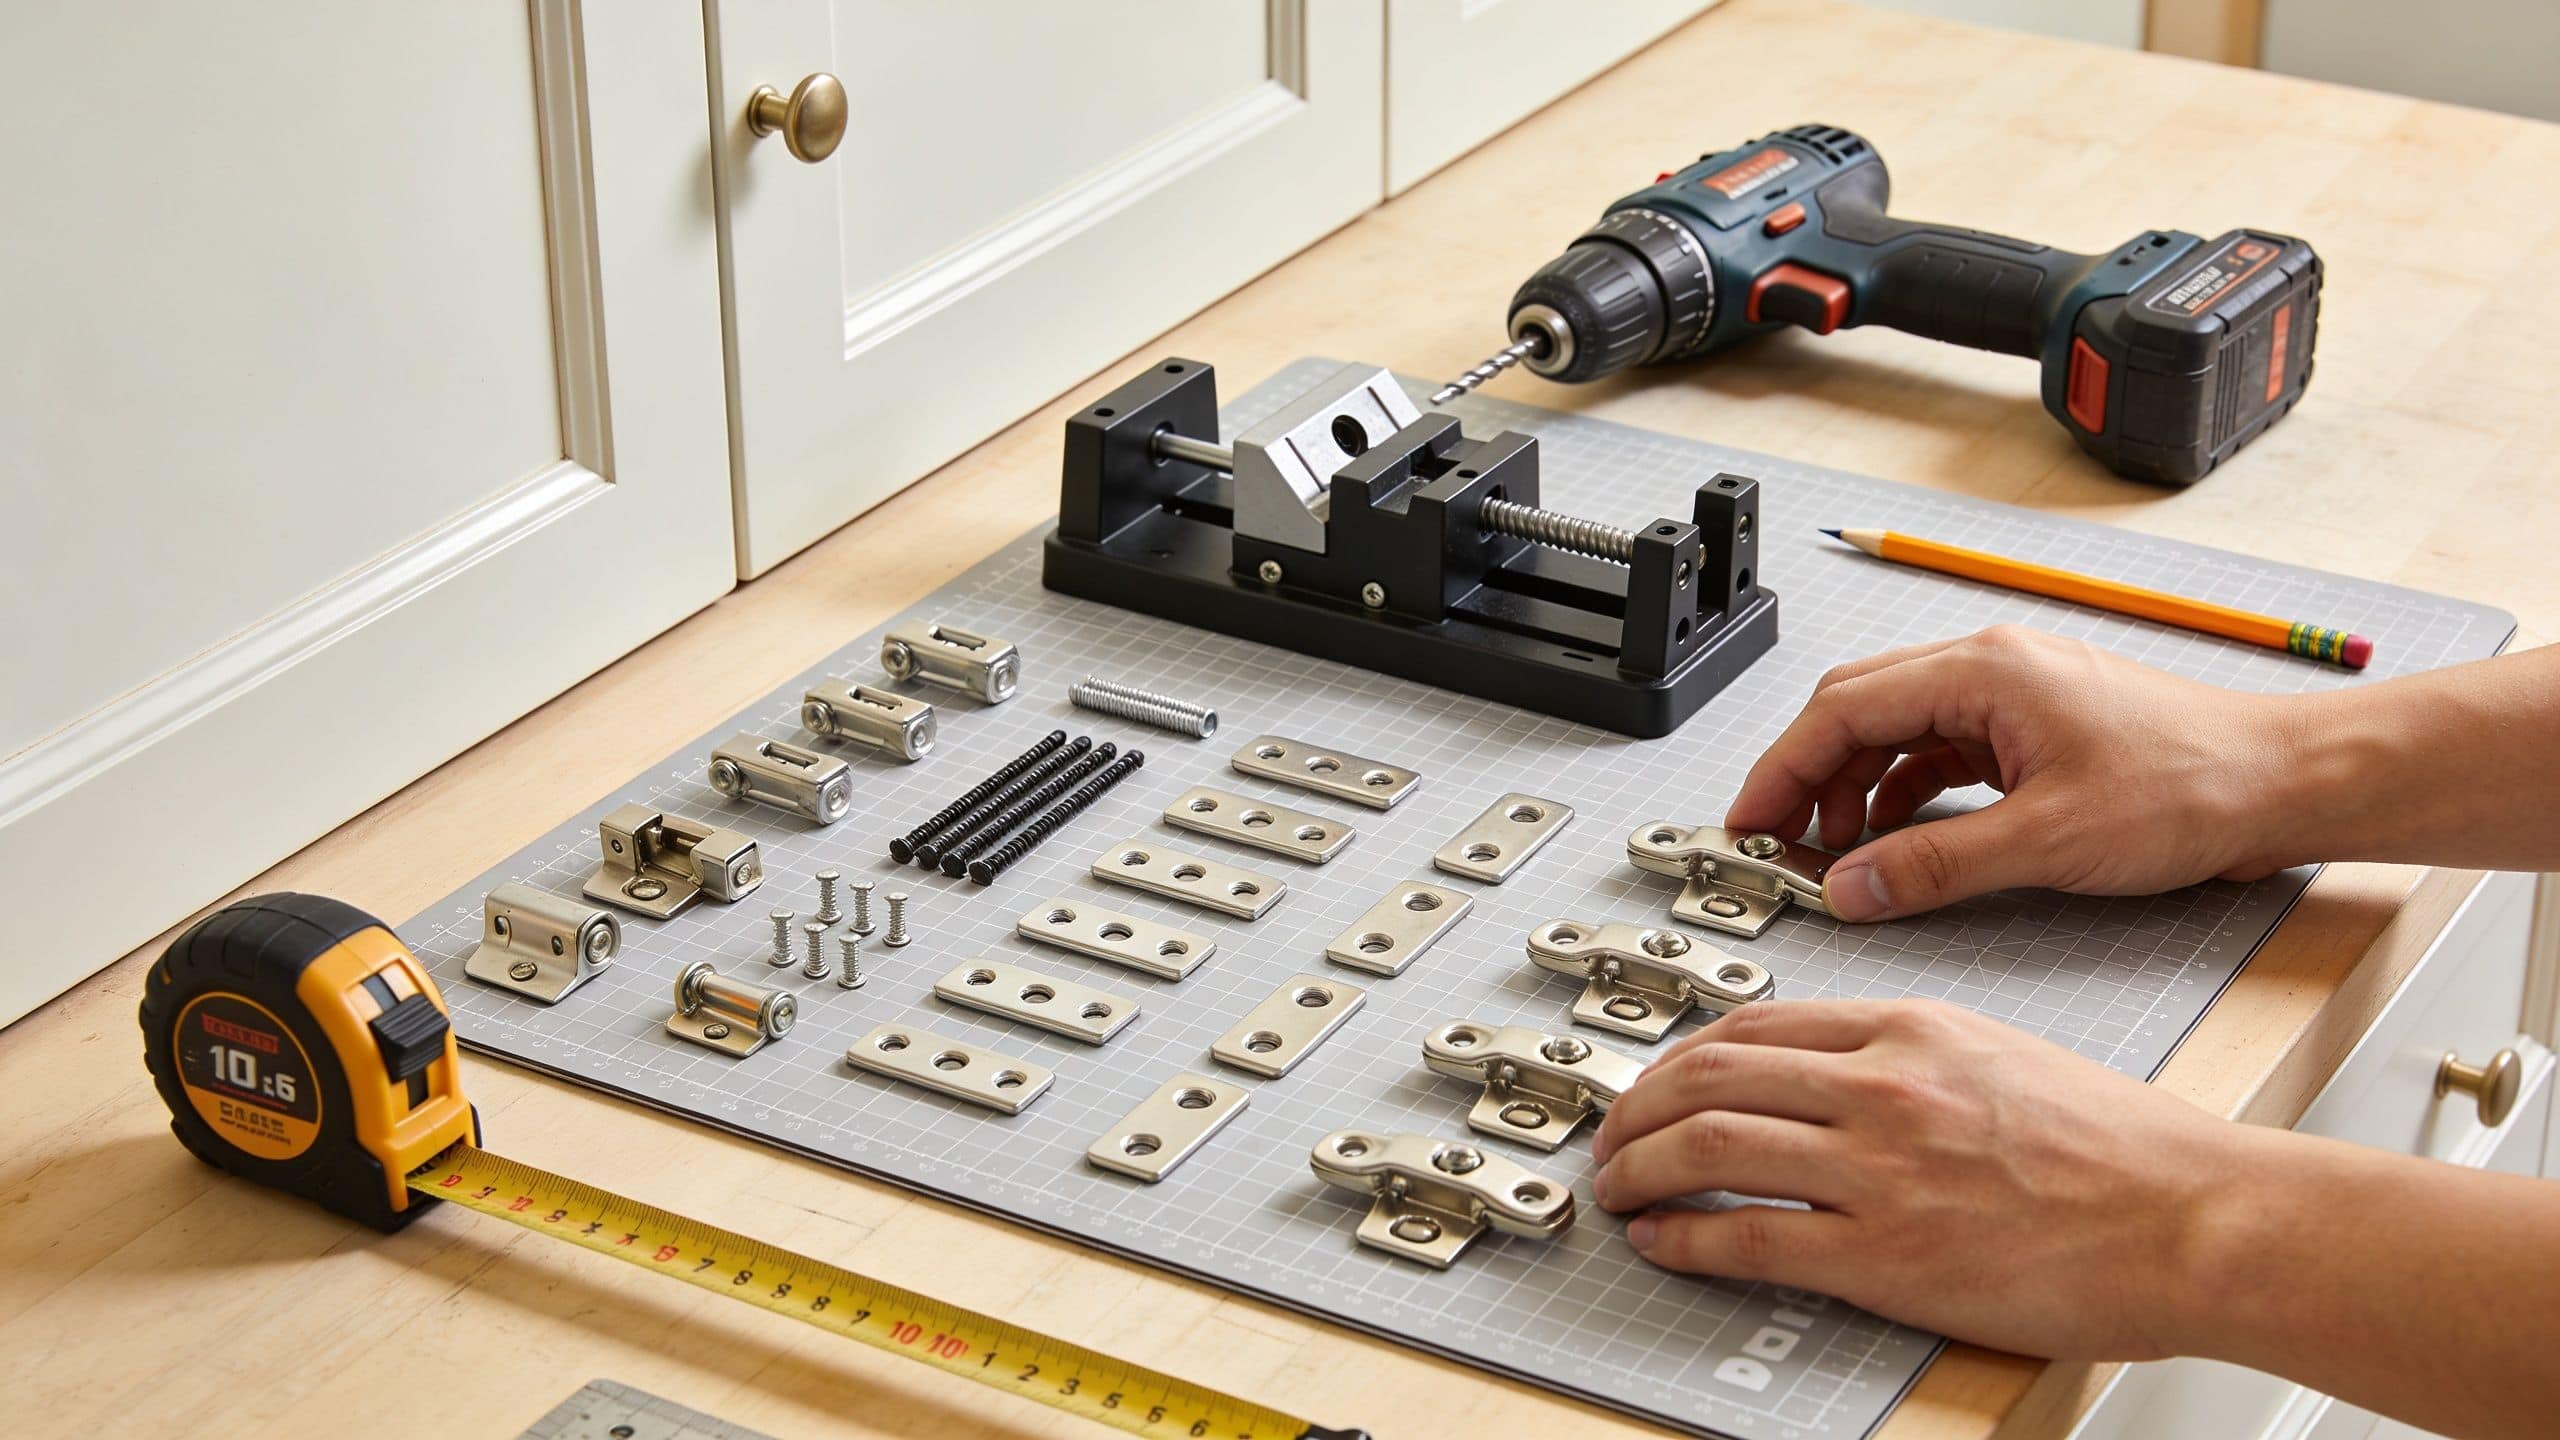
What to have on hand
This is the kit I’d want on-site for a first-time installer:
- Cabinet hardware jig or template: This is the one tool I’d push hardest. It removes repeated measuring and keeps placement uniform.
- Power drill: A compact drill gives you enough control on doors and drawer fronts.
- Sharp drill bit: A dull bit tears fibers instead of cutting cleanly.
- Painter’s tape or masking tape: It helps with marking and keeps the bit from skating across the finish.
- Tape measure and pencil: Still useful, but not as your main placement method.
- Level: Helpful when you’re checking your setup or a reference line.
- Scrap wood: This matters later when it’s time to drill cleanly through the panel.
- Screwdriver: Good for final snugging so you don’t overtighten with the drill.
- Vacuum or brush: You want to clear drilling dust before it gets ground into the finish.
Notice what’s missing from that list. Confidence based on eyeballing. That tool never works.
How to set up the work area
Prep the room like you’re trying to avoid little mistakes, because that’s exactly what you’re doing. Clear the counters, remove anything breakable from nearby surfaces, and wipe down the cabinet fronts so tape and pencil marks behave the way they should.
Then check each door and drawer front for surprises. In older South Jersey homes, some fronts look square until you put a template against them. An uneven reveal, a slightly shifted drawer face, or a previous repair can throw off your layout if you don’t catch it before marking.
A clean setup also helps you stay patient. When the drill, screws, template, and hardware are all within reach, you’re less likely to improvise.
Clean cabinets, a stable stance, and good light beat speed every time.
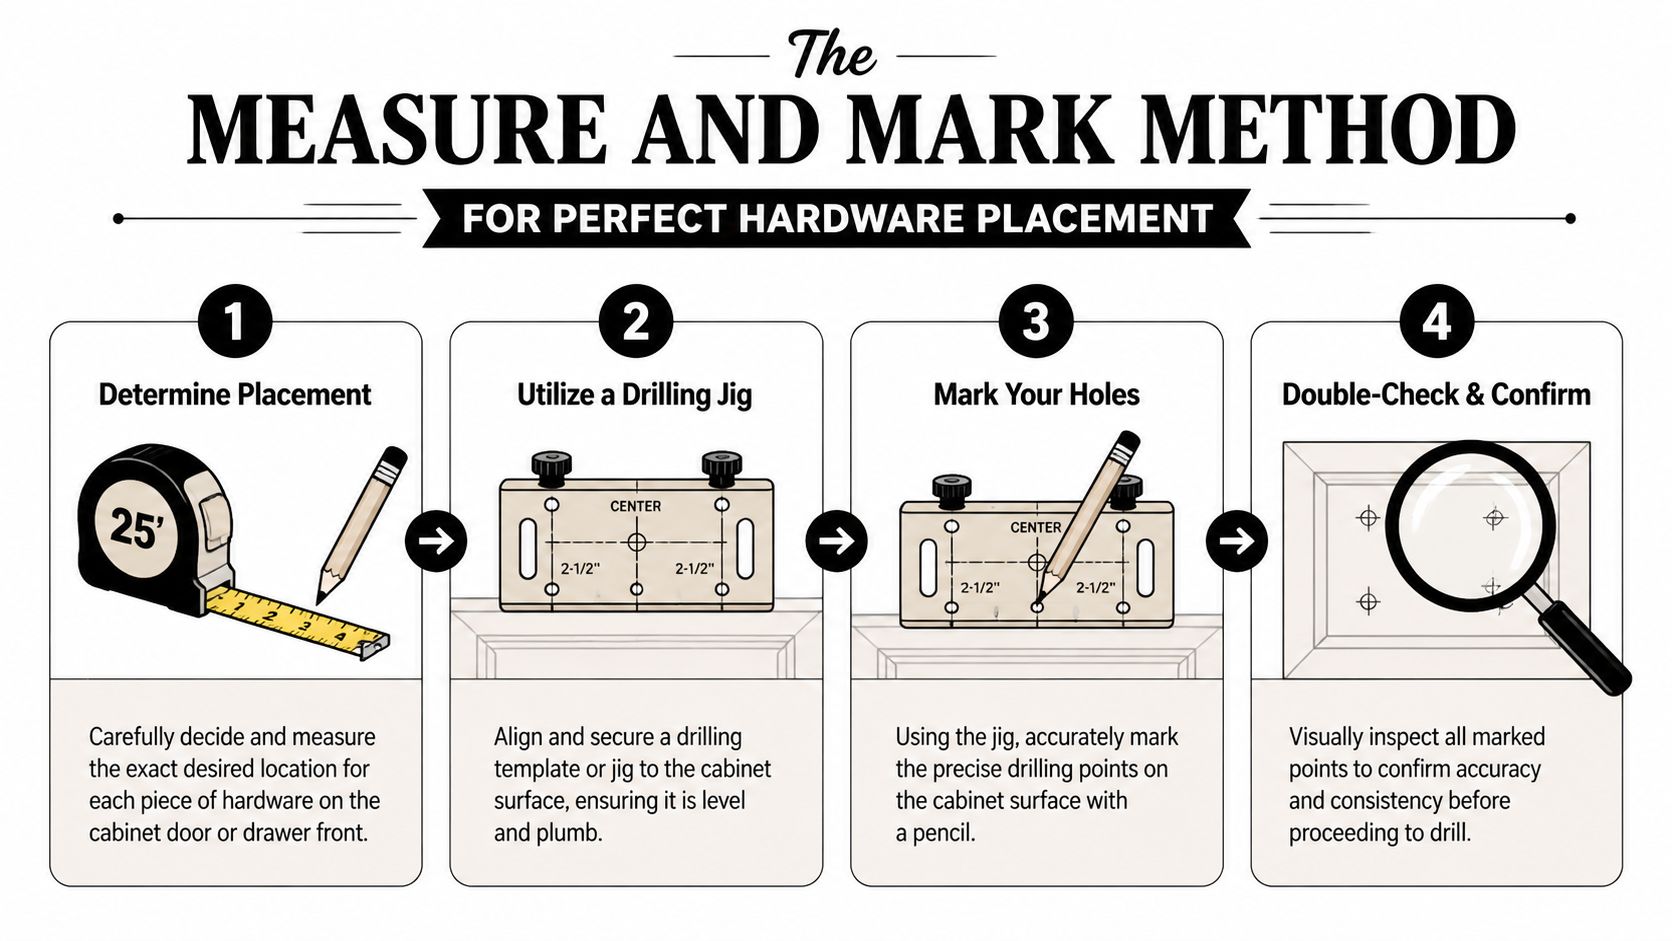
The Measure and Mark Method for Perfect Placement
The whole job turns on this part. If the marks are right, the drill work is straightforward. If the marks are wrong, every step after that gets more expensive.
Why templates beat repeated measuring
Professional installers lean on templates for a reason. Templates or jigs are the most critical success factor because they remove repetitive measuring and reduce the kind of mistakes that happen when every door gets marked by hand. They also come with standard center-to-center options, so once you choose the spacing, you can transfer that layout across the full run of cabinetry without redoing the math each time, as noted in True Position Tools’ guide to installing cabinet hardware like a pro.
That’s the big difference between homeowner method and trade method. A homeowner often measures each door separately with a tape measure and pencil. A pro sets a reference once, confirms it looks right, and repeats it.
If you’re still choosing between knobs, short pulls, or longer handles, the visual proportion matters as much as the exact hole placement. A practical way to think through those choices is this guide to choosing the perfect kitchen or bathroom fixture, especially if you want the hardware to fit the scale of the room.
How to mark doors and drawers accurately
The cleanest approach is simple.
- Pick one door and one drawer as your test pieces. Use the least visible pair if possible.
- Hold the hardware in place. Make sure your hand likes the location before you commit to it.
- Set the jig or template. Lock in the same offsets you want to repeat across the rest of the cabinets.
- Mark through the template. A single, clear mark is enough.
- Step back and compare. Open the sample door. Pull the sample drawer. Look at both from normal standing height.
For homeowners without a commercial jig, a DIY cardboard template can still work well if it matches the dimensions you’re repeating. The point isn’t that the template has to be fancy. The point is that your layout method has to be repeatable.
Here’s where people often get tripped up:
| Cabinet front | What usually works | What goes wrong |
|---|---|---|
| Shaker door | Consistent placement near the rail or stile | One knob lands slightly higher than the rest |
| Slab door | A deliberate, measured location that suits the flat face | “Centered by eye” placement that looks adrift |
| Drawer front | Pull centered and repeated exactly | Minor drift from drawer to drawer |
Use your eyes after you use the template, not instead of using the template. Visual confirmation matters, but it should be the second check, not the first method.
If a mark makes you pause, stop there. Redo the mark before you drill. A two-minute delay beats a permanent hole in the wrong place.
Drilling and Fastening Your New Hardware
Drilling is the point where a lot of homeowners tense up, especially on painted doors or older slab fronts you see all over Cherry Hill and Winslow. The good news is that clean results come from setup and control. If the marks are right, the job now is to keep the bit steady and give the finish a fair chance.
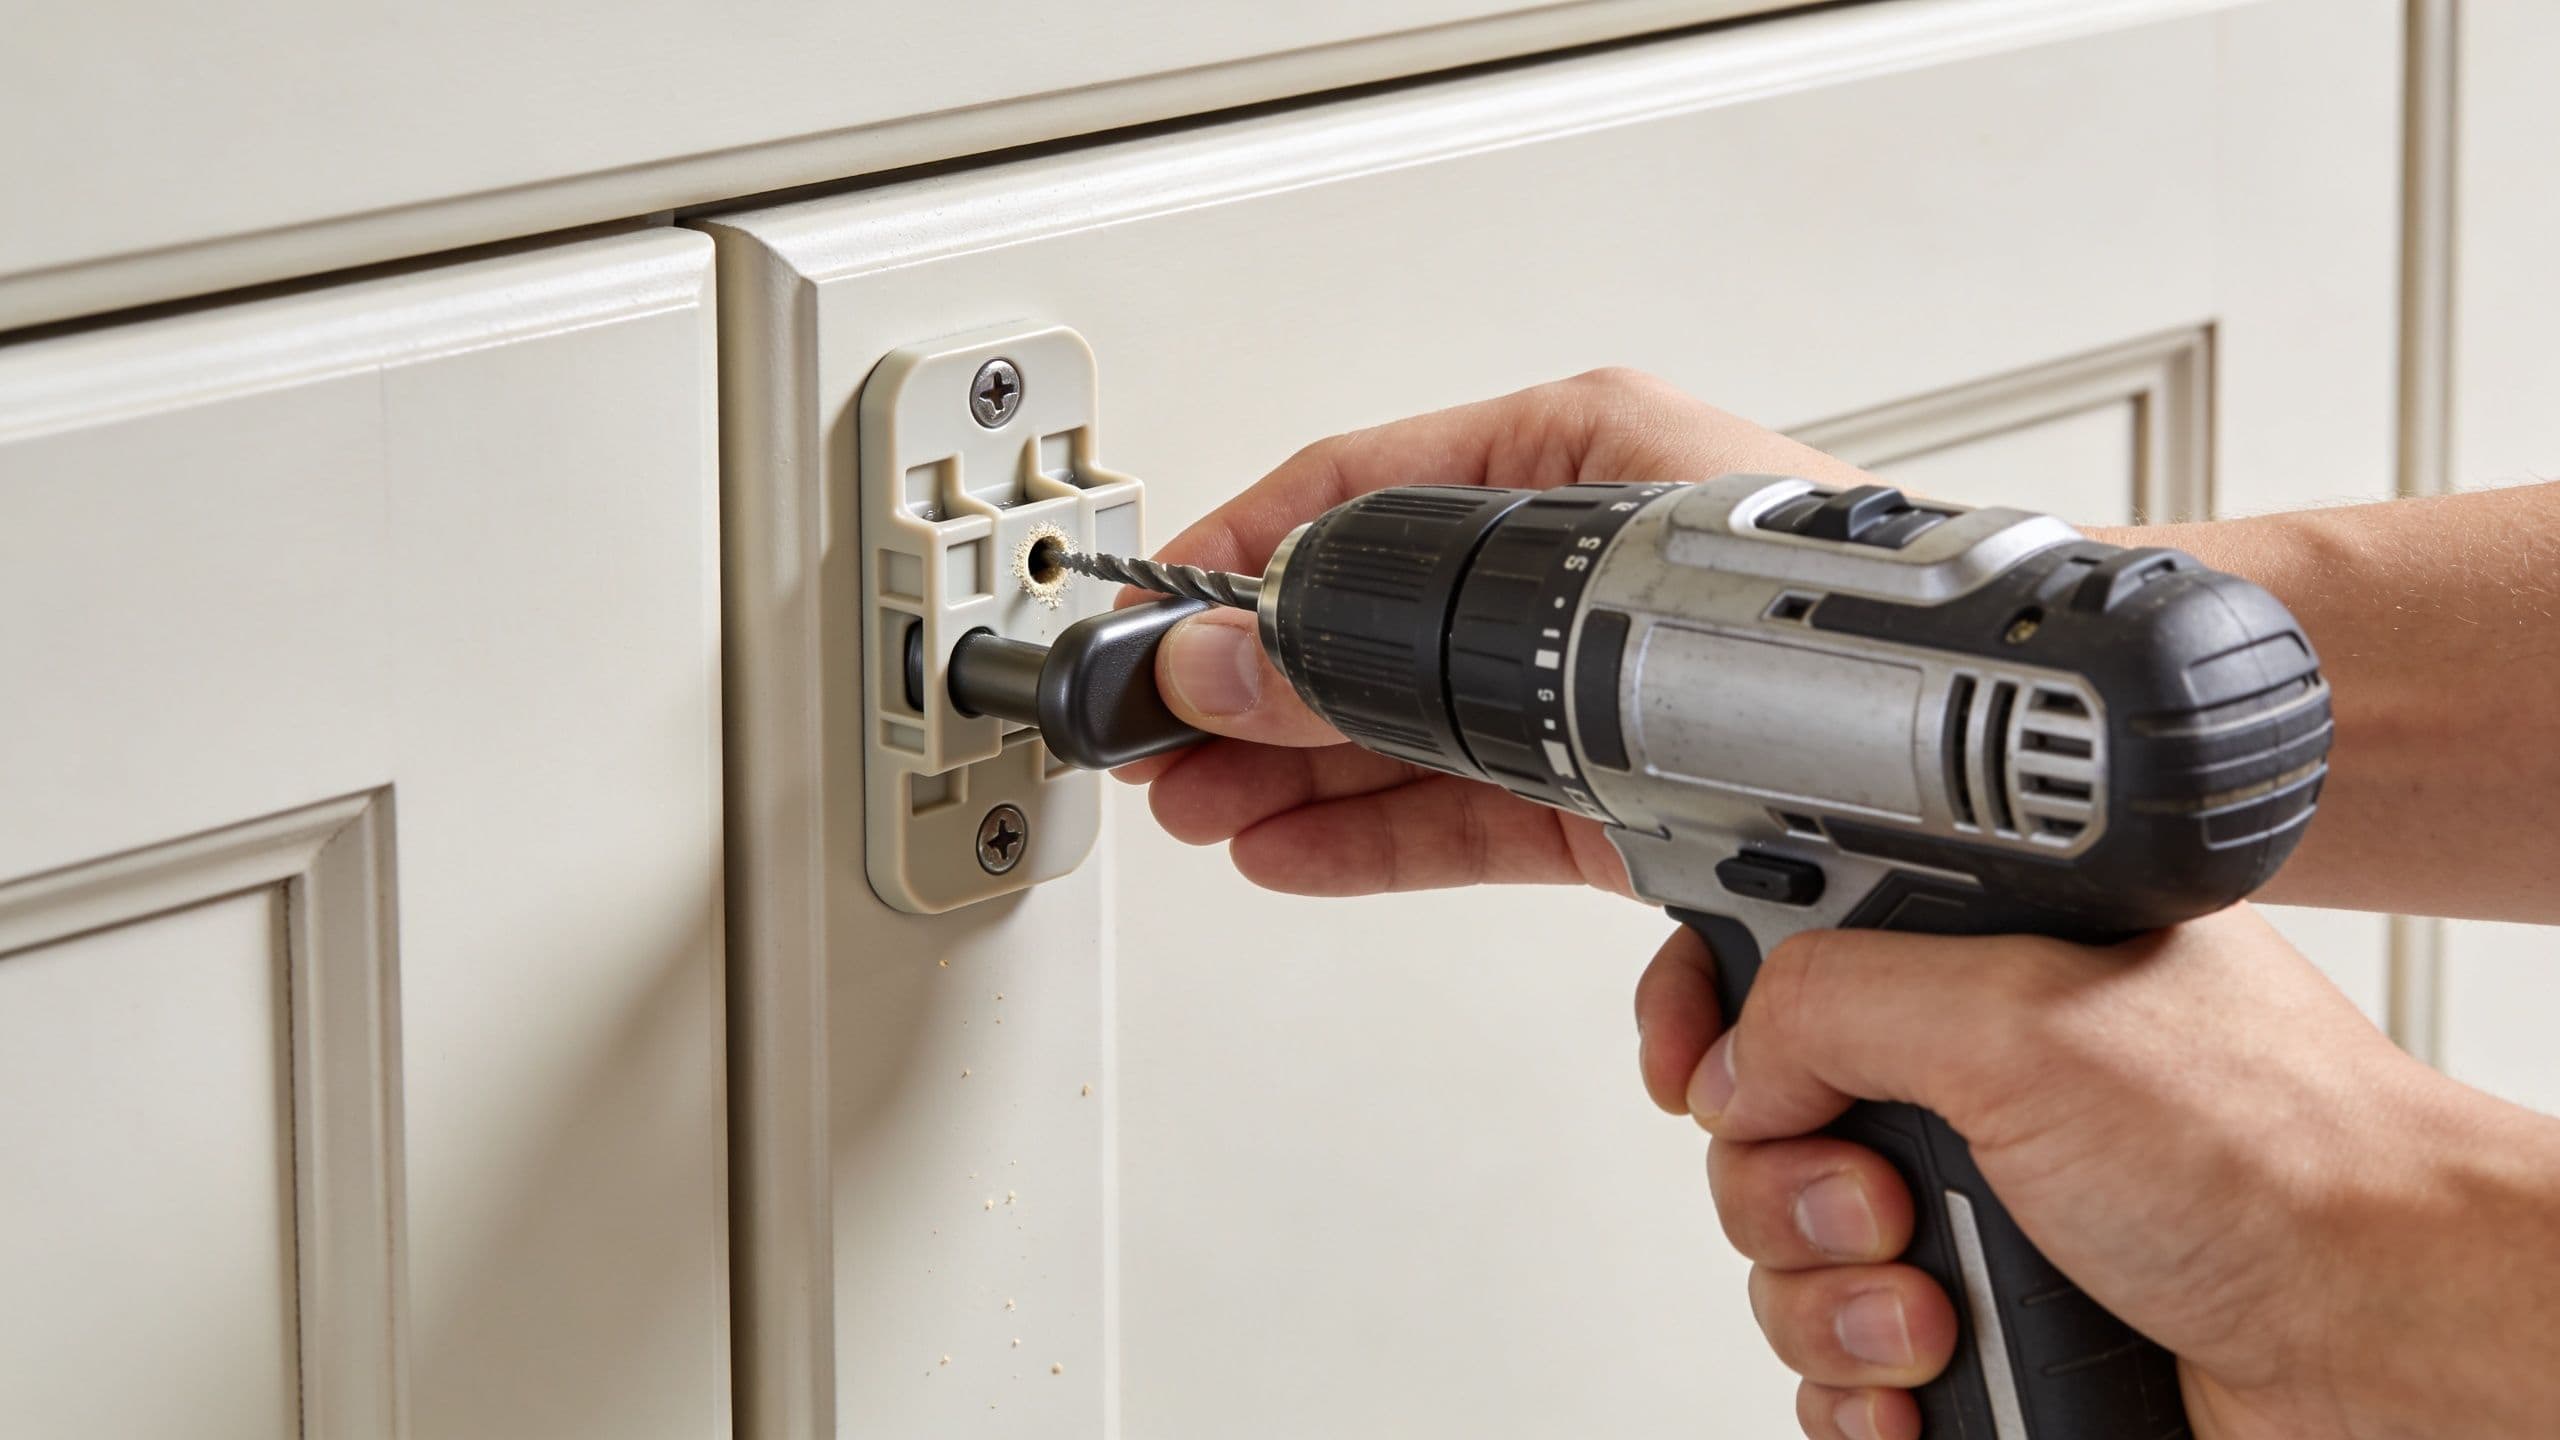
How to drill clean holes without blowout
For most knobs and pulls, a 3/16-inch drill bit with 8/32-inch screws is a safe starting point because the screw passes through the door cleanly instead of biting into the wood face. That helps prevent binding, finish chipping, and the twisting that happens when a screw is trying to force its own path.
A steady routine keeps the holes clean:
- Tape the face first: Put masking tape over the drill location to help with bit control and reduce surface splintering.
- Keep the drill square to the door: A slight angle is enough to make a pull sit crooked.
- Start slow: Let the tip score the surface before you add speed.
- Support the back with scrap wood: A tight backer block cuts down on tear-out on the exit side.
- Use a sharp bit: Sharp bits cut cleaner and wander less.
On older cabinet fronts, especially the flatter slab styles common in South Jersey kitchens, I like to treat every visible face as if it chips easily, because plenty of them do. Painted MDF, older oak veneer, and refinished doors all react a little differently. If you’re making your own templates or repeat jigs for a full kitchen, our cabinet installation tips and project examples show the kind of repeatable setup that saves time and keeps spacing consistent.
For thicker doors, drilling halfway from the front and finishing from the back can help protect the finish. That method takes longer, but it can be the better call on dark paint, stained wood, or any door where a blown-out exit hole will stare at you every morning.
If your project also includes built-ins or small finish carpentry jobs, Tip Top Furniture's DIY guide is a useful companion for related work around bookcases and storage pieces.
Here’s a quick visual demo of the process in action:
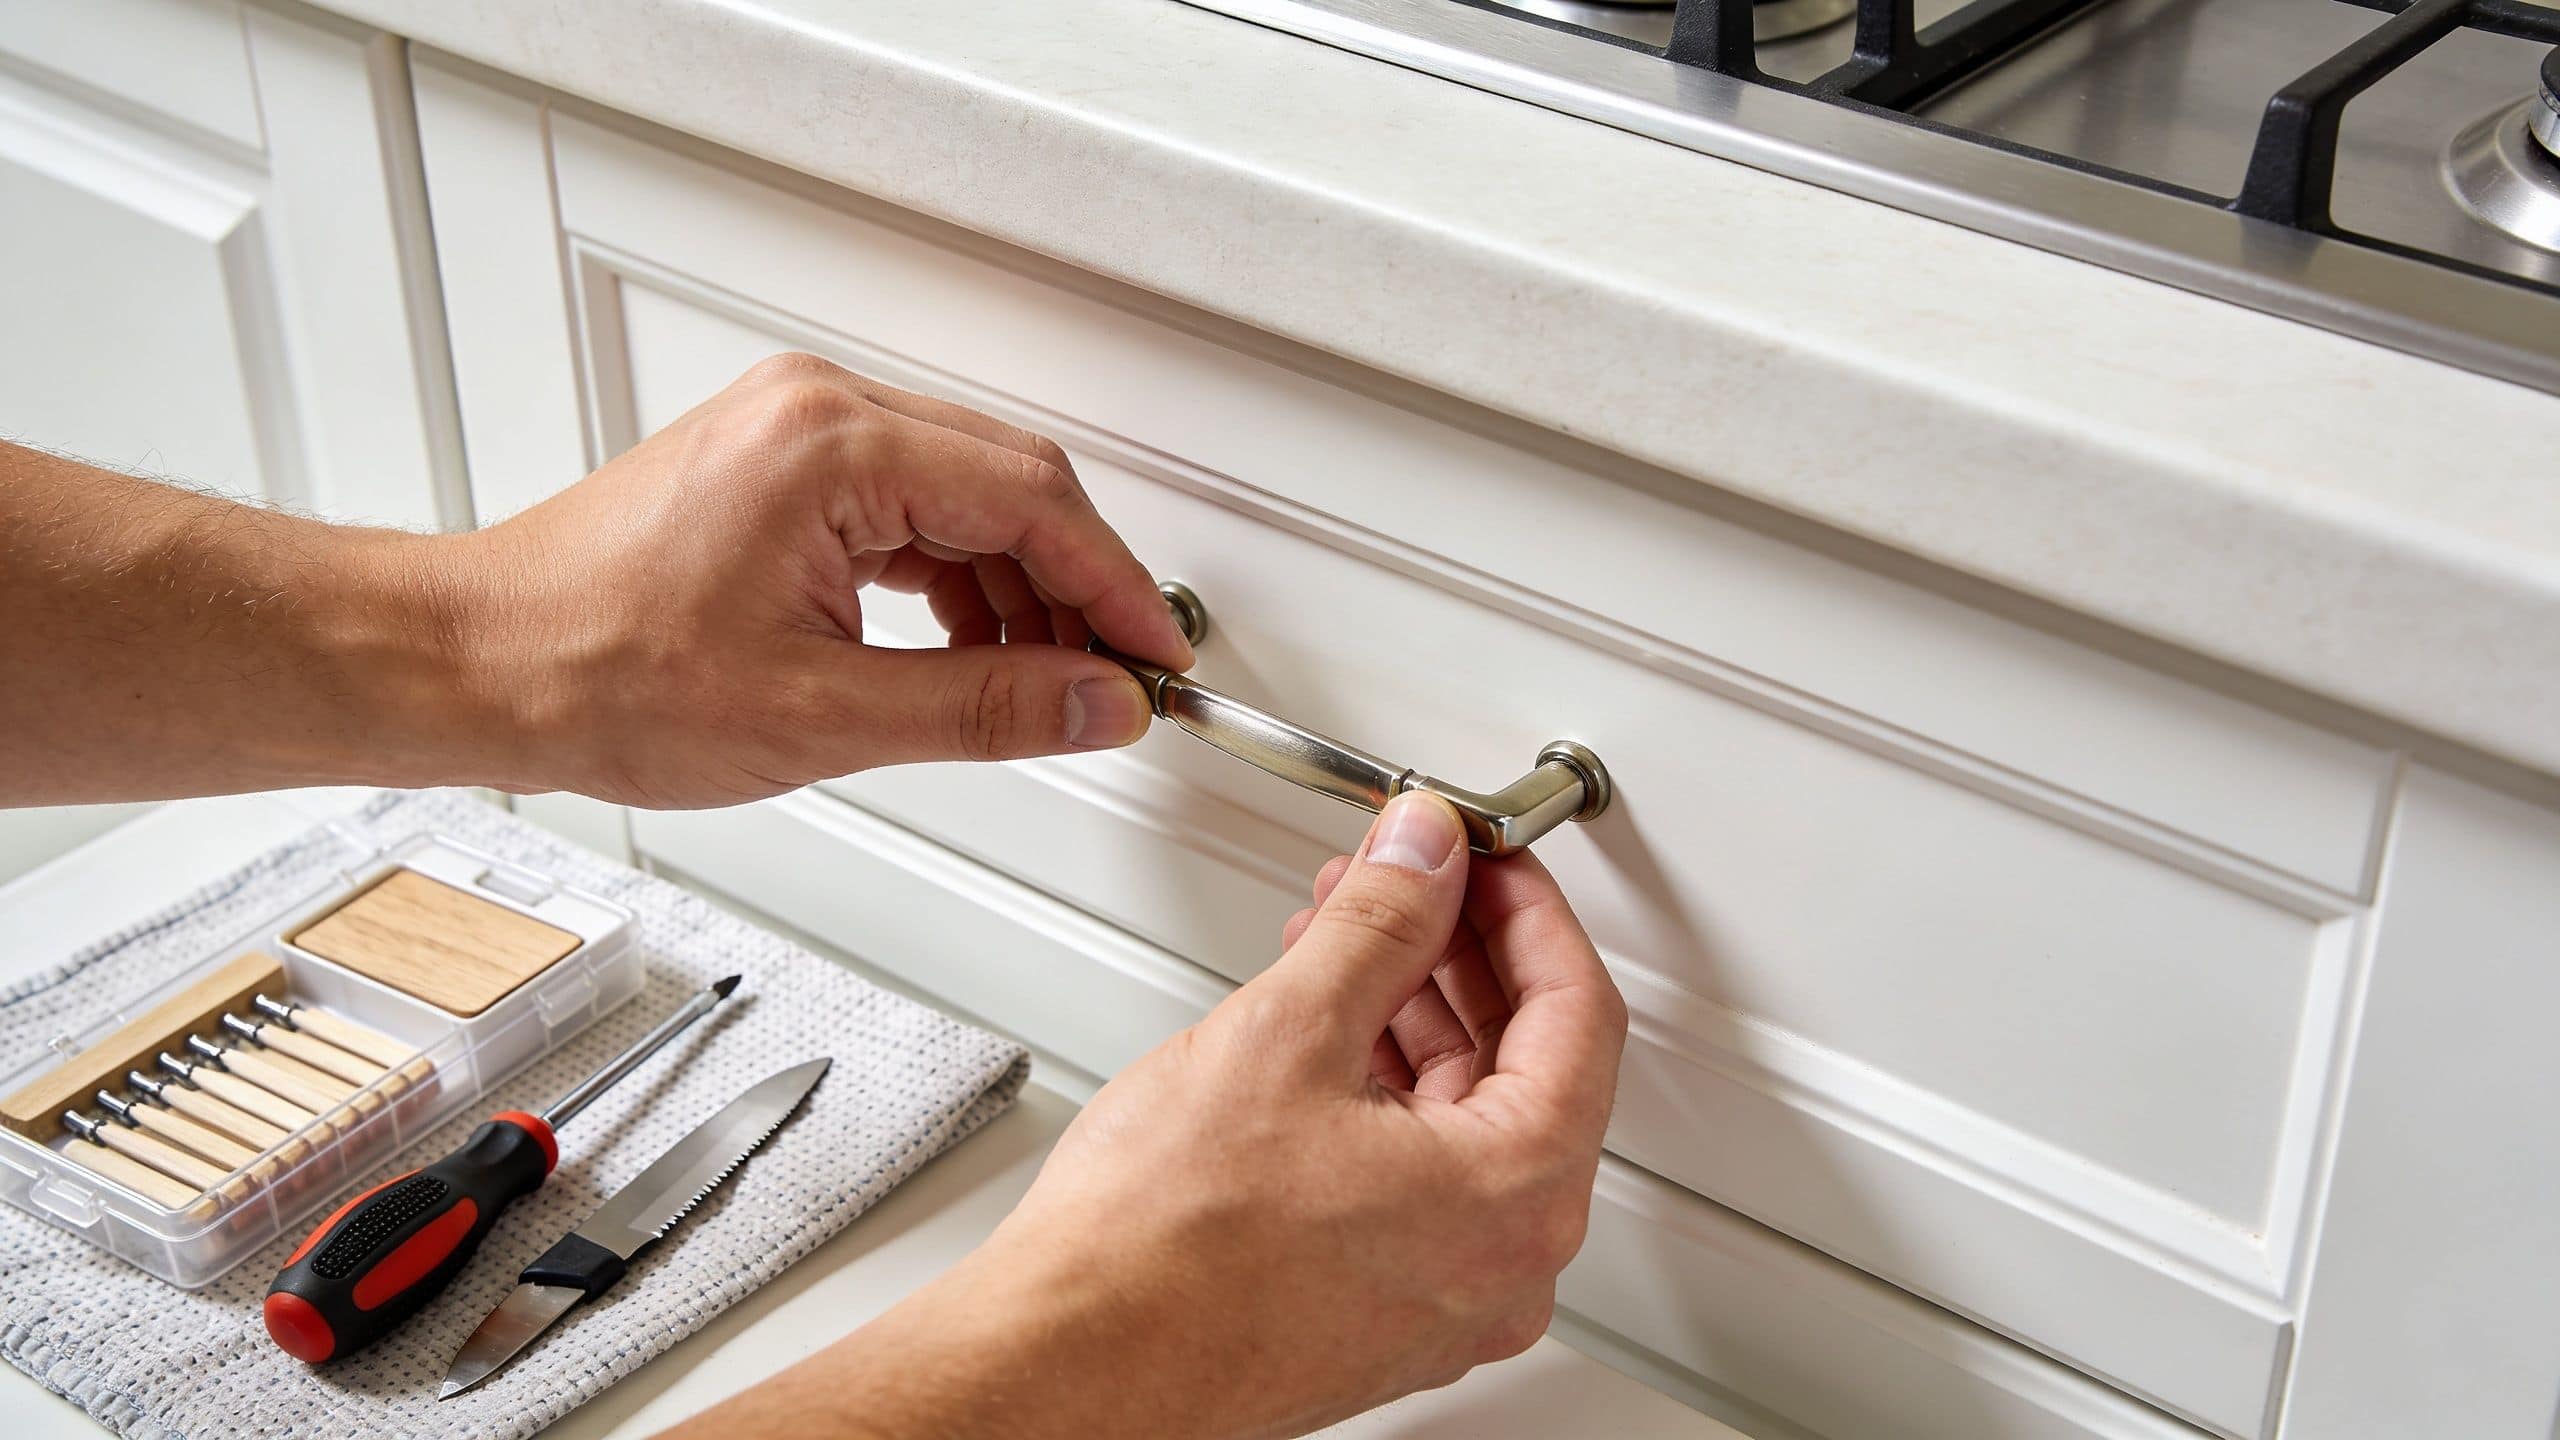
How to fasten hardware without damaging the finish
Once the holes are drilled, slow down again.
Feed the screws from the back, hold the knob or pull in place on the face, and tighten until it sits snug and flat. Use the drill carefully if you want, but stop short of full tightness and finish by hand. That extra half-minute prevents stripped screw heads, crushed fibers around the hole, and pulls that end up just a hair out of line.
Check these points before you call it done:
- Watch the hardware face: It should sit flat with no rocking.
- Correct rotation before final tightening: A small twist is easy to fix while the screws still have some play.
- Test the grip right away: Open the door or pull the drawer a few times and make sure it feels natural in your hand.
If a pull feels like it has to be forced into place, stop. On the job, that usually means the holes are slightly off, the screws are too long, or the back of the drawer front has debris keeping the screw head from seating flat. Forcing it usually turns a small correction into a chipped finish or bent hardware.
Troubleshooting Common Installation Issues
Most guides make cabinet hardware installation sound like every house has perfectly square cabinets and perfectly uniform fronts. That’s not how it goes in a lot of South Jersey homes.
In places like Cherry Hill, Winslow, Haddonfield, and Moorestown, plenty of kitchens have been updated in stages. The cabinets may be older than the counters. Drawer fronts may have been replaced without changing the boxes. Some doors are slab, some are shaker, and some sit just a hair differently because the house has settled over time.
What changes in older South Jersey homes
A lot of first installs go sideways because the assumption is that every front should be measured the same way. But some doors need to be judged by visual alignment and function together, not by a single repeated edge measurement.
A slab door is a good example. Because there’s no frame detail to guide the eye, even a small placement error is obvious. On uneven drawer fronts, a pull can be mathematically centered and still look off once all the drawers are viewed together.
Common problems and practical fixes:
- The handle doesn’t sit flush: Check whether the hole was drilled at a slight angle. Loosen the screw, reseat the pull, and inspect for debris around the hole.
- One knob looks high: Compare it to the door next to it, not just the rail itself. Sometimes the cabinet front, not the hardware, is the inconsistency.
- The drawer pull twists during tightening: Confirm that both holes are aligned and free of packed sawdust.
- The hardware interferes with the way the door opens: Recheck the reach and hand position. What looks nice on a closed door can feel awkward in daily use.
Older cabinets don’t reward rigid formulas. They reward careful comparison from one opening to the next.
When a DIY plywood template works better
A lot of homeowners assume a commercial jig is always the best option. Often it is. But not always.
For older South Jersey homes with slab doors or uneven fronts, a DIY plywood template calibrated to the door thickness can reduce errors by 70% compared to manual marking and save $50-100 over commercial jigs, according to Kitchen Cabinet Kings’ guide on installing cabinet hardware. The same source notes that this is especially useful when the cabinet thickness falls in the 1/2-3/4 inch range.
That makes sense on the job. A homemade plywood jig can be tuned to your exact cabinet condition instead of asking a generic tool to adapt to odd reveals or retrofitted fronts.
A good DIY plywood template should:
- Reference a real edge on the cabinet: Not a guessed line in space.
- Match the door thickness you’re working with: That helps the jig register consistently.
- Be labeled clearly: Door left, door right, drawer center, and so on.
- Be tested on one hidden location first: You want proof before repetition.
On a newer run of cabinets, that extra effort may not be necessary. On an older kitchen with mixed conditions, it can be the difference between a clean upgrade and a weekend full of patching mistakes.
Final Checks and When to Call a South Jersey Pro
Once everything is installed, don’t put the tools away just yet. Walk the room and check it the way you’ll see it every day, standing in the doorway, moving between the sink and the refrigerator, opening lower drawers, and catching the line of pulls across the whole run.
The last walkthrough before you call it done
Use a slow final check instead of a quick glance.
- Look across rows, not piece by piece: A drawer pull can seem fine on its own and still break the line of the full bank.
- Touch each handle: Make sure none are loose or rocking.
- Wipe the surfaces down: Fingerprints, pencil marks, and drilling dust can make a finished job look unfinished.
- Open everything once: Confirm that every placement feels natural in use.
If you find one issue, don’t panic. Most post-install problems are small. A slightly rotated pull, a loose screw, or a missed smudge is easy to correct right away.
Jobs that are better handed off
Some projects are perfect for DIY. A bathroom vanity with a few doors and drawers is very manageable. A full kitchen with custom-painted cabinetry, mixed door styles, and a long list of expensive fronts is a different calculation.
That’s where it helps to be honest about risk. If you’re working with a full remodel, if the cabinetry is high-end, or if you don’t want to gamble on permanent holes, it’s smarter to bring in a local pro. The same goes for projects that involve layout decisions beyond hardware alone, especially when cabinetry, fixtures, and finishes all need to land together.
If you’re at that point, reaching out through The Cabinet Coach contact page is a practical next step for homeowners in Camden and Burlington counties who want expert help without turning a cabinet refresh into a repair job.
A clean hardware install comes down to patience, repeatable layout, and disciplined drilling. If you’ve got those, you can get a result that looks sharp and feels right every time you use the room.
If you want experienced help with cabinet hardware, cabinetry selections, or a larger kitchen or bathroom update, The Cabinet Coach brings South Jersey homeowners a guided, in-home approach that makes the whole process easier, from design choices to final details.