
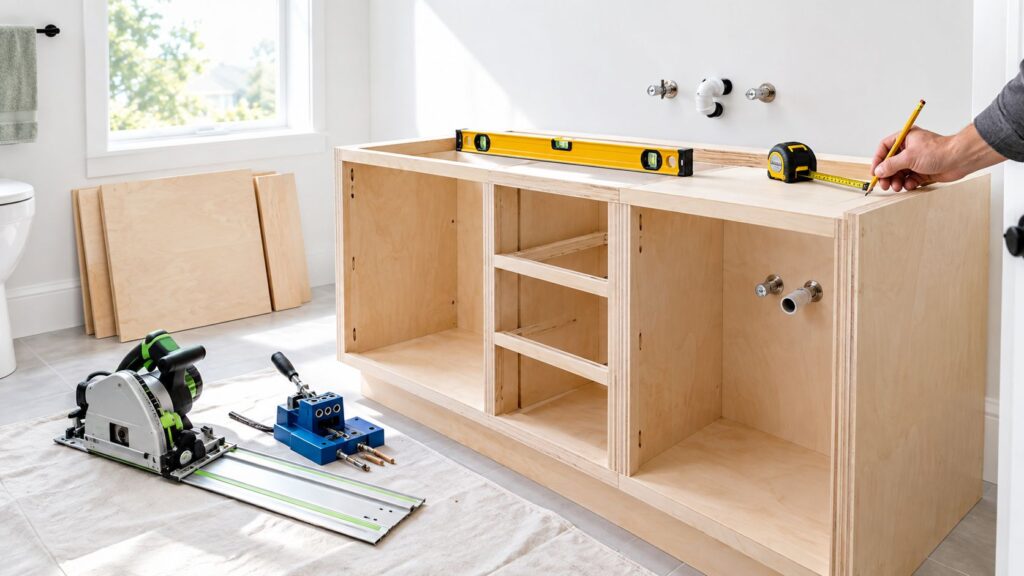
You're halfway through a bathroom renovation in Cherry Hill. The subfloor is exposed, plumbing stubs are sticking out of the wall, and you haven't ordered tile because you still don't know where the vanity will land. That uncertainty is more serious than it looks. The vanity controls the tile layout, mirror width, outlet position, plumbing access, and, in a narrow cape or half-bath, whether the door can open without striking a cabinet corner.
A successful bathroom vanity build starts before the first plywood panel is cut. It accounts for moisture, uneven South Jersey walls, existing plumbing, wall support, and the practical difference between a stock cabinet and a made-to-fit installation. The bathroom vanities market reflects strong ongoing demand, estimated at about US$43.34 billion in 2024 and projected to reach US$65.55 billion by 2030 at a 7.3% CAGR, according to Persistence Market Research's bathroom vanities market analysis. More homeowners are replacing and remodeling vanities, but the cabinet itself is only one part of the job.
Table of Contents
- Planning Your Bathroom Vanity Build the Right Way
- Materials Tools and Edge Sealing That Actually Hold Up
- Cutting Assembling and Fitting the Vanity Carcass
- Plumbing Rough In Wall Support and Leveling
- Finishing Hardware and Realistic Cost Time Estimates
- Pitfalls That Derail a DIY Vanity Build
- When to Hire a South Jersey Pro and How a Mobile Showroom Helps
Planning Your Bathroom Vanity Build the Right Way
Start with the room, not the cabinet catalog. Measure the available wall at the floor, countertop height, and upper wall, then check the depth at several points. Older plaster walls in Cherry Hill capes and colonials are often out of plumb, and a narrow half-bath may have an alcove that looks standard until the baseboard, casing, or toilet clearance is measured.
Modern vanity dimensions are fairly standardized. Common widths range from 18 to 96 inches, standard depth is typically 21 inches, and common heights run from 30 to 36 inches. Comfort-height vanities generally fall within 34 to 36 inches, while floating units can help preserve floor space in compact rooms, as summarized by BFP Cabinetry's vanity cabinet guide.
Lock the footprint before ordering finishes
Before woodwork begins, make a quick scaled sketch showing:
- The cabinet footprint: Include countertop overhang, filler space, baseboard interference, and the high point of each wall.
- The plumbing: Mark supply lines, drain center, shutoff reach, and the direction of the existing waste line.
- The surrounding fixtures: Check the distance to the toilet, shower, tub, door swing, and any wall-mounted radiator.
- The electrical plan: Set the mirror and outlet locations only after the vanity width and sink orientation are settled.
- The wall structure: Locate studs where a ledger, cleat, or back rail will fasten.
Decide whether the sink should be centered, split for a double vanity, or shifted away from an existing drain. In a tight master bath, an off-center basin may provide better drawer storage than forcing the plumbing into the middle of the cabinet. Also choose the working height before fabrication. A lower vanity can suit children or shorter users, while a taller cabinet reduces bending for many adults. The right choice depends on the household, countertop thickness, vessel sink design, and mirror placement.
That sketch should also answer a more expensive question: can the plumbing shift without opening the opposite wall? If the drain can't move, the cabinet needs to adapt. Planning a bathroom remodel around the existing room conditions is far easier before tile, drywall, and countertop orders are committed. For homeowners still comparing door styles, colors, and cabinet profiles, find your vanity style with Task Masters before narrowing the construction details.
Choose the build path that matches the room
The three common options serve different South Jersey conditions.
| Build path | Typical fit | Main advantage | Main compromise |
|---|---|---|---|
| Stock | Common compact widths, often 24 to 48 inches | Fast purchase and straightforward assembly | Limited plumbing, depth, and filler flexibility |
| Semicustom | Broader room-specific sizing, often 48 to 72 inches | More finish, drawer, and sizing choices | Requires ordering and careful showroom coordination |
| Full custom | Unusual depths, knee spaces, offset layouts, or non-standard heights | Best response to an irregular room | Longer fabrication process and more field-finishing responsibility |
Stock cabinets work well when the wall is straight, the plumbing is cooperative, and the room accepts the available dimensions. They create problems when a half-bath has a narrow passage, an off-center drain, or a door casing that leaves no room for a standard filler.
Semicustom cabinets are often the practical middle ground for a Cherry Hill primary bath. They provide more control over drawer placement, finishes, and sizing without requiring every component to be built from raw material. Full custom makes sense when the vanity must be shallow, unusually tall, integrated with a knee space, or fitted between walls that aren't parallel.
The sequence changes with each choice. Stock cabinetry moves quickly to assembly. Semicustom requires accurate field measurements before ordering. Full custom demands final site verification before fabrication and often leaves more finishing and fitting work on-site. A DIYer may be able to build a stock cabinet, but a custom project usually means coordinating the cabinetmaker, plumber, countertop fabricator, electrician, and tile installer.

Materials Tools and Edge Sealing That Actually Hold Up
The material decision determines whether the cabinet tolerates routine splashing or slowly fails at the sink base. Standard MDF and particleboard are risky in splash-prone zones because water can enter unsealed edges, cause irreversible swelling, and weaken the cabinet beyond practical repair. Cabinet-grade plywood and veneer guidance explains why plywood's cross-laminated structure generally handles warping and moisture expansion better than MDF.
Use cabinet-grade plywood for the carcass, especially for the bottom, side panels, and any section near the floor or sink. Moisture-resistant MDF can work for painted doors and drawer fronts in relatively dry areas, but only if every edge is sealed and the room isn't experiencing standing water or chronic leaks.
Buy the supporting materials with the wet zone in mind
A dependable materials list includes:
- Baltic birch or cabinet-grade plywood: Use stable sheet goods for the box and drawer components.
- Solid wood or plywood edge banding: Never leave a raw MDF edge beside a sink or floor.
- Exterior-rated or marine-grade glue: Choose adhesive that tolerates humid conditions.
- Stainless or galvanized fasteners: Bathroom humidity can accelerate corrosion on ordinary hardware.
- Moisture-blocking sealer: Coat every cut edge before the parts disappear inside the assembly.
- Countertop support material: Plan the front rail and side supports around the selected stone or solid-surface top.
The workbench tools should be equally deliberate. A track saw or straight-edge-guided circular saw handles clean panel cuts, while a pocket-hole jig speeds carcass joinery. Add an edge-banding trimmer, random orbital sander, countersink bit, clamps, square, and a quality level longer than 24 inches. If you're comparing stone, solid surface, and the finishing profile at the cabinet edge, this guide to countertop edge options can help connect the top detail to the cabinet design.
Seal before assembly
Edge sealing is the step most DIY builders rush. Sand the cut edge, remove dust, apply the first coat of sealer, let it cure, sand lightly, and apply a second coat. The second application closes pinholes and exposed fibers that the first coat may leave behind.
Seal the bottom edges of side panels, the sink cabinet floor, plumbing cutouts, toe-kick parts, and every field-cut opening. Finish the panel faces after the edges are protected, then assemble only once the coating has cured. A beautiful painted cabinet with an unsealed sink cutout is still a moisture failure waiting to happen.

Cutting Assembling and Fitting the Vanity Carcass
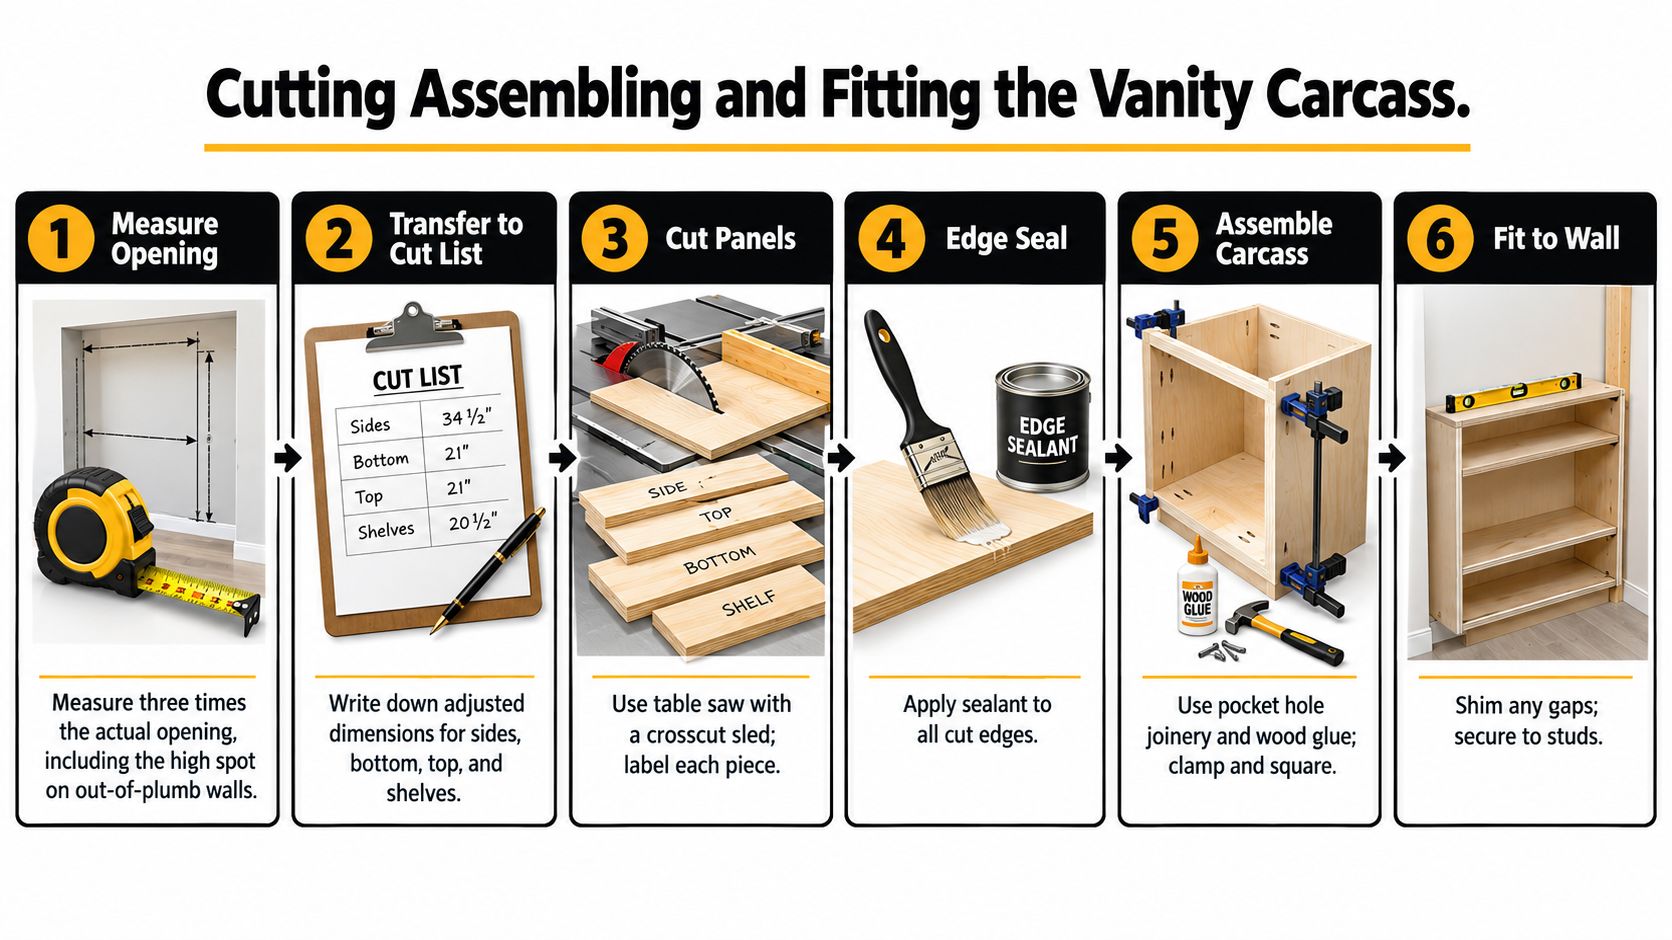
Measure the actual opening twice, then build the cut list from the smallest usable dimensions. In an older South Jersey bathroom, the high spot on a plaster wall matters more than the room's nominal width. Leave intentional shim space rather than discovering after assembly that the box has no way to enter the alcove.
Mark each plywood panel on the face and edge before cutting. A track saw or straight-edge-guided circular saw produces clean, repeatable cuts, but the support beneath the sheet matters just as much. A sagging panel can shift during the cut and create a subtle taper that later shows up as a crooked drawer front.
Keep the carcass square while it becomes rigid
Dry-fit the side panels, bottom, stretchers, and back rail on a flat surface. Pre-drill where necessary, apply glue to the mating edges, and use pocket holes or another appropriate joinery method without overtightening the screws.
Check the diagonals before locking the back rail. If both measurements match, the box is square. If they don't, clamp and correct the carcass before the back panel goes on. Add the 1/4-inch plywood back only after the box is square, because the back locks the shape and can preserve an error just as easily as it preserves accuracy.
Set the dry-fit carcass into the alcove before final fastening. Confirm side clearance for drawer slides, space behind the cabinet for shims, and room for the countertop overhang. Mark plumbing openings while the cabinet is still easy to handle, then drill or cut them cleanly with a hole saw or jigsaw. Retrofitting a drain opening into a glued carcass invites blowout and often forces awkward cuts around finished surfaces.
Prepare moving parts before the finish
Drawer boxes can be cut from stable half-inch Baltic birch, with dadoed sides where the design calls for stronger mechanical connections. Keep the drawer interior clear of the P-trap and supply lines by deciding the false front and service area before cutting the box.
Doors and drawer fronts need consistent reveals. If you're using frame-and-panel construction, allow the panel to move within the frame rather than gluing it rigidly across its width. Small movement is normal. Binding, split joints, and uneven reveals usually mean the cabinet was cut or installed without accounting for the room.
For a practical visual reference, watch the vanity carcass construction video after reviewing your own cut list, not before. The correct sequence depends on your wall, plumbing, and cabinet configuration. A clear comparison of plywood and MDF cabinet construction is also useful before you commit to a painted sheet-good design.
Plumbing Rough In Wall Support and Leveling
The plumbing rough-in has to agree with the cabinet layout. Don't install the vanity and hope the drain, drawers, and shutoffs find a workable arrangement afterward. Lay the cabinet drawing over the wall, mark the sink center, and verify that the drain lands in an open service zone rather than directly behind a drawer box.
For a standard vanity, supply placement is often planned around the lower cabinet and drawer arrangement, but the exact location depends on the selected cabinet, sink, finished floor, and countertop. Confirm the dimensions with the actual product specifications and local plumbing requirements. A fixture installer can also help identify whether the current rough-in is serviceable before the cabinet closes the wall.
| Fixture | Height Off Floor | Offset From Centerline |
|---|---|---|
| Hot supply | Verify against cabinet and sink specifications | Align with faucet and basin layout |
| Cold supply | Verify against cabinet and sink specifications | Align with faucet and basin layout |
| Drain outlet | Verify against P-trap and drawer clearance | Center on basin unless the design requires an offset |
| Shutoff valves | Keep reachable from the cabinet interior | Place clear of drawers, shelves, and false fronts |
Replace questionable shutoffs while the wall is open. In older South Jersey homes, a valve may look intact but fail to close or crumble when disturbed. For general guidance on fixture connection and installation coordination, Good Boy Plumbing's fixture installation resource provides a useful reference, although your local plumber must verify the site conditions and code requirements.
Give the cabinet a real structural connection
Plaster and lath aren't a substitute for stud support. Locate the studs behind the wall finish and install a ledger, cleat, or substantial back rail that can receive cabinet screws. For a floating vanity, this support is even more important because the wall carries the cabinet, countertop, sink, and stored contents.
Set the cabinet on shims and level it across the front and from side to side. Then check both side panels for plumb before fastening. A cabinet that is level but twisted can make drawers bind and doors appear uneven.
Leave service clearance around the P-trap and keep shutoffs accessible. Don't bury a valve behind a fixed drawer stack without an access panel or removable false front. Once the cabinet is fastened, professional bathroom vanity installation can be the sensible handoff if the plumbing, wall support, and countertop all need to be coordinated at the same visit.
Finishing Hardware and Realistic Cost Time Estimates
Finishing quality starts with the edges, not the paint color. Prime raw plywood, sand the visible surfaces, and apply a durable bathroom-appropriate coating. Conversion varnish and catalyzed polyurethane are common professional choices for exposed cabinet surfaces, while a carefully brushed finish can hide dust and minor texture more effectively than a high-gloss sprayed surface in a working renovation room.
Sand doors and drawer fronts to a smooth finish before coating. Allow the finish to cure fully before installing hardware, fitting the countertop, or loading the drawers. A soft-close hinge with a European 35mm cup pattern and full-extension slides suited to the drawer load provide useful daily durability, but the exact hardware must match the cabinet construction and manufacturer requirements.
The cost spread is wide because cabinet size, countertop material, plumbing work, and site repairs change the job more than the box alone.
| Vanity Size | DIY Cost | DIY Hours | Hybrid Cost | Pro Cost |
|---|---|---|---|---|
| 30-inch single vanity | $450 to $900 | 18 to 30 | Varies by scope | Varies by finish and site work |
| 48-inch double vanity | $900 to $1,800 | 35 to 55 | Varies by scope | Varies by finish and site work |
| Custom carcass with prefinished doors and professional rough-in | Not applicable | Depends on cabinet work | $1,400 to $3,200 installed | Varies by design |
| Professional Cherry Hill to Marlton build | Not applicable | Not applicable | Not applicable | Starts around $2,800 for a 36-inch vanity |
The ranges above come from the project assumptions provided for this guide. They should be treated as planning figures, not a quote. Older homes can add cost through floor leveling, corroded valve replacement, plaster repair, and extra shimming. A stone top may also require templating and a separate fabrication visit.
Lighting deserves a place in the budget before the mirror is ordered. Review practical bathroom lighting ideas from DLG Electrical while deciding whether the vanity will use an overhead fixture, side sconces, or both. For a deeper cost discussion around made-to-fit cabinetry, custom bathroom vanity pricing guidance can help you separate cabinet cost from installation and trade coordination.
Pitfalls That Derail a DIY Vanity Build
Most failed vanity projects don't collapse because the builder couldn't cut a straight line. They fail because moisture, wall irregularities, and service access were treated as afterthoughts.
Unsealed MDF is the classic failure. Water enters a raw edge near the sink or toe kick, the material swells, and the damage can't be sanded back into its original shape. Use plywood in exposed or splash-prone parts, and seal every cut edge before assembly.
A square box can still fit badly. An out-of-plumb plaster wall can leave a visible gap, twist the cabinet, and throw off the countertop. Find the wall's high point, scribe or shim to that condition, and check plumb at both side jambs before fastening.
Leveling only one direction creates drawer trouble. A cabinet can read level across the front while leaning from one side to the other. Check the run, the face, and each side panel before installing slides.

Three more problems show up after the cabinet is already screwed in:
- Buried shutoffs: Add a discreet removable panel or false front before the cabinet blocks valve access.
- Crowded plumbing: Dry-fit the P-trap and supply lines before driving the final cabinet screw. Drawer depth must account for the waste assembly.
- Premature flooring or tile: Confirm the finished vanity footprint and depth against the tile pattern before setting surrounding surfaces.
A weak countertop support plan can also create movement or stress at the cabinet. Add the required rails and side support for the selected top rather than assuming the cabinet's upper edges will carry every material equally.
Ask yourself one direct question before continuing: do three or more of these conditions already describe the room? If they do, stop cutting and recheck the layout. A short reset now is cheaper than rebuilding around a blocked valve, binding drawer, or swollen cabinet floor.
When to Hire a South Jersey Pro and How a Mobile Showroom Helps
DIY is reasonable when the cabinet stays in place, the wall is accessible, the plumbing is sound, and the builder can measure, cut, seal, assemble, and finish carefully. The handoff point arrives when the drain or supplies must move, a corroded shutoff breaks during removal, the wall is plaster over masonry, or the vanity needs structural support that isn't visible from the room.
A dropped or uneven subfloor can also change the decision. If the floor doesn't provide a stable plane across the cabinet span, leveling becomes part of the installation rather than a cosmetic adjustment. A stone countertop adds another coordination point because the fabricator needs accurate cabinet dimensions and may require a site template before final production.
Use the consultation to resolve the hidden conflicts
The Cabinet Coach's mobile showroom brings cabinet lines, finish samples, hardware, and organizer options into the home. That makes it possible to compare actual vanity proportions against the alcove, toilet, mirror wall, and existing plumbing instead of making decisions from isolated catalog samples. The process can also identify support, clearance, and rough-in conflicts before a cabinet order is placed.
For a busy South Jersey homeowner, that in-home review can replace repeated showroom trips with one focused design conversation. It doesn't remove the need for a licensed plumber, electrician, or required local approvals, but it can clarify which trade needs to act first and which cabinet dimensions will preserve service access.
A good vanity decision isn't just a style choice. It's a plumbing, moisture, support, and daily-use decision that happens to be visible.
The practical middle path is often a hybrid build. You can handle demolition, finish selection, or some cabinet assembly while a designer confirms the dimensions, a plumber handles rough-in changes, and an installer levels and secures the finished unit. That approach keeps the homeowner involved without assigning structural and waterproofing risks to a cabinet that was never measured for them.
The Cabinet Coach brings bathroom vanity cabinet design, countertops, hardware, and tile selections into your South Jersey home through its mobile showroom process. Visit The Cabinet Coach to schedule a consultation, review your actual vanity wall and plumbing conditions, and turn the build into a coordinated plan before materials are ordered.