
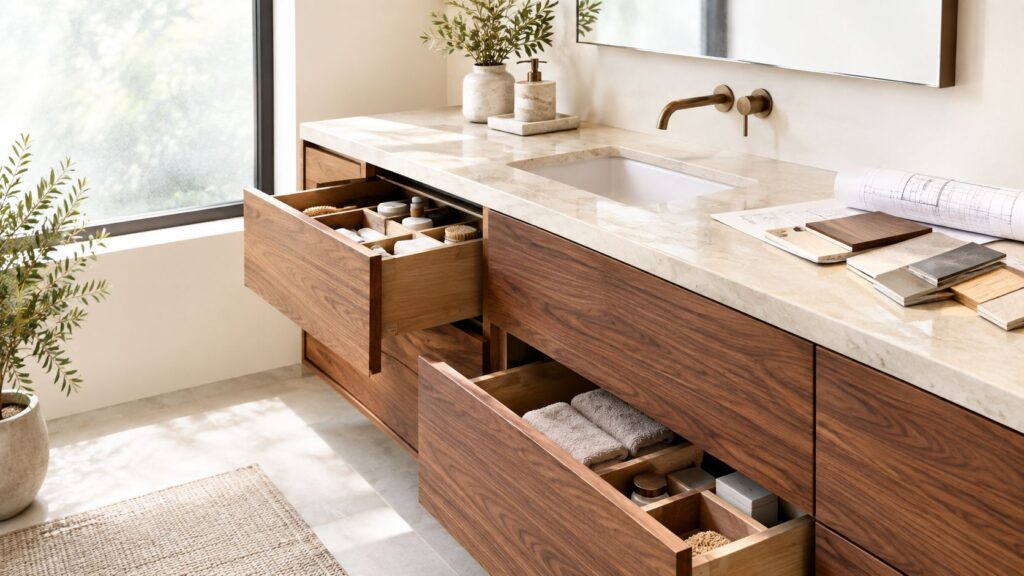
You're standing in a half-finished bathroom with a tape measure in one hand and a stock vanity order on the other side of the problem. The cabinet looked right online, but the six-inch gap beside the toilet makes the room feel unfinished. Or the drawers collide with the door swing. Or the sink lands just far enough from the existing drain that the “simple replacement” now involves opening the wall.
That's the moment a custom bathroom vanity cabinet starts to make sense. Not because custom is automatically better, and not because a showroom photograph deserves to dictate your renovation. Custom earns its place when the room's plumbing, walls, windows, clearances, and storage demands make a standard box work harder than it should.
The global bathroom vanities market was estimated at USD 43.34 billion in 2024 and is projected to reach USD 65.55 billion by 2030, with custom vanities representing a distinct 18.3% share of the category, according to DataIntelo's bathroom vanities cabinet market report. The market is large, but the practical decision in your South Jersey home is smaller and more concrete: will a standard cabinet fit the room, or will it force compromises you'll notice every morning?
Table of Contents
- When a Stock Vanity Stops Working
- Custom Versus Stock and Semi-Custom
- Sizing the Vanity Around Plumbing and Clearance
- Materials and Finishes That Survive a Bathroom
- Storage and Plumbing Working Together
- What a Custom Vanity Actually Costs
- How The Cabinet Coach Mobile Showroom Works
- Your Next Step and Common Mistakes to Skip
When a Stock Vanity Stops Working
A stock vanity stops being a bargain when you have to redesign the room around it. Start by measuring the finished wall, not the bare framing. Tile, baseboard returns, casing, and a slightly crooked corner can take away the inches that made the catalog dimensions look safe.
Odd wall lengths are the most common trigger. A 36-inch vanity may leave an awkward gap beside the toilet, while a 42-inch cabinet might crowd the door casing. Semi-custom sizing can solve a modest width problem, but it won't necessarily solve a window jamb, an offset drain, or a drawer that meets the swing path.
The room tells you where custom matters
Look closely at the conditions that stock cabinets handle poorly:
- Uneven walls: An out-of-plumb wall can create a visible wedge between the cabinet and the wall or force a countertop to be scribed on site.
- Soffits and slopes: A low soffit or sloped ceiling may limit mirror height, upper storage, or the cabinet's finished elevation.
- Windows: A window over the sink can interrupt the mirror run and dictate a lower or narrower cabinet.
- Plumbing stacks: A drain or supply line that misses the stock cabinet's service opening can consume drawer space or require costly relocation.
- Door swings: Pulls, drawer fronts, and cabinet corners all need to clear the bathroom door, shower door, and nearby fixtures.
Practical rule: Measure the obstacles first. Choose the vanity style after you know what the room will permit.
A custom cabinet is especially useful when the wall has a fixed feature you can't move. It can be built around a pipe chase, narrowed beside a toilet, notched for a baseboard, or arranged with a false front where the P-trap needs service access. That doesn't mean every unusual room needs fully bespoke cabinetry. It means you should identify the constraint before paying for a cabinet that treats the constraint as your installation problem.
The U.S. supply base is substantial, with the Cabinet and Vanity Manufacturing industry valued at USD 22.0 billion in 2026, while U.S. bathroom vanity revenue reached USD 8.775 billion in 2024 and is projected to reach USD 12.6602 billion by 2030, according to IBISWorld's industry overview. You have plenty of product choices. The right choice still has to fit your particular wall.
Custom Versus Stock and Semi-Custom
A vanity that looks perfect in a showroom can fail at the wall. The deciding issue is usually not the door style. It is whether the cabinet leaves room for the drain, supply lines, doors, drawers, and nearby fixtures. Stock wins on speed and initial price. Semi-custom adds limited flexibility. Custom solves the geometry that the other two tiers leave untouched.
Stock cabinets use fixed widths, standard depths, and predetermined drawer layouts. Choose one for a straightforward bathroom with square walls, centered plumbing, and a clear installation path. If it fits without filler strips, awkward spacers, or plumbing modifications, stock is the sensible choice. Busy homeowners also avoid extra design and fabrication time.
Semi-custom offers more width options, finishes, door profiles, and hardware, but the manufacturer still works within a defined system. A line may provide a narrower cabinet or altered drawer stack. It may not move an internal divider, reroute a back panel, or place a step-in hamper exactly where the room requires it.
Custom earns its premium when a specific site condition makes standard cabinetry inefficient. Taller toe kicks can improve access for some homeowners. A step-in hamper can replace a freestanding basket. The cabinet can match the finished wall length, shift the sink away from an off-center drain, or preserve usable storage around fixed conditions.
| Factor | Stock | Semi-Custom | Custom |
|---|---|---|---|
| Fit | Fixed dimensions and service openings | Limited sizing flexibility | Built around finished site conditions |
| Storage | Predetermined drawer and door layout | Some layout choices | Drawer stacks, hampers, and access arranged for the room |
| Lead time | Usually quickest | Longer than stock | Longest, because drawings and fabrication are involved |
| Cost | Lowest initial tier | Middle tier | Highest premium, tied to labor and detail |
| Best fit | Square room with centered plumbing | Mostly standard room with modest adjustments | Tight, irregular, or plumbing-heavy room |
Compare the broader fit and cost trade-offs in prefab kitchen cabinets versus custom cabinetry. The same principle applies in a bathroom. A lower purchase price is not a saving if the cabinet creates filler, relocation work, rework, or unusable storage.
Custom vanities represent a meaningful part of the market, and the category is projected to grow. That supports treating personalization as a practical option, not a showroom-only request. My recommendation is direct: choose stock when the room is cooperative, semi-custom when it needs modest adjustment, and custom when plumbing or wall geometry would otherwise dictate the entire design.
Sizing the Vanity Around Plumbing and Clearance
A vanity sketch should begin with the lavatory centerline, toilet, tub or shower edge, door swing, and plumbing rough-in. Cabinet width comes later. Major-market guidance aligns with at least 15 inches from the lavatory or toilet centerline to a side wall or adjacent fixture, plus 21 inches of clear floor space in front of the vanity. Where the room allows it, 30 inches improves comfort and drawer access, as outlined in the bathroom cabinet clearance calculator.
Measure in this order:
- Mark the centerline. Locate the existing drain and supply lines, then establish where the basin can sit without forcing a plumbing relocation.
- Check the front zone. Measure from the finished face of the vanity to the opposite wall, toilet, or fixture. Open every drawer during the layout review.
- Check the side zones. Include tile thickness, baseboard, casing, and the actual edge of the tub or shower.
- Record obstructions. Note window sills, side-wall outlets, medicine cabinets, and baseboard returns before selecting a cabinet width.
- Confirm floor conditions. An out-of-level floor may require shims or an adjustable toe-kick treatment so the countertop finishes level.
Why the drain beats the catalog
A P-trap that sits well forward or off-center can eliminate a deep drawer, even when the outside cabinet dimensions look acceptable. A shallow vanity may solve the walkway problem but leave too little room for the trap, shut-off valves, and service access. A designer should draw the basin, trap, drain, drawer travel, and back panel together.
For another perspective on double-basin planning and the relationship between width, basin placement, and circulation, review SitePro Bathrooms' vanity guide. It's useful before you decide that a wide double vanity automatically represents an upgrade.
You can also compare the practical planning considerations in this double vanity size guide. My rule for South Jersey bathrooms is simple: don't approve a cabinet elevation until the plumbing rough-in and finished clearances appear on the same drawing. A beautiful front view can't rescue a drawer that hits a trap or a walkway that feels pinched every day.
Materials and Finishes That Survive a Bathroom
Bathroom cabinet material is a moisture-management decision, not merely a color or grain decision. Steam, splash, condensation, sink cutouts, and a slow leak all attack exposed edges differently. Standard MDF or particleboard can swell at edges and fastener points after repeated moisture exposure, while plywood's cross-laminated structure gives it better dimensional stability in humid conditions, as explained in this vanity cabinet material guide.
For most bathrooms, I prefer an exterior plywood box with sealed edges and a protected back panel. Solid wood makes sense for a toe kick, face frame, or visible trim where impact and repairability matter. MDF still has a place in painted door panels in relatively dry zones, but I wouldn't make standard MDF the exposed carcass around a sink or plumbing cutout.
| Material | Moisture resistance | Best use | Watch for |
|---|---|---|---|
| Exterior plywood | Stronger dimensional stability in humid conditions | Vanity boxes and wet-adjacent cabinet construction | Unsealed cut edges and openings |
| Marine-grade plywood | Highest-spec option for demanding moisture exposure | Coastal or especially wet applications | Higher material cost and the need for proper detailing |
| Solid wood | Durable for selected structural and trim parts | Face frames, toe kicks, visible accents | Seasonal movement and finish maintenance |
| MDF | Appropriate in protected, dry decorative zones | Painted door and drawer panels | Swelling at raw edges and fastener points |
| Particleboard | Poor choice for repeated bathroom exposure | Avoid for exposed wet-zone carcasses | Edge swelling, delamination, and fastener failure |
Finish details matter more than showroom labels
Conversion varnish and catalyzed lacquer can provide durable cabinet coatings when properly applied. UV-cured topcoats can add another layer of factory-controlled protection. In a steamy bathroom, a two-component finish generally gives me more confidence than a basic single-component coating, but no finish compensates for an unsealed sink cutout or a leaking supply connection.
Hardware deserves equal attention. Use corrosion-resistant hardware, and consider 304 or 316 stainless steel where the bathroom sees persistent humidity or coastal air. Around sink cutouts, sealed edge-banding and carefully treated shaped openings prevent water from reaching the board core.
Red flags include raw edges under the sink, an unsealed back panel, swollen-looking samples, exposed particleboard, and a quote that lists only “water-resistant finish” without identifying the box material or edge treatment. In older South Jersey bathrooms with weak ventilation, specify the more durable construction and repair the exhaust problem rather than asking the vanity finish to absorb every mistake.
For a deeper cabinet-box comparison, use this plywood versus MDF cabinet guide. The recommendation is clear: spend on the box and edge protection before spending on exotic wood species.
Storage and Plumbing Working Together
A drawer stack and a P-trap occupy the same space, so they belong on the same drawing. The most useful bathroom storage plan isn't the one with the most drawers. It's the one that keeps the drawers usable while leaving the trap, shut-off valves, and outlet accessible.
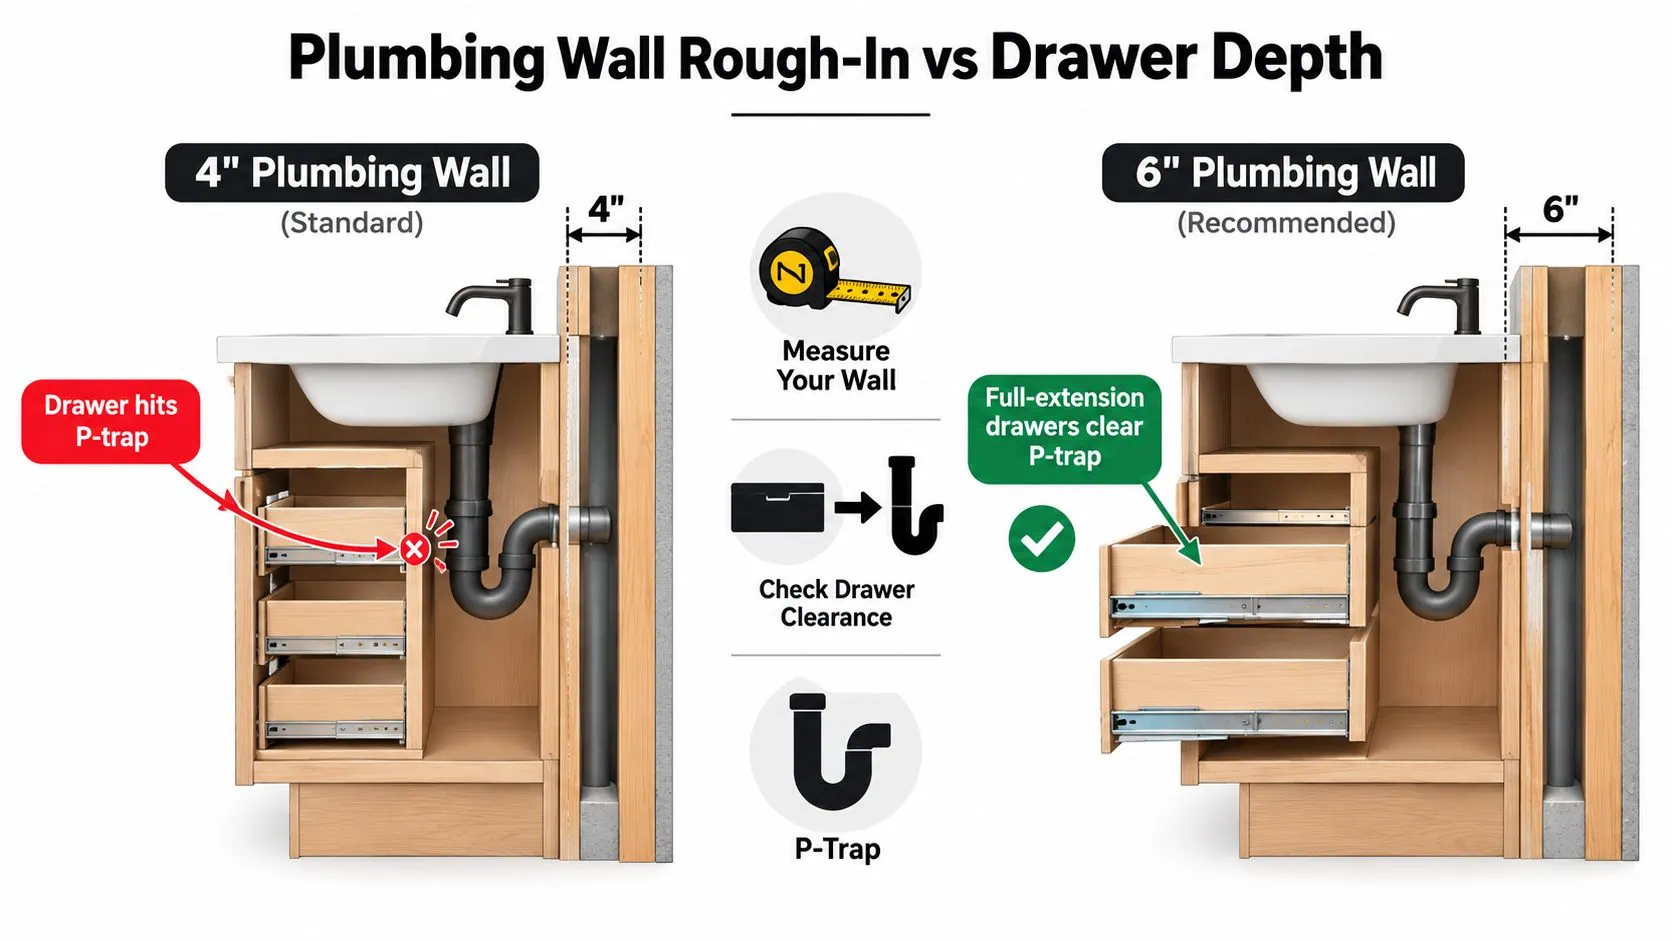
A plumbing wall rough-in can determine whether full-extension drawers pass cleanly behind the sink. With a deeper service chase, the cabinetmaker may be able to preserve more drawer volume. With a shallower or badly aligned rough-in, the design may need a reduced-depth drawer, a notch, or a false front.
Pair each storage choice with its consequence
- False-front panel: It hides the trap and preserves a clean elevation, but it wastes the volume behind the front unless you add a tilt-out tray or service arrangement.
- Drawer stack: It gives better access to toiletries and cleaning supplies, but the upper drawer may need a U-shaped cutout around the trap.
- Tilt-out beside the sink: It can hold hair tools or small grooming items, but electrical placement must remain safe and accessible.
- Open shelf: It makes a small bathroom feel lighter, but it leaves supply lines and stored items visible.
- Outlet below the sink: It can serve a disposer-style appliance or charging arrangement, but it consumes valuable service space and must follow applicable electrical requirements.
- Side-drawer outlet: It keeps the under-sink area clearer, though the drawer depth and cord routing need to be planned before fabrication.
A 6-inch plumbing wall rough-in may allow a cleaner relationship between drawer depth and trap location, while a 4-inch condition may force a more conservative drawer arrangement. Those dimensions are design examples, not universal code requirements, so the actual trap envelope and rough-in should be measured on site.
For practical layout ideas that keep plumbing serviceable, compare these bathroom vanity storage solutions. The right answer usually combines a shallow top drawer, a serviceable sink zone, and deeper lower drawers rather than trying to make every drawer full depth.
What a Custom Vanity Actually Costs
Custom pricing rises where the cabinetmaker adds labor, drawings, special sizing, unusual materials, or site-specific solutions. It doesn't rise because the vanity has a different door profile. A standard box with a straightforward engineered-stone top can stay relatively controlled, while integrated lighting, exotic species, custom metalwork, and specialized organizers can push the premium quickly.
Recent market data places custom-built vanity construction as high as US$2,800 per linear unit, with installation adding US$200 to US$1,000, according to Astute Analytica's bathroom vanities market summary. Treat that as a market reference, not a guaranteed South Jersey quote. Your actual proposal should separate cabinet construction, countertop, hardware, plumbing work, and installation.
Where the money goes
- Cabinetry: The box, doors, drawer fronts, finish, interior accessories, and custom fitting usually form the largest portion.
- Countertop: Engineered stone offers a predictable appearance and practical maintenance. Integrated sinks, unusual edge profiles, and complex cutouts increase fabrication work.
- Hardware: Soft-close hinges and drawer slides improve daily use, but every upgraded component adds to the package.
- Installation: Scribing, shimming, wall reinforcement, countertop setting, plumbing reconnect, and punch-list work should appear as distinct scope items.
| Vanity size | Cabinetry only | With countertop | Lead time |
|---|---|---|---|
| 30-inch single sink | Quote by selected box, finish, and hardware | Add countertop fabrication and sink cutout | Confirm with fabricator |
| 48-inch single sink | Higher material and drawer-layout allowance | Add larger top and finishing details | Confirm with fabricator |
| 60-inch single sink | Larger cabinet footprint and storage package | Add top, cutout, backsplash, and edge profile | Confirm with fabricator |
| 60- to 72-inch double sink | Two basin zones and more complex plumbing coordination | Add double cutouts and larger top | Confirm with fabricator |
The cabinet cost per linear foot guide can help you compare proposals, but don't reduce a bathroom quote to width alone. A narrow cabinet with a difficult trap, wall scribe, and specialty finish may require more design and installation work than a wider cabinet in a perfectly square room.
For timing, ask for design approval, fabrication, countertop templating, and installation as separate milestones. A shop that gives you one vague delivery date hasn't shown you where delays could occur.
How The Cabinet Coach Mobile Showroom Works
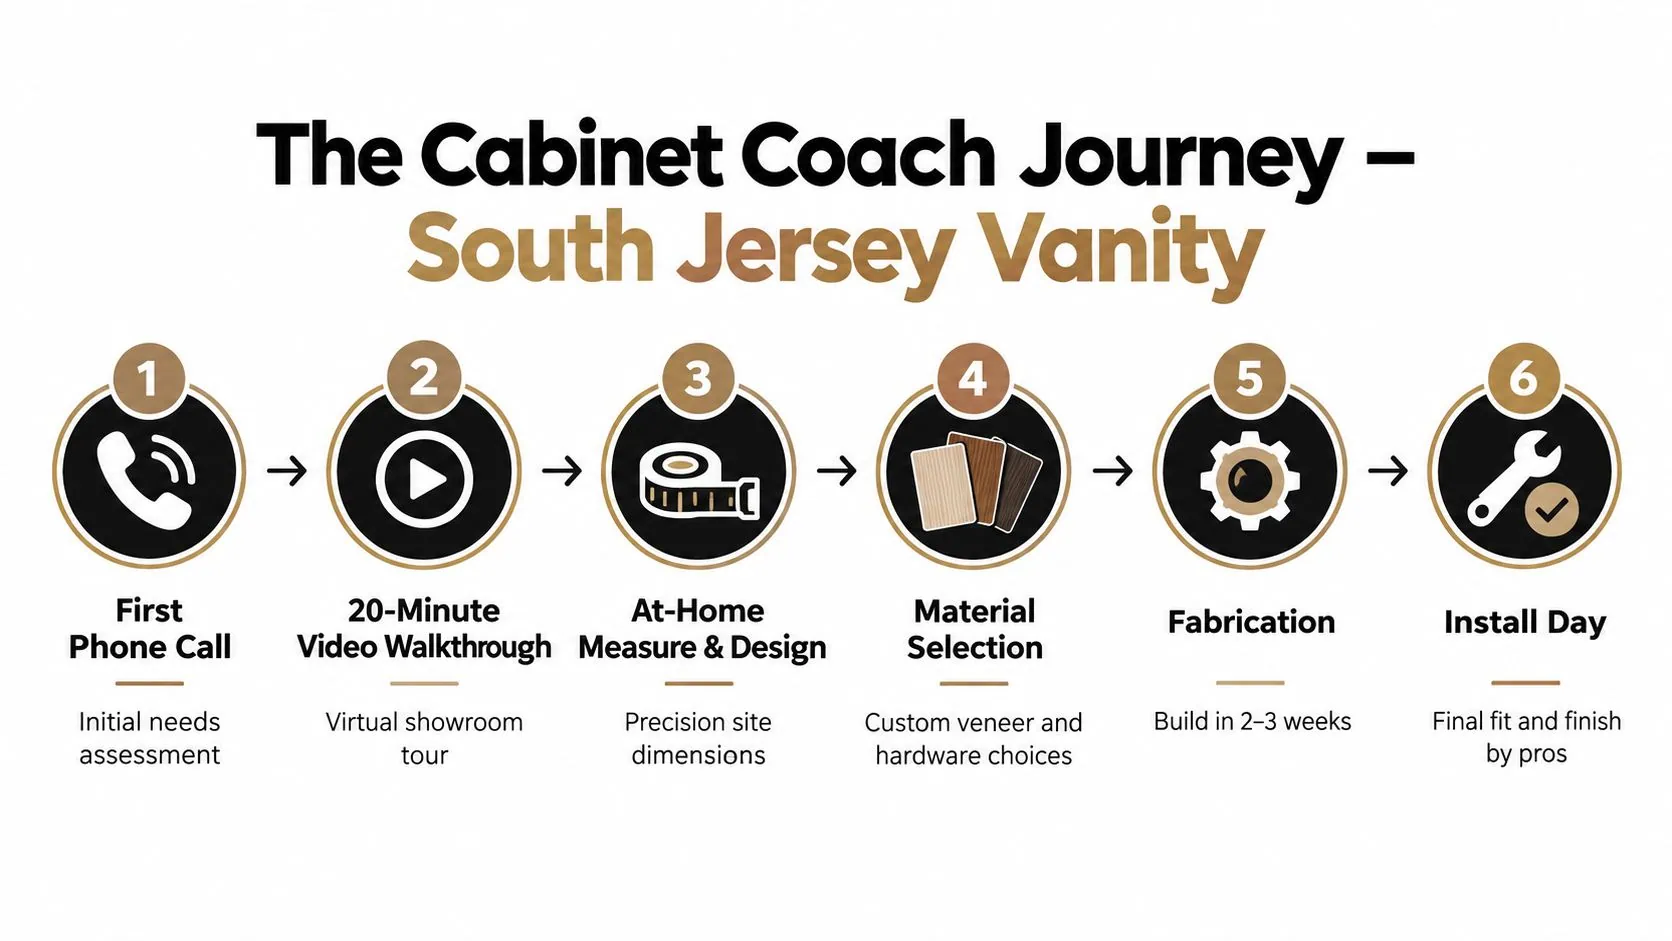
A useful vanity process starts before anyone sells you a door style. In a South Jersey project, the first conversation should establish the room dimensions, existing vanity width, plumbing locations, desired sink count, storage problems, and renovation timing. A complimentary video consultation can let the designer review those conditions on screen before an in-home appointment is scheduled.
The mobile showroom changes the selection process. Instead of traveling between separate cabinet, countertop, hardware, and tile stores, the homeowner can review coordinated samples at home. Door samples, finish chips, hardware, and a full-size vanity box make it easier to judge cabinet depth, drawer-stack height, toe-kick clearance, and the way the finish looks beside the bathroom tile.
A project visit should settle the hidden details
During the in-home design visit, the critical work is less glamorous than choosing a finish. The designer confirms finished wall dimensions, plumbing centerlines, outlet placement, window and casing conditions, toe-kick requirements, and access around the P-trap. Those details should appear in the shop drawing before fabrication begins.
The homeowner then reviews the drawing, approves the materials and hardware, and confirms what the quote includes. The supplied workflow describes a New Jersey shop build window of 4 to 6 weeks, followed by a one-day installation with plumbing reconnect. Those are stated process expectations, so confirm the current schedule and the responsibilities of your plumber, countertop fabricator, and installer before signing.
A punch-list walkthrough should cover drawer alignment, door reveals, countertop seams, caulk lines, hardware operation, plumbing connections, and warranty documentation. You can also see the company's approach in this short custom cabinetry process video.
The advantage of a mobile showroom isn't novelty. It removes a practical source of delay for busy homeowners: making separate trips while trying to remember whether the cabinet finish works with the tile, whether the hardware fits the door rail, and whether the countertop sample suits the lighting. Seeing those decisions in the actual bathroom makes the final design more accountable to the room.
Your Next Step and Common Mistakes to Skip
If your bathroom has a tight opening, an awkward drain, or limited walkway, get those facts together before asking for a vanity proposal. Custom work earns its keep only when the cabinet solves a real room constraint. Bring clear photos, rough finished dimensions, and the location of every fixture that could limit the design.
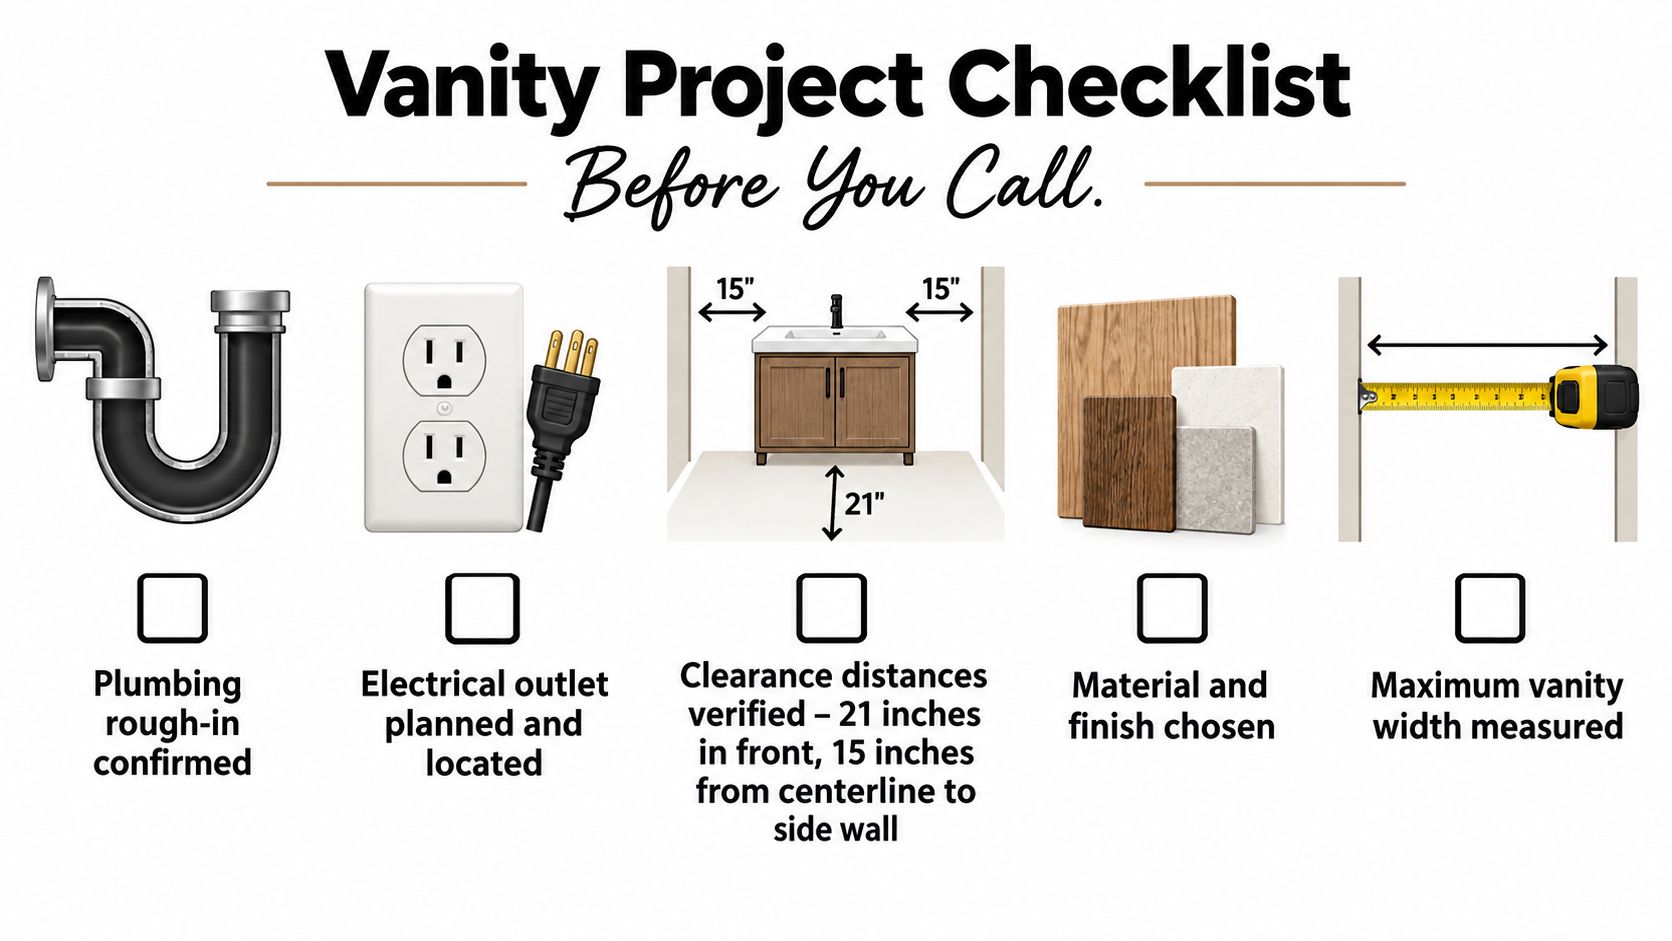
Use this pre-consult checklist:
- Confirm plumbing: Photograph the drain, supply lines, shut-off valves, and wall openings.
- Plan electrical: Mark the outlet, lighting circuit, and any grooming appliances that need access.
- Verify clearance: Measure the front walkway, side walls, toilet relationship, shower edge, and door swing.
- Choose materials intelligently: Match the cabinet box and finish to ventilation, splash exposure, and possible standing moisture.
- Measure maximum width: Record the finished wall from casing to casing. Subtract space for fillers, scribing, and fixture clearance.
Mistakes that create expensive rework
A vanity wider than the finished opening will not fit, even if the framing measurement looks generous. Measure finished surfaces, not exposed studs. Check the P-trap before choosing deep drawers, or the drawer fronts may become fixed panels. Standard MDF also needs careful consideration in a poorly ventilated, windowless bathroom because a finish cannot correct ongoing moisture exposure.
Set the outlet location before fabrication. Review the drawer elevation with the sink and trap clearance shown. Require a written cabinet-box specification and edge-treatment detail instead of approving a vague “water-resistant cabinet” description.
The rule I use is simple: plumbing and clearance decide the cabinet, then storage and style complete it.
For a South Jersey homeowner, the next step is straightforward. Book a video consultation with The Cabinet Coach. Have rough-in photos, finished-wall measurements, fixture locations, and a few inspiration images ready, so the vanity can be scoped accurately on the first call.
The Cabinet Coach brings a mobile showroom to South Jersey homes, letting you review bathroom vanity cabinetry, countertops, hardware, and tile in the actual room. That removes the friction of traveling between three stores while the plumbing, clearance, storage, and budget decisions are still being made. Start with those constraints. They determine whether custom construction is worth the investment.