
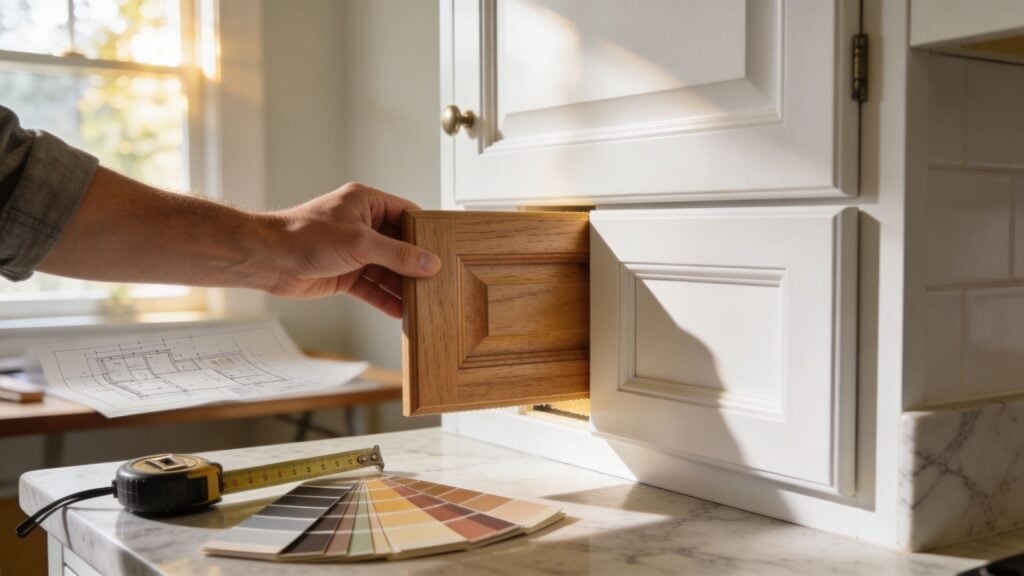
You're probably standing in your kitchen looking at cabinet doors that still work, but everything about them feels tired. Maybe the finish is worn around the pulls, the layout wastes space, or one awkward corner makes the whole room harder to use than it should be. In South Jersey, that situation is common. A lot of kitchens in Camden and Burlington County homes have good bones but dated cabinet styles, uneven walls, tricky additions, and layout decisions that no longer fit how people cook now.
That's why learning how to remodel cabinets starts with a practical question, not a style question. What needs to improve, and what can stay? If you get that answer right early, the rest of the project gets easier. Your budget works harder, your schedule gets more predictable, and the finished kitchen feels intentional instead of pieced together.
Table of Contents
- First Steps Defining Your Cabinet Remodel Goals
- The Big Decision Refinish Reface or Replace
- Choosing Materials and Finishes That Last
- Budgeting and Timelines for Your South Jersey Project
- Assembling Your Team DIY vs Hiring a Pro
- Managing Your Remodel From Start to Finish
- Frequently Asked Questions About Cabinet Remodeling
- Is it worth remodeling cabinets if the boxes are still solid
- How do I know if refacing will look new enough
- Should flooring or cabinets come first
- Can I remodel cabinets without changing the whole kitchen
- What's the biggest mistake first-time homeowners make
- Are older South Jersey kitchens harder to remodel
First Steps Defining Your Cabinet Remodel Goals
Most cabinet projects start with a surface complaint. “I hate the oak.” “These doors look old.” “The kitchen feels dark.” But the finish usually isn't the core problem by itself. The actual issue is that the cabinets no longer support the way the household lives.
In Cherry Hill, Haddonfield, Moorestown, Mount Laurel, and nearby towns, I often see the same pattern. Homeowners focus on color first, then later realize the bigger issue was poor storage, bad appliance placement, weak lighting, or an aisle that's too tight when two people are in the room. If you skip that diagnosis, you can spend good money and still end up with a kitchen that looks newer but works the same.
Start with the pain points you feel every day
Walk through a normal weekday in your kitchen and write down the friction points.
- Storage failures: Which items never fit where they belong? Pots, lunch containers, small appliances, recycling bins, spices, pet supplies, and sheet pans usually reveal the weak spots fast.
- Workflow issues: Notice where people collide. The refrigerator door, dishwasher door, trash pullout, and range area often compete for the same space.
- Visual problems: Look at lighting, worn finishes, mismatched doors, and exposed cabinet damage, but keep these separate from functional problems.
- Future use: A kitchen for resale in a competitive neighborhood isn't planned the same way as a kitchen you expect to use for years.
Practical rule: Your cabinet remodel should solve at least one daily frustration, not just one visual annoyance.
Build a must have list before you shop
A clear list keeps you from drifting into expensive decisions that don't match your priorities. Start with “must have,” then create a separate “nice to have” column.
A must-have might be deeper drawers for cookware, better pantry access, or a more workable sink wall. A nice-to-have might be decorative glass doors, a furniture-style island end, or specialty inserts. Both matter, but they don't carry the same weight when pricing comes back.
If you need help visualizing ideas before committing, it can be useful to improve interior design rendering skills so you can communicate layout and finish choices more clearly with your designer or contractor.
Match the remodel to your real goal
If your main goal is resale, avoid over-customizing. If your goal is long-term living, focus more on use patterns and less on what looks impressive in listing photos. Those are different projects.
A planning worksheet helps. The kitchen remodel planning guide is a good way to organize scope, priorities, and early decisions before you start collecting samples.
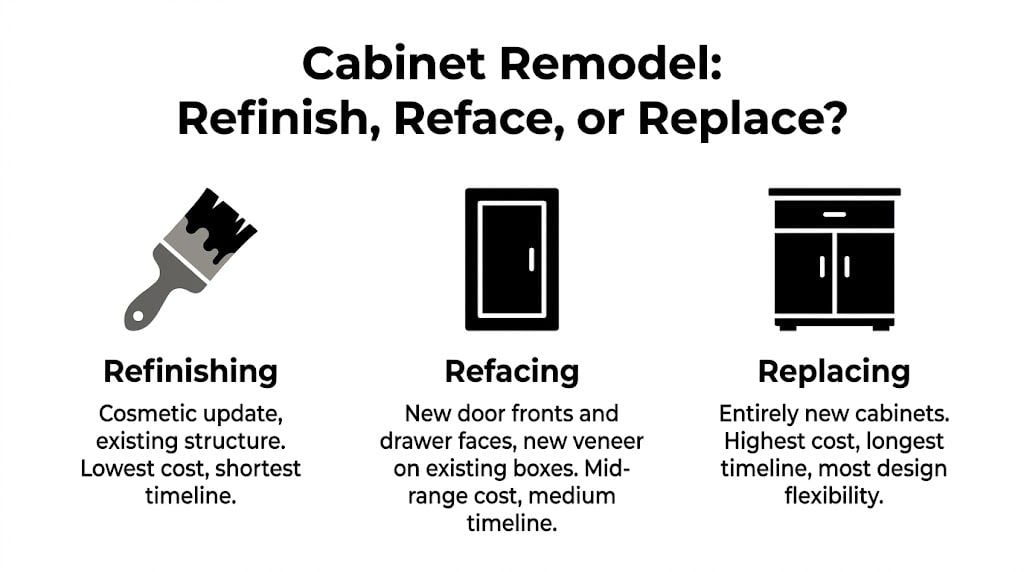
The Big Decision Refinish Reface or Replace
This is the fork in the road. Once you decide whether to refinish, reface, or replace, your budget, disruption level, and design flexibility become much clearer.
Cabinet Remodel Options Compared
| Factor | Refinish | Reface | Replace |
|---|---|---|---|
| Scope | Keeps doors and boxes, changes finish | Keeps cabinet boxes, installs new doors, drawer fronts, veneer, and hardware | Removes existing cabinets and installs all new cabinetry |
| Best for | Solid cabinets with a style you already accept | Structurally sound boxes with dated fronts or finishes | Poor layout, damaged boxes, or major redesign goals |
| Design change | Low | Moderate to high visually | Highest |
| Layout change | Very limited | Limited | Full flexibility |
| Disruption | Light | Moderate | Highest |
| Budget impact | Lowest path | Middle path | Highest path |
When refinishing makes sense
Refinishing is a cosmetic move. It works best when the cabinet boxes and doors are in good shape and the door style still fits the home. If the profile is heavily dated, refinishing can leave you with fresh paint on an old-looking cabinet.
That's why refinishing often disappoints homeowners who are chasing a completely different look. It changes color. It doesn't change proportions, reveal lines, overlay style, or storage function.
Why refacing has become a serious option
Refacing is the middle ground that many homeowners should consider first. You keep the cabinet boxes, then install new doors, new drawer fronts, updated hardware, and matching exterior surfaces so the kitchen reads as new.
That approach lines up with broader remodeling behavior. According to This Old House's 2025 kitchen remodeling trends coverage, cabinet refreshes involving new doors, hardware, and paint made up nearly 40% of kitchen projects, while full gut renovations accounted for 25%. The same source says cabinet refacing typically costs $4,500 to $13,000, which is 50% to 70% less than full replacement, and can be completed in about 3 to 5 days versus 8 to 12 weeks for complete replacement.
For occupied homes in South Jersey, that shorter disruption matters. If you've got kids, work-from-home schedules, or one functioning kitchen in the house, time matters almost as much as price.
Keep the boxes if they're structurally sound and the layout still works. Replace them when the structure or the plan is the real problem.
When replacement is the right answer
Full replacement gives you the most freedom. It's the right move when cabinet boxes are failing, the layout needs to change, or you're solving deeper issues like appliance relocation, added storage walls, or a complete style reset.
It's also the most expensive path, and the return isn't always better. The 2026 Kitchen ROI & Cabinet Trends Report states that a minor kitchen remodel averaged $28,458 and added $32,141 in resale value for a 112.9% cost recouped rate, while a major midrange remodel averaged $82,793 with 50.9% recouped, and a major upscale remodel averaged $164,104 with 35.7% recouped. The same report says 68% of renovating homeowners replace all cabinets, 27% choose a partial-upgrade approach, and 5% make no cabinet change.
That's the financial case for restraint. If your cabinet boxes are solid, a visible upgrade often gives you a better balance of cost, use, and resale.
For homeowners comparing real project scope, this breakdown of the cost of kitchen cabinet refacing helps frame the trade-offs.
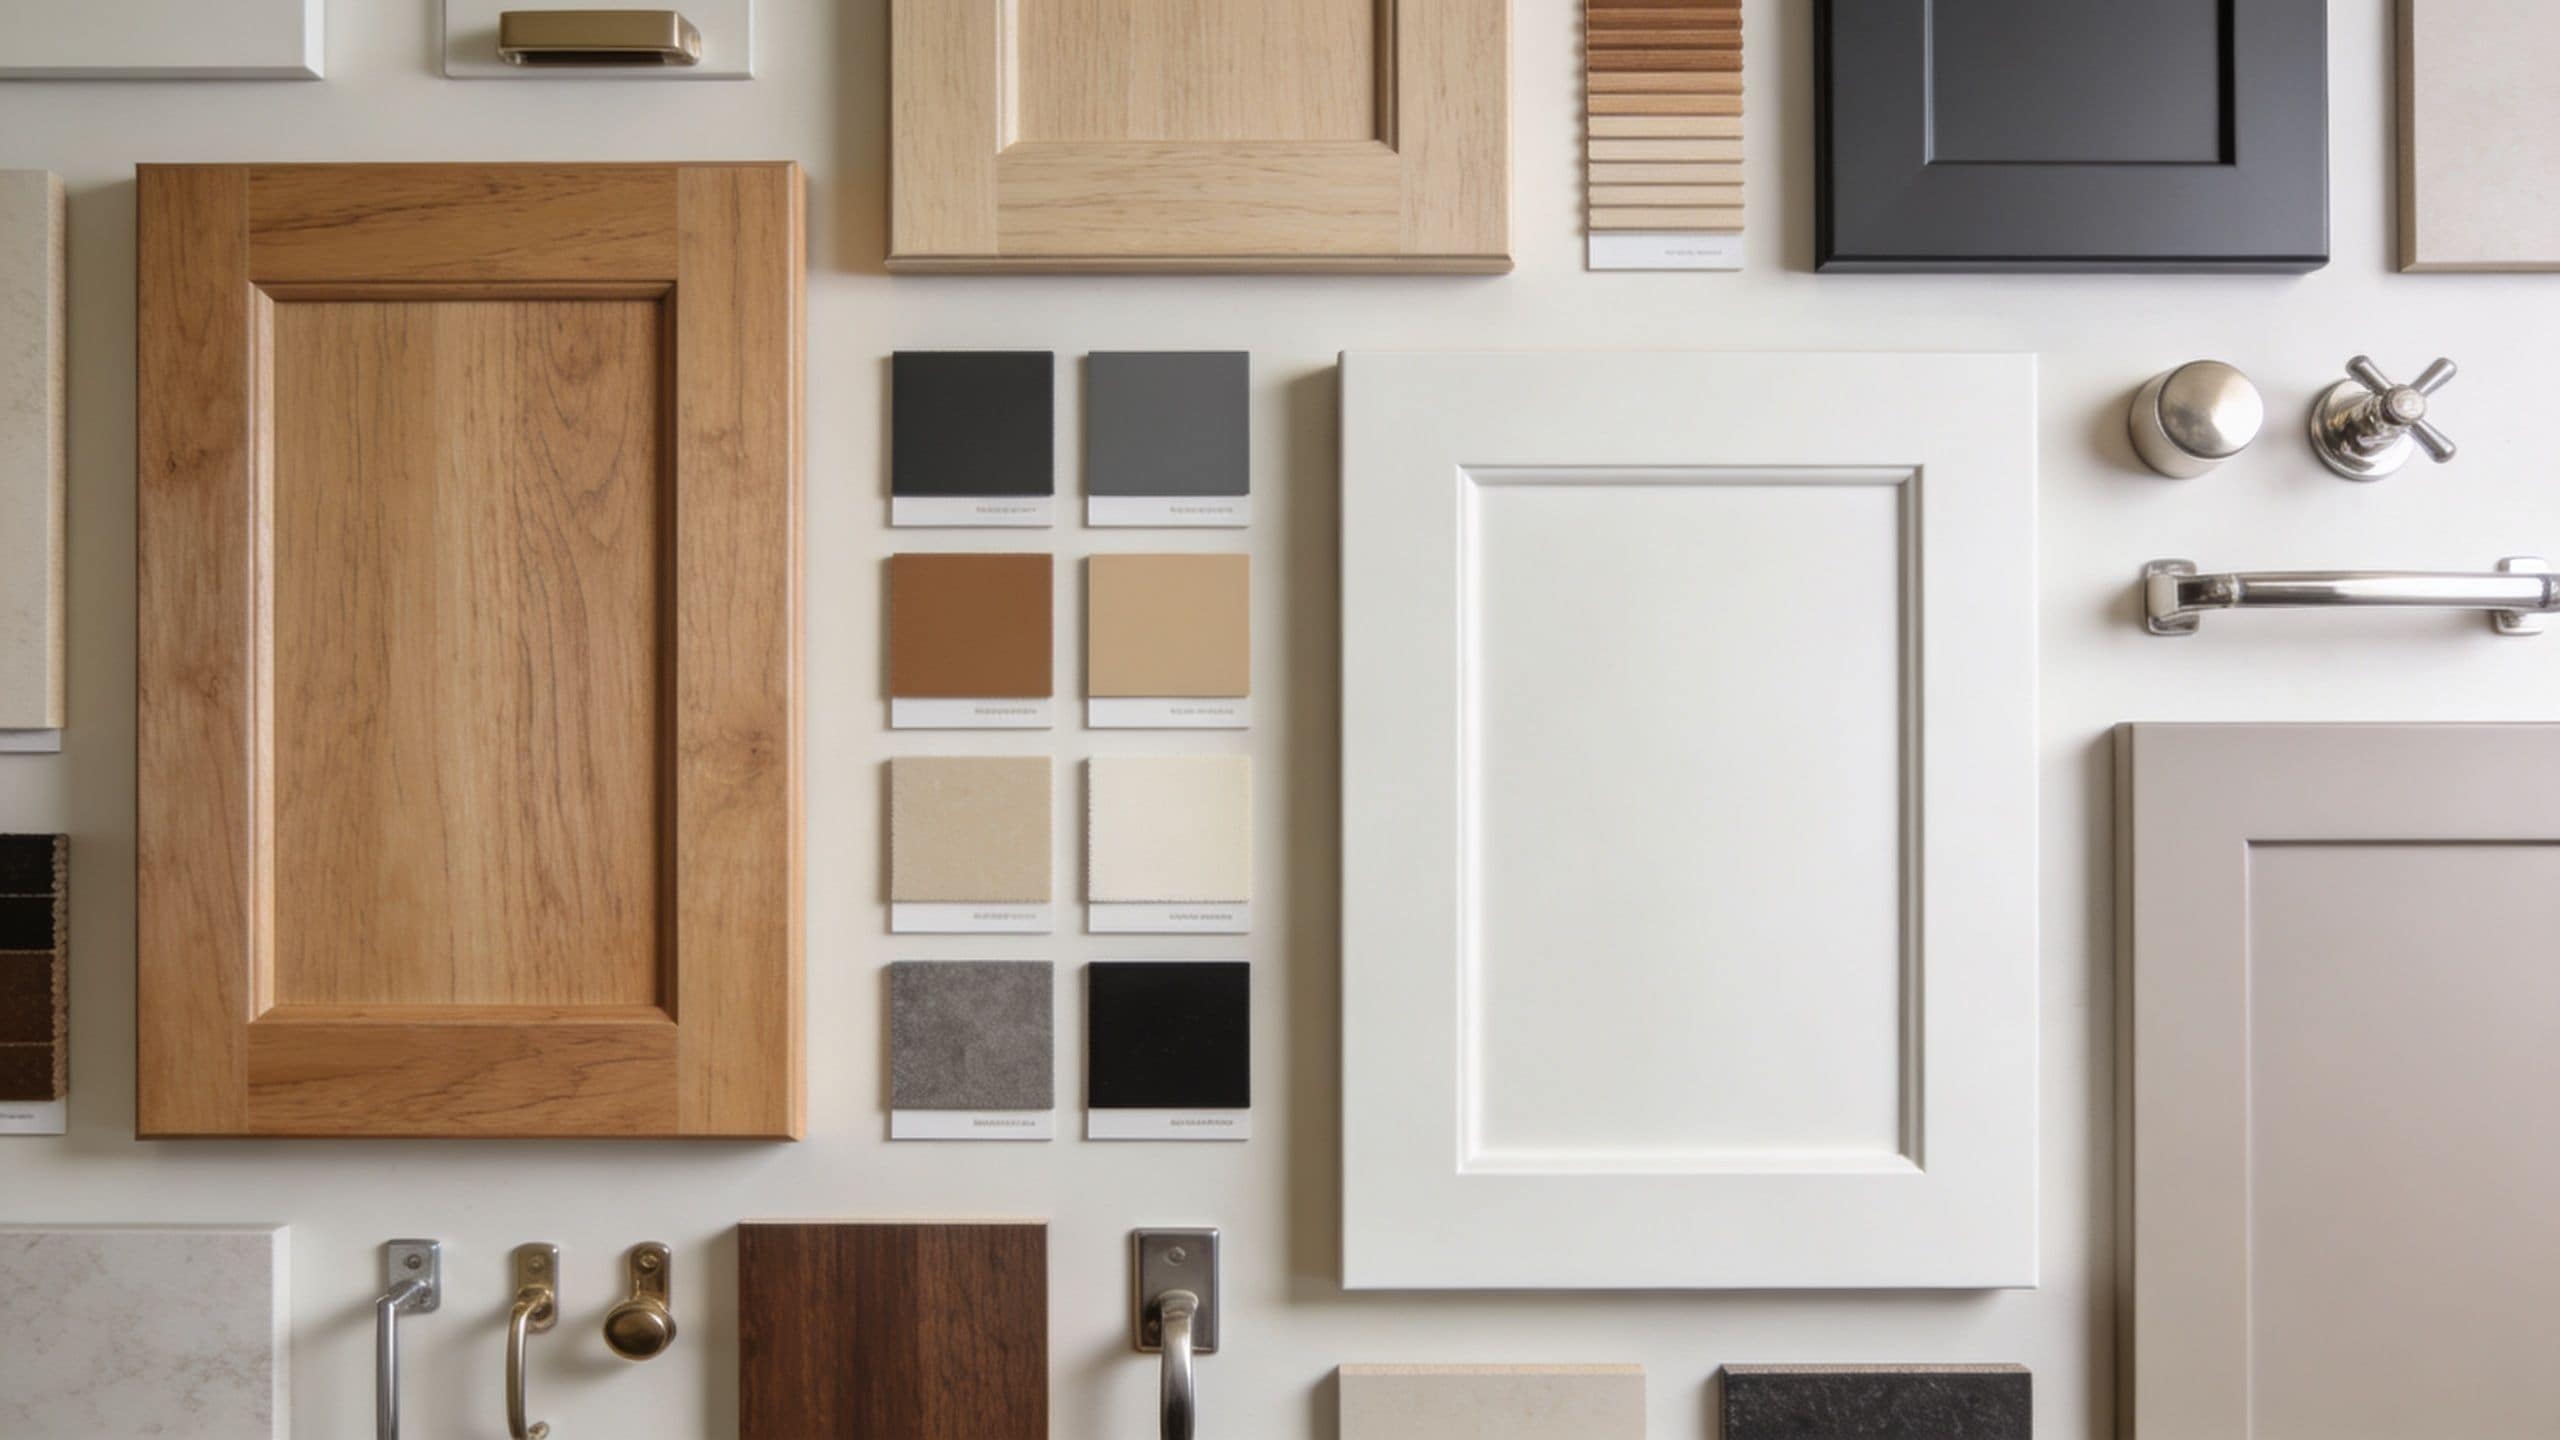
Choosing Materials and Finishes That Last
Good cabinet remodeling isn't only about appearance. The materials and finish choices determine how the kitchen will wear, clean up, and hold up under normal use.
In South Jersey homes, you also have to respect the room you're working with. Older homes in Collingswood, Haddon Heights, Merchantville, and parts of Moorestown often come with walls that aren't perfectly square, floors that drift, and additions that create odd transitions. Material and design choices need to survive that reality.
Pick materials based on wear, not only price
For cabinet boxes, plywood is often chosen when durability and screw-holding matter. MDF is commonly used for painted door fronts because it gives a smooth finish. Solid wood has its place, especially for stained applications or specific design goals, but it also moves with humidity and needs to be specified carefully.
The wrong move is choosing a material because it sounds premium without considering how it will be used. Painted slab or Shaker-style doors need a different conversation than a stained wood kitchen with visible grain.
A helpful place to sort through those trade-offs is this guide on MDF vs wood cabinet doors which one is right for your home.
Choose a door style that fits the house
Shaker works in a wide range of homes for a reason. It can sit comfortably in a Moorestown colonial, a Haddonfield traditional home, or a newer Voorhees kitchen without feeling forced. Flat-panel doors push more modern. Raised-panel doors can still work, but they need the rest of the room to support them.
Don't choose a profile in isolation. Look at casing, flooring, window style, wall color, and appliance finish. Cabinets take up a lot of visual space. If they fight the architecture, the whole room feels unsettled.
A cabinet door can be technically well made and still be the wrong choice for the room.
Functional upgrades that earn their keep
Decorative trim is fine, but the best upgrades usually improve how the kitchen works.
Consider features like these:
- Pull-out storage: Better than stacking deep shelves you can't fully reach.
- Toe-kick drawers: Useful in compact kitchens where every inch matters.
- Glass-front doors: Best used selectively so they lighten the room without creating display pressure everywhere.
- Furniture details: Legs, feet, or open-end styling can soften a long run of cabinets when used carefully.
Recent homeowner interest has leaned toward high-impact, low-disruption changes like glass-pane doors, pull-out storage, toe-kick drawers, and furniture-style details, as discussed in this affordable ways to redo kitchen cabinets article.
Here's a useful look at cabinetry details and finish choices in motion:
Handle corners and angled walls early
Many remodels go wrong because standard cabinet plans often assume square corners and clean dimensions. Many South Jersey homes don't give you that.
According to this cabinet layout video on angled walls and corner planning, angled walls can require roughly 10 inches of dead space for a 24-inch base cabinet and fillers to keep doors and drawers from colliding. The same source shows alternatives like rotating cabinets to 45 degrees or using fillers and panels to build a usable corner solution.
Those details matter because corner mistakes don't look obvious on paper. They show up after install, when a drawer hits a handle, a dishwasher crowds a cabinet door, or an angled wall creates a filler strip that looks accidental.
Budgeting and Timelines for Your South Jersey Project
You set aside six weeks and a firm number for the kitchen. Then the first cabinet comes off the wall in a 1960s Cherry Hill ranch or a Mount Laurel split-level, and the room starts asking for more. A wall is out of square. The floor drops. The new refrigerator needs a wider opening. That is how cabinet remodel budgets drift in South Jersey.

Cabinet costs follow scope, not just product. The total usually changes based on whether you are keeping the layout, reusing boxes, upgrading door style, adding organizers, changing countertops, or opening walls for electrical and plumbing work. The more trades involved, the less room you have for last-minute changes.
The biggest budget overruns usually come from mid-project decisions. A homeowner starts with repainting and new hardware, then adds refacing after seeing worn cabinet sides, then decides the sink should move, and now the countertop, plumbing, and schedule all shift with it. That chain reaction is common, and it is preventable if selections are made early.
South Jersey homes add a layer many online budget guides skip. Older kitchens in Camden and Burlington counties often need extra fitting work because walls are not perfectly plumb and floors are rarely level. Scribing fillers, shimming base cabinets, adjusting crown lines, and cleaning up uneven soffits all take time. They also make the finished job look intentional instead of patched together.
Before you approve materials, map the project by category. This kitchen remodeling cost breakdown helps you sort cabinet work, counters, installation, site prep, and allowance items before small upgrades blur together.
Order first, demo second
Demolition feels productive. Ordering is what protects your schedule.
Cabinet timelines depend on the product line, finish, and accessory package, and delays usually start before installation day. Appliance specs need to be confirmed early. Countertop fabricators need final cabinet dimensions. Specialty inserts, decorative panels, and matching end skins can hold up a whole run if they were missed at ordering.
That is why a schedule-friendly planning process matters so much for busy South Jersey households. Mobile showroom appointments and video consultations let you compare door samples, paint colors, and hardware in your own kitchen, under your own lighting, without spending three Saturdays driving around Marlton, Voorhees, or Medford. The Cabinet Coach uses that process to help homeowners make decisions sooner, reduce revision cycles, and keep ordering aligned with installation windows.
Communication matters just as much once ordering starts. Many remodel firms are improving scheduling and handoff systems with tools like AI for general contractors and remodelers, especially when they are coordinating selections, field measurements, and client updates across several jobs at once.
A calmer project usually starts earlier
A realistic timeline is built around lead times, approvals, and coordination. It is also built around the house you own, not a perfect showroom kitchen.
For a cabinet remodel to stay orderly, lock in the cabinet style, finish, hardware direction, appliance sizes, and countertop plan before tear-out. That extra planning week often saves several stressed-out weeks later. In older South Jersey homes, it also gives enough room to address the small field adjustments that show up once measurements are verified.
Fast projects are usually well-decided projects.
Assembling Your Team DIY vs Hiring a Pro
DIY can work for parts of a cabinet remodel. It usually doesn't work well for the whole thing.
Painting, hardware swaps, light trim work, and some organizational add-ons are reasonable for a skilled homeowner with patience. Cabinet installation is different. So is field-measuring for stone, managing appliance clearances, handling out-of-square walls, and coordinating electricians, plumbers, flooring installers, and countertop templating.
What homeowners can usually do well
Some projects are low-risk and worth handling yourself.
- Painting existing cabinets: Best for homeowners who understand prep and accept that durability depends on process.
- Replacing knobs and pulls: A simple update if hole spacing works.
- Adding interior accessories: Rollouts, dividers, and organizers can be manageable after the main install.
Where DIY gets expensive
Cabinets have to land in the right place the first time. If a base run is off, countertops, fillers, crown alignment, appliance openings, and reveals all get harder. One mistake can carry across the room.
That's why many homeowners benefit from professional project management even if they keep a few small tasks for themselves. The value isn't only labor. It's coordination, sequencing, and accountability.
Digital tools are also changing how contractors manage communication and scheduling. If you're curious how workflows are evolving, this overview of AI for general contractors and remodelers is a useful look at the operational side.
Hire help where mistakes are hardest to undo
Electrical work, plumbing moves, cabinet install, and countertop templating are the places where “close enough” creates long-term problems. For most first-time remodelers, a hybrid approach works best. Handle cosmetic tasks if you enjoy them, and hand off structural and sequencing-heavy work to pros.
If you're evaluating who will coordinate the moving parts, this guide on how to manage contractors is worth reviewing before the project starts.
Managing Your Remodel From Start to Finish
On day one, the old doors are off, the room looks bigger, and it feels like real progress. By day three, the questions start. Did the electrician finish before the cabinet delivery? Is the floor ready for install? What happens if the wall behind the sink is out of square? That is the point where cabinet remodels are won or lost.
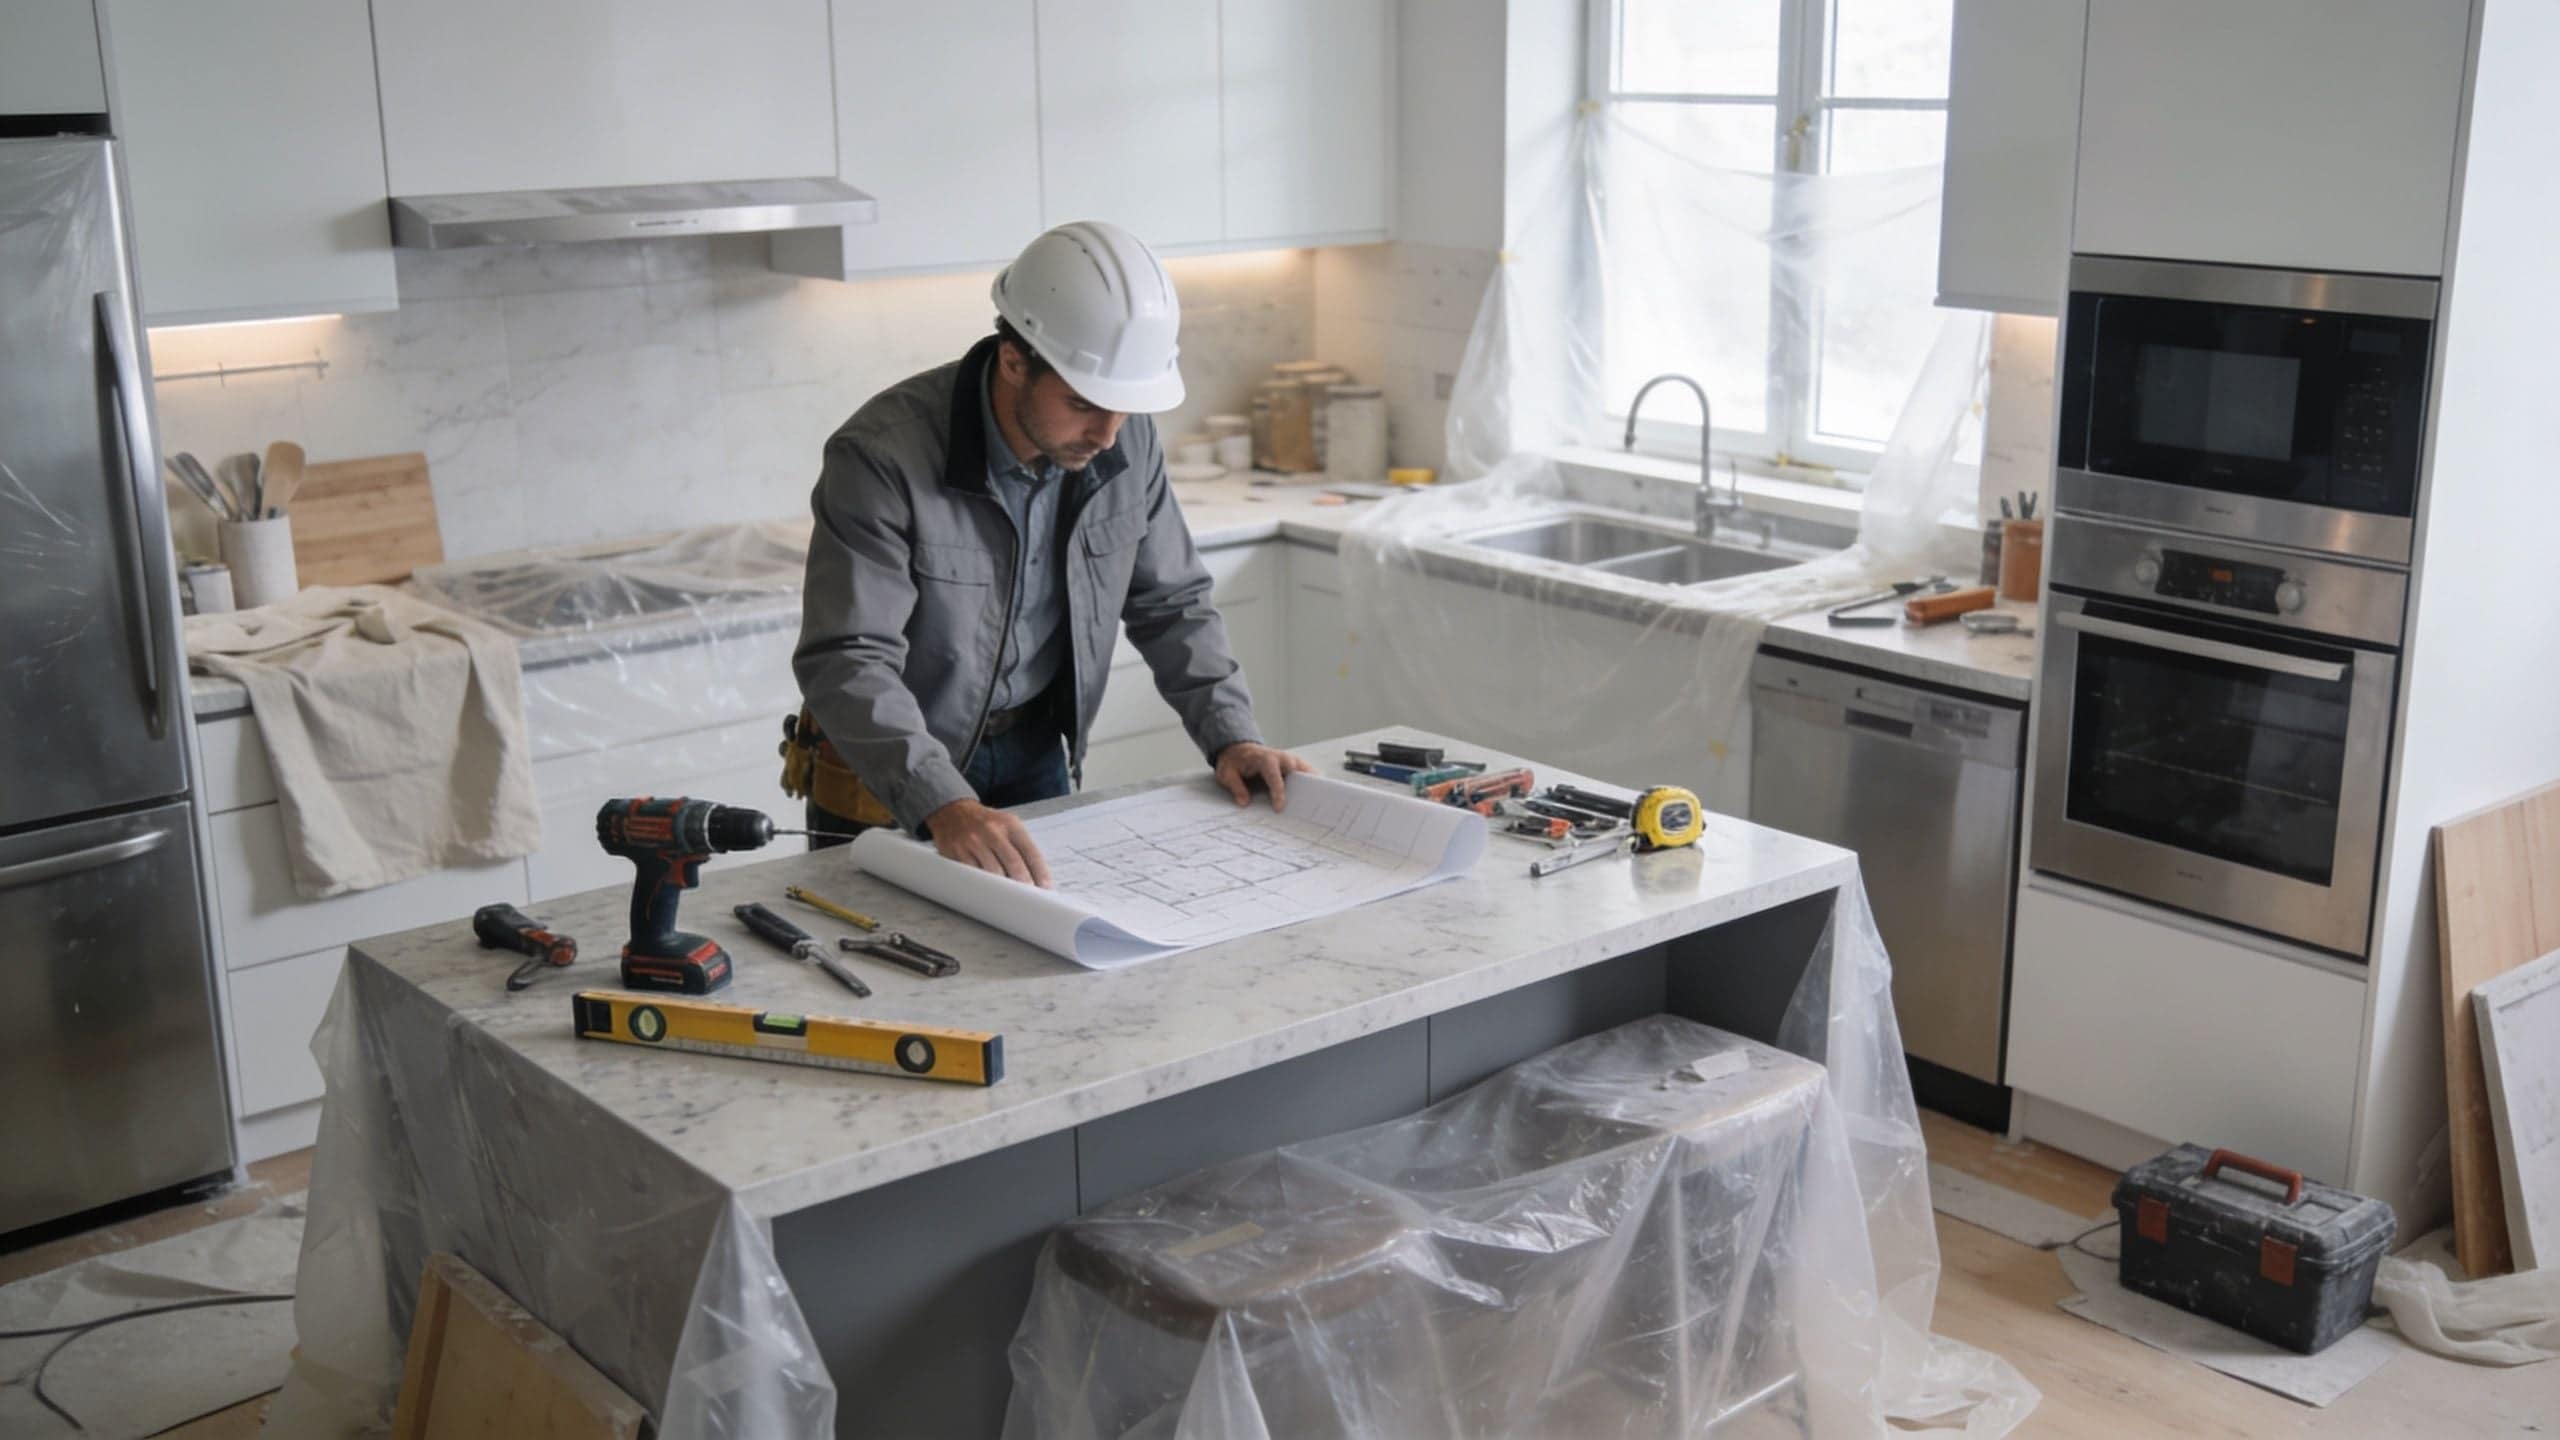
A well-run project depends on sequence, access, and decisions made early enough to keep the next trade working. In Camden and Burlington County homes, that matters even more because many kitchens sit inside older houses with uneven floors, patched plaster, settled openings, and previous remodel work hiding behind the walls.
The order that protects the project
The general sequence stays fairly consistent. The Dura Supreme kitchen remodel process guide outlines a typical flow of demolition → rough-in work → cabinet/countertop installation → finishing touches.
That order sounds simple until real houses get involved.
Rough-in work has to be completed and approved before cabinets go in. If plumbing or electrical changes are still open, installers either wait or work around unfinished conditions, and that usually creates avoidable cost. In South Jersey, inspections are not a formality. They can hold the next phase in place for days if the schedule is too optimistic.
This is one reason a schedule-friendly process helps first-time remodelers. Video consultations can settle layout questions before anyone steps into the house, and a mobile showroom helps narrow door styles, finishes, and hardware without adding another weekend of store visits. Fewer late decisions usually means fewer jobsite delays.
Flooring decisions affect cabinet timing
Flooring still has to be coordinated carefully, but the right sequence depends on the material. As noted earlier, tile and site-finished hardwood are usually installed before cabinets, while floating floors are usually installed after. The goal is simple. Avoid trapping a floor that needs room to move, and avoid creating height or gap problems around appliances and end panels.
I tell homeowners to look past the sample board and ask a more practical question. What has to sit on top of what for the room to work five years from now? That answer often settles the flooring debate faster than style preferences do.
Expect the plan to tighten after demolition
Demolition exposes field conditions, not design intent. Once the walls are open, crews may find old wiring, out-of-level subfloors, damage around sink bases, or framing that pushes a cabinet run out by half an inch. In a newer house, that may be a minor adjustment. In an older Collingswood, Haddonfield, or Moorestown kitchen, it can affect fillers, crown lines, appliance fit, and countertop templating.
Good project managers don't panic at demolition findings. They expect them, price them transparently, and adjust the sequence before the next trade walks in.
That is the difference between a stressful remodel and a controlled one. The best process does not promise zero surprises. It keeps surprises from turning into chaos.
Frequently Asked Questions About Cabinet Remodeling
Is it worth remodeling cabinets if the boxes are still solid
Usually, yes. If the boxes are structurally sound and the layout is functional, a targeted upgrade can make more sense than a full tear-out. The key is being honest about whether the problem is cosmetic, functional, or both.
How do I know if refacing will look new enough
Refacing can look dramatically different because the visible surfaces change. It tends to work best when the cabinet layout already suits the room and you want a fresh style without a full reconstruction.
Should flooring or cabinets come first
It depends on the flooring material. As noted earlier in the article, tile and hardwood are typically installed before cabinets, while floating wood floors are installed after. That's a technical decision, not a style preference.
Can I remodel cabinets without changing the whole kitchen
Yes. Many homeowners improve cabinets while keeping parts of the room intact. New fronts, new hardware, selective storage upgrades, and corrected problem areas can make the kitchen feel substantially better without turning it into a full gut job.
What's the biggest mistake first-time homeowners make
They choose finishes before they define scope. That leads to pretty samples, unclear priorities, and budget confusion. Start with use, layout, and what needs to change.
Are older South Jersey kitchens harder to remodel
They can be. Older homes often have uneven walls, awkward corners, additions, and legacy plumbing or electrical work that complicates installation. None of that makes remodeling a bad idea. It just makes planning more important.
If you're ready to sort out whether your kitchen needs a refresh, refacing, or a full cabinet replacement, The Cabinet Coach offers a practical starting point with design guidance, in-home product selections, and a process built for South Jersey homeowners who want clear decisions before construction begins.