

You’ve signed the contract. The samples are picked. You can finally see the new kitchen or bath in your head. And then the worry sets in.
Who’s showing up first. What happens if materials arrive late. Who answers when the plumber blames the tile layout, or the cabinet installer says the wall is out of square, which in South Jersey homes happens more often than people expect. That nervous feeling is normal. A remodel puts your money, your schedule, and your home life in the same blender.
Managing contractors well isn’t about hovering over every cut and screw. It’s about building a process that keeps the project clear, documented, and moving. If you're in Cherry Hill, Moorestown, Haddonfield, Voorhees, Medford, Mount Laurel, or nearby, the details matter even more because local permitting, older housing stock, tight delivery access, and family routines all shape how the job should run.
Before the dust starts, get your household logistics straight too. If you’re clearing out a kitchen or staging a temporary living setup, a practical moving-out checklist like Emmanuel Transport’s moving-out list can help you avoid last-minute scrambling while the work zone gets set up. And if you’re still tightening your vision before construction starts, this guide on how to plan a kitchen remodel is worth reading.
Table of Contents
- Your Remodel Roadmap from Contract to Completion
- The Pre-Construction Foundation Vetting Contracts and Permits
- Kicking Off the Project Scheduling and Communication
- Managing the Day-to-Day Progress and Problem Solving
- Navigating Change Orders and Payments
- Quality Control and Project Closeout
- When to Hire a Professional Project Manager
Your Remodel Roadmap from Contract to Completion
A good remodel doesn’t run on good intentions. It runs on a sequence. First, you confirm who’s responsible for what. Then you lock down paperwork, permits, schedule, communication, site oversight, money flow, and closeout. If one of those pieces is weak, the whole project starts wobbling.
What homeowners usually get wrong
Most homeowners focus hard on finishes and not hard enough on management. They’ll spend hours choosing quartz, hardware, and tile, then give five minutes to the payment schedule or the change order procedure. That’s backwards.
The pretty part sells the project to your imagination. The management part protects you when real life shows up.
Practical rule: If something matters during the remodel, it belongs in writing before the remodel.
That includes:
- Scope details: Which rooms, which walls, which fixtures, which finishes, and who supplies each item.
- Decision deadlines: When you must finalize faucets, tile, lighting, paint, cabinet hardware, and appliance specs.
- Responsibility lines: Who handles permits, dumpster placement, inspections, punch list coordination, and debris removal.
- Communication rules: Who contacts you, how often, and what happens when a problem appears on site.
The rhythm that keeps jobs from drifting
On smaller residential remodels in Camden and Burlington Counties, jobs drift when there’s no rhythm. One trade finishes late. Another gets pushed. A missing vanity top turns into three quiet days. Nobody is lying. Nobody is panicking. The project just loses shape.
That’s why homeowners need a simple operating routine:
- One lead contact
- One current schedule
- One place for written approvals
- One running issue list
- One final punch list at the end
That’s how to manage contractors without turning into the jobsite sheriff.
What success actually looks like
A well-managed remodel still has surprises. A wall may be uneven. A valve may need replacing. A delivery may slip. The difference is that surprises get addressed quickly, documented clearly, and priced before work moves forward.
If you want the shortest version, it’s this:
| Stage | What to control |
|---|---|
| Before work starts | Contractor vetting, contract terms, permits |
| First week | Schedule, access, communication habits |
| During work | Documentation, issue handling, material verification |
| Near the end | Punch list, inspections, lien protection, final payment |
You don’t need construction experience to manage a remodel well. You need structure, patience, and the willingness to ask clear questions before a small problem turns expensive.
The Pre-Construction Foundation Vetting Contracts and Permits
Most remodel problems don’t begin with demolition. They begin earlier, when a homeowner assumes the contractor’s process is solid because the estimate looked professional. That assumption costs people a lot of sleep.
The stakes are real. Over 50% of engineering and construction professionals reported at least one underperforming project in the prior year, and 69% of project owners cited poor contractor performance as the single biggest reason for project failure, according to Autodesk’s construction industry statistics.

Vet the company, not just the salesperson
A smooth consultation doesn’t tell you how the project runs once walls open up. You need to know who’s supervising the work, who’s doing the trade labor, and how problems get escalated.
Ask for these items before work begins:
- New Jersey registration and insurance: Confirm they’re properly registered and fully insured. Ask for proof, not verbal reassurance.
- Project lead information: Get the name of the person who’ll run your job day to day.
- Trade structure: Find out whether plumbing, electrical, tile, cabinetry, and painting are in-house or subcontracted.
- Recent references: Call people whose projects resemble yours in size and complexity.
When you call references, skip “Were you happy?” Ask sharper questions.
- Was the schedule realistic or constantly revised?
- Did the contractor return calls quickly when something went wrong?
- Were there surprise costs that should have been identified earlier?
- Did the crew protect floors, dust paths, and adjacent rooms?
- Would you hire them again for another kitchen or bath?
A contract should answer ordinary conflict before it happens
Weak contracts create strong arguments. A strong contract makes disagreements boring, which is exactly what you want.
Your agreement should spell out:
| Contract item | What it should include |
|---|---|
| Scope of work | Clear description of demolition, framing, plumbing, electrical, finishes, installation, and cleanup |
| Materials | Product names, model details, allowances if used, and who purchases what |
| Payment schedule | Payments tied to milestones, not vague dates |
| Change orders | Written approval process before extra work proceeds |
| Timeline | Start window, major phases, and how delays are handled |
| Permits and inspections | Who pulls permits and who attends inspections |
If you need a good primer before signing with anyone, this resource on getting started before hiring a contractor covers the pre-hire planning that too many homeowners rush through.
Never accept “we’ll figure that out later” on anything that affects cost, schedule, or finish quality.
Permits in South Jersey are not a side issue
In towns across Camden and Burlington Counties, permit procedures can differ in timing and paperwork, but the principle is the same. If the job requires permits, they should be pulled properly. Kitchens and baths often involve electrical, plumbing, framing, or mechanical changes, and those usually trigger permit requirements.
The homeowner should know:
- Who is pulling the permit
- What inspections are expected
- Whether the permit card must be posted
- How the final approval gets closed out
If a contractor tells you permits aren’t needed for work that obviously changes systems inside the home, slow down and verify. A permit isn’t a nuisance. It’s one of the few formal protections you have that the work must meet code.
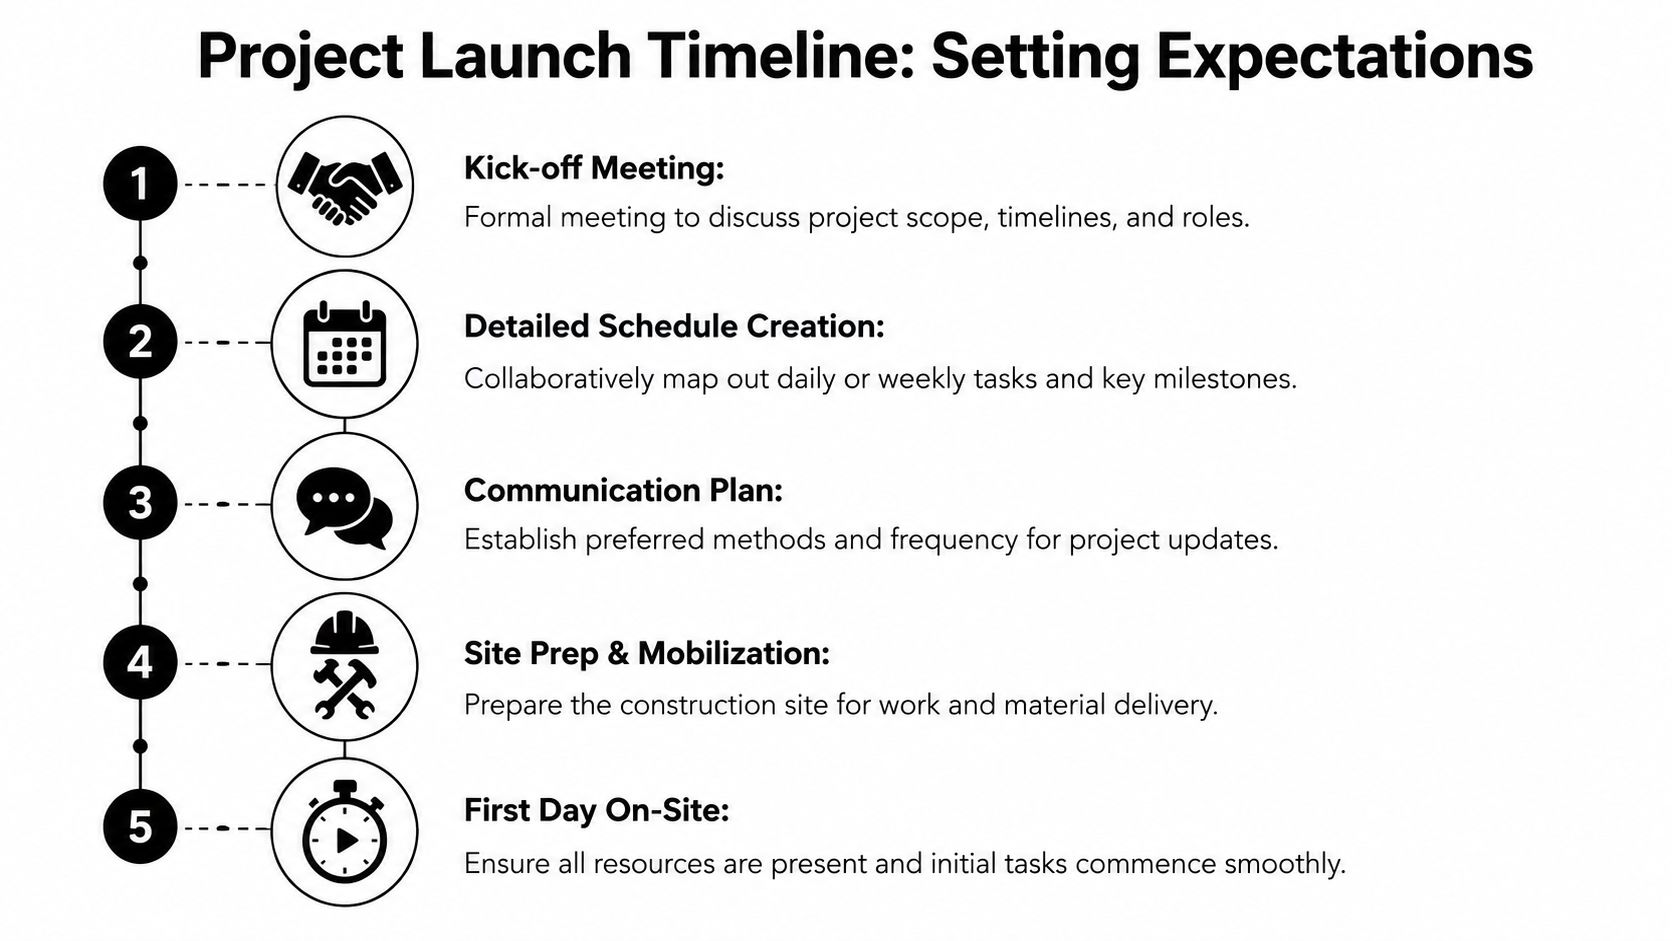
Kicking Off the Project Scheduling and Communication
The first days of a remodel tell you a lot. Not because everything goes perfectly, but because you can see whether the project has a real system behind it.
A kickoff should produce a usable schedule, not just a hopeful one. In a kitchen or bathroom, key milestones usually include demolition, rough plumbing and electrical, inspections, drywall or prep work, cabinet installation, countertop templating, finish plumbing, tile completion, punch work, and final walkthrough.
Start with a visible roadmap.
Build a schedule people can actually follow
A realistic schedule accounts for inspections, lead times, and dependencies. Countertops can’t be templated until base cabinets are installed correctly. Tile layout decisions can hold up trim and glass. Appliance specs can affect cabinet openings and electrical placement.
Use a kickoff conversation to lock down these points:
- Milestone dates: Not every daily task, but the major checkpoints that affect other trades.
- Long-lead materials: Cabinets, slab material, specialty hardware, plumbing fixtures, and custom glass.
- Access rules: Arrival windows, parking, lockbox access, pets, alarm instructions, and bathroom availability for workers.
- Decision deadlines: The last sensible date to choose finish items without delaying work.
Set a communication operating system
Communication breakdowns often lead to project failures. Fifty-seven percent of project failures are attributed to communication breakdowns, according to Freed Associates. In remodeling terms, that usually means rework, wrong assumptions, slow approvals, or trades walking in with different instructions.
Pick one system and stick to it.
| Communication need | Best practice |
|---|---|
| Daily field questions | Text thread with project lead |
| Formal approvals | Email or signed document |
| Weekly status updates | Scheduled call or site meeting |
| Product decisions | Shared written record with item names and dates |
Here’s a useful walkthrough to pair with your planning:
A simple communication rhythm works well for most homeowners:
- Twice-weekly check-ins: Short calls or onsite reviews on fixed days.
- End-of-week recap: What got done, what’s next, what needs your decision.
- Issue escalation rule: Trades don’t debate with the homeowner individually. Questions run through the lead.
If three different people are texting you separate answers, you don’t have communication. You have noise.
That one change alone makes how to manage contractors much easier. You stop reacting to fragments and start responding to a controlled flow of information.
Managing the Day-to-Day Progress and Problem Solving
By the second week, the project feels less like a plan and more like a living thing. People are in and out. Boxes arrive. Questions come fast. At this point, homeowners either become effective observers or accidental micromanagers.
The sweet spot is simple. Be present enough to verify, but not so involved that every trade loses time re-explaining the job.

A typical week on a remodel
Monday, demolition runs longer because an old mud bed in the bathroom is thicker than expected. Tuesday, the electrician needs confirmation on fixture placement. Wednesday, the wrong accent tile lands on the porch. Thursday, the cabinet installer notices one wall bows enough to affect reveals. Friday, you’re wondering whether any of this is normal.
It is. What matters is how the issue gets handled.
Good management looks like this: the lead tells you what happened, documents the issue, explains options, and confirms any cost or schedule impact before moving ahead.
Bad management looks like this: a worker asks you casually, “Do you mind if we just…” and by the time the final decision reaches you, the work is already done.
Your site visit checklist
You don’t need technical mastery to do useful walk-throughs. You need consistency.
- Right crew present: Does today’s work match the current phase?
- Reasonable site order: Tools and debris don’t need to be pretty, but the jobsite should show basic control.
- Work matches plan: Cabinet locations, niche placement, outlet positions, and tile direction should reflect approved decisions.
- Materials verified: Check labels, colors, quantities, and visible damage before installation.
- Questions captured: If something looks off, note it and raise it with the lead, not the nearest worker.
Use simple data, not gut feelings
This is one of the most practical parts of contractor oversight. Effective contractor management programs boost productivity by 20-30% through data-driven adjustments, according to Assignar. For a homeowner, that “data” can be simple. Daily photos, short notes, and a milestone checklist are enough to catch drift early.
A basic tracking sheet can look like this:
| Date | Planned work | Actual work completed | Questions or issues |
|---|---|---|---|
| Monday | Demo and haul away | Demo done, extra wall repair needed | Waiting on approval |
| Tuesday | Rough electrical | Partial rough-in complete | Fixture height confirmed |
| Wednesday | Material delivery | Tile delivery incorrect | Replacement requested |
Keep your own photo log. Wide shots for progress. Close-ups for details. Date everything.
Solve problems through the chain of command
If the wrong faucet finish arrives, don’t corner the installer. If tile spacing looks inconsistent, don’t direct the setter mid-task. Bring concerns to the project lead and ask for a measured answer.
Use this script:
- State what you observed
- Ask whether it matches the approved plan
- Request the correction path
- Get the answer in writing if it affects cost or time
That approach prevents the emotional spirals that ruin homeowner-contractor relationships. It also helps you avoid several of the traps covered in these common remodeling mistakes, especially the ones caused by rushed field decisions.
Navigating Change Orders and Payments
Homeowners often hear “change order” and assume something has gone wrong. Sometimes it has. Often, it hasn’t. A change order is just the paper trail for a change in scope, price, or timing.
That’s not a threat. That’s a management tool.
A clean change order protects both sides
Old homes in South Jersey hide things. Rotten subfloor near a tub. Unexpected plumbing routing. Electrical that doesn’t match what anyone expected. Then there are owner-driven changes, which are common too. You see the vanity in place and decide you want sconces moved. You upgrade hardware. You switch to a different tile pattern.
Any of those changes should be written before the extra work starts.
A proper change order includes:
| Required item | Why it matters |
|---|---|
| Description of change | Prevents fuzzy memory later |
| Added cost or credit | Clarifies the financial effect |
| Schedule impact | Shows whether the finish date moves |
| Approval signatures | Confirms both parties agreed |
If the contractor says, “We’ll sort it out on the final invoice,” push back. That’s how small disagreements turn into ugly ones.
Milestone payments should feel routine, not tense
A healthy payment schedule doesn’t front-load too much money and doesn’t leave the contractor guessing when they’ll be paid. It ties payment to visible progress.
Before releasing a payment, verify that the milestone tied to it is complete enough to justify the draw. Not perfect. Complete enough. For example, if a draw is tied to cabinet installation, you should confirm the cabinets are in, aligned, and materially consistent with what was ordered.
Homeowner check: Never make a payment because someone says they’re “basically done.” Pay when the milestone in the contract is actually met.
For homeowners who want a broader business perspective on why payment language matters, this article on drafting effective payment terms for CFOs is a useful read. Different industry, same principle. Clear terms reduce friction.
If budget pressure is part of your stress, it helps to think through the money side early with a guide on kitchen remodel financing. The calmer you are about cash flow, the less likely you are to make bad decisions under pressure.
Quality Control and Project Closeout
A project is not finished because the crew says it’s finished. It’s finished when the work is complete, corrected, inspected where required, and documented well enough that you can close the job with confidence.
That final stretch is where many homeowners let their guard down. Don’t.
In small residential projects, 62% of contractors face heightened supply chain risks, and a lack of oversight on lower-tier subcontractors leads to unreported quality issues in 40% of projects, according to Trimble’s discussion of hidden subcontractor risk. That matters because a kitchen or bath often involves multiple hands touching the same room. The painter may not notice a tile issue. The plumber may not flag a cabinet ding. The general contractor is responsible, but your final quality pass still matters.
Build a punch list room by room
A punch list is not complaining. It’s the formal record of what still needs correction or completion.
Walk the space in daylight if possible. Open doors and drawers. Turn on fixtures. Check trim edges, caulk lines, paint touch-ups, hardware alignment, outlet covers, and transitions between materials.
Here’s a simple format:
Sample Punch List
| Item/Issue | Location | Date Noted | Date Corrected |
|---|---|---|---|
| Paint scuff on wall | Kitchen entry | ||
| Crooked outlet cover | Vanity backsplash | ||
| Cabinet door needs adjustment | Island end panel | ||
| Missing caulk touch-up | Shower corner |
What to inspect before final sign-off
Don’t do your walkthrough as one big vague pass. Break it down.
- Cabinetry: Door alignment, drawer operation, finish consistency, filler fit, crown details, and hardware placement.
- Tile and stone: Lippage, grout consistency, edge finishing, slope where needed, and chip-free surfaces.
- Plumbing and electrical: Fixture operation, switch function, outlet placement, leak check, fan performance, and lighting alignment.
- Paint and trim: Cut lines, patch quality, nail fill, and touch-up coverage.
- Cleanliness and debris: The project should be broom-clean and clear enough to review properly.
Done means corrected, not just installed.
Close the loop on paperwork too
If your town required inspections, make sure final approvals are completed. Ask for documentation that the permit is closed out if that applies to your job.
Also request any final paperwork your contract calls for, including product information, care instructions, and lien protection documents where appropriate. Final payment should come after punch list completion or after a clearly defined holdback item is resolved by agreement.
This is also the moment to look hard at work done by lower-tier subcontractors. If the tile looks rushed or a finish detail seems sloppy, raise it before the project is financially closed. Once the final check clears and everyone moves on to the next job, getting attention gets harder.
When to Hire a Professional Project Manager
Some homeowners can manage a remodel well. They’re organized, available, comfortable making decisions quickly, and willing to stay engaged for weeks. Others have demanding jobs, kids’ schedules, travel, or no desire to spend evenings sorting tile disputes and delivery updates.
That doesn’t make them bad clients. It makes them realistic.
The workload is bigger than most people expect
If you’ve read this far, you can see what the job really includes. Vetting. Contracts. Permits. Scheduling. Material coordination. Daily communication. Documentation. Payment control. Punch list closeout.
And skilled oversight is not easy to come by. The Project Management Institute projects a global need for 25 million project management professionals by 2030, and 77% of construction firms already reported difficulties filling these roles, according to GoCodes’ summary of project management statistics. That shortage helps explain why experienced project leadership is so valuable on complex remodels.
Signs you should not manage it yourself
A homeowner should strongly consider professional management if any of these sound familiar:
- You’re rarely home during work hours
- You don’t want to coordinate multiple trades
- You feel uneasy reviewing contracts and change orders
- You know conflict avoidance is your weak spot
- Your project includes layout changes, custom cabinetry, or several moving parts
There’s no prize for white-knuckling a remodel yourself.
In other industries, businesses often offload coordination work to specialists for the same reason. Even resources about managed virtual assistant services point to the same basic truth. Delegating project coordination can protect your time and improve follow-through when the task load gets heavy. The remodel version is hiring real local project leadership that understands field conditions, permits, trades, and finish quality.
Picking the right type of help
Not every homeowner needs a separate stand-alone project manager. Sometimes the right fit is a design-build company with real operational control. Sometimes it’s a remodeling partner who manages selections, trade coordination, and execution under one roof.
If you’re weighing that choice, this piece on architect or design-build firm can help you think through the difference.
The best decision is the one that matches your bandwidth. A remodel should improve your home, not take over your life.
If you want local guidance without juggling every moving piece yourself, The Cabinet Coach offers South Jersey homeowners a more managed path through kitchen and bathroom remodeling. From in-home design support and product selection to trade coordination and construction management, the process is built to reduce guesswork, protect quality, and make the remodel feel organized from first consultation to final walkthrough.