
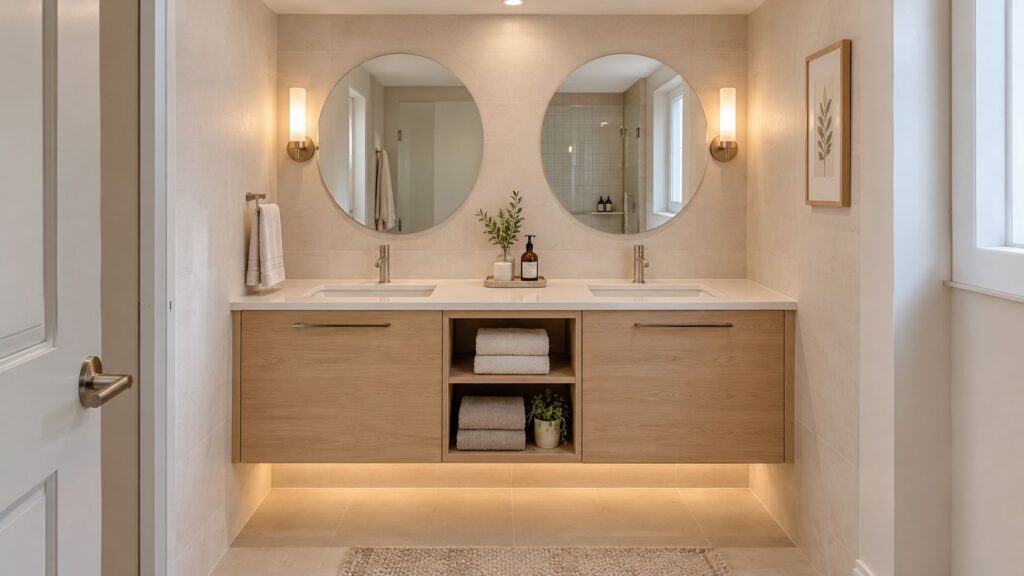
Most advice about a small double sink bathroom starts with the wrong question. Homeowners ask whether two basins can physically fit, then discover too late that the vanity has no useful drawers, the counter has nowhere to set down a hairbrush, and two people can't use the room without bumping elbows.
The better question is whether the vanity is large enough to support two complete routines, not merely two faucets. Design guidance consistently places 60 inches of total vanity width at the practical minimum for a double-sink layout, with roughly 24 to 30 inches per sink and 30 inches of clear floor space in front for comfortable use, as outlined in this bathroom sink sizing guide. A 72-inch vanity is where the arrangement starts to feel intentional rather than compressed.
Table of Contents
- Why Most Small Bathrooms Should Skip the Double Sink
- Measuring Your Bathroom Before Anything Else
- Vanity and Sink Configurations That Actually Work
- Plumbing Layouts That Save Storage Space
- Storage and Lighting for Tight Double Vanities
- Budget, Timeline, and Permit Reality in South Jersey
- When to Bring in a Mobile Showroom and Remodeler
Why Most Small Bathrooms Should Skip the Double Sink
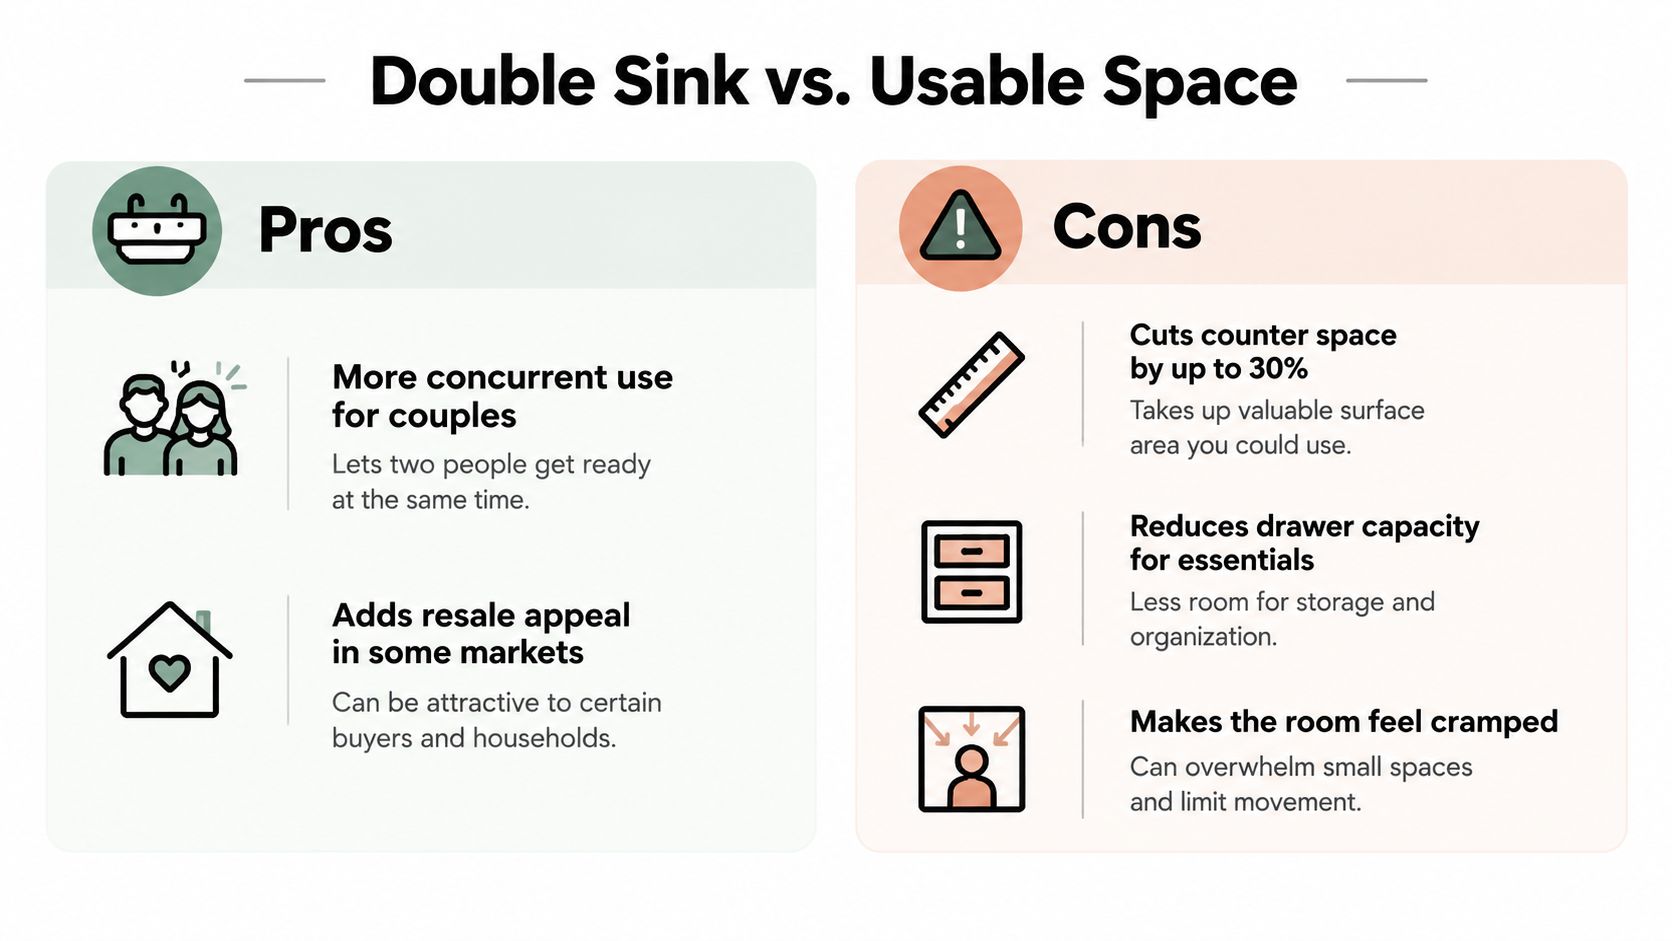
Most small bathrooms should skip the double sink. That sounds contrary to the usual remodeling advice, but two basins consume more than bowl space. They take counter landing area, interrupt drawer banks, complicate plumbing, and make the walking zone feel tighter.
A vanity below 60 inches is generally the wrong starting point for two sinks. Small bathroom sinks may be only 15 to 20 inches wide, yet the cabinetry and countertop still need to accommodate the spacing, faucet hardware, storage, and a usable edge around each bowl. Contemporary guidance commonly describes double-basin configurations as occupying 36 to 48 inches of total bowl span, which leaves little room for the rest of the vanity in a compact footprint. See this standard double vanity size reference before treating a catalog photograph as a layout plan.
The 60-inch threshold is a compromise
At 60 to 66 inches, two sinks are possible, but the compromise usually appears in storage. There may be only a narrow shared strip between bowls, not enough space for a practical drawer stack. The result looks symmetrical, yet daily grooming becomes a series of small inconveniences.
The first routines to suffer are usually:
- Shared makeup and grooming: Each person loses the counter space needed for brushes, cosmetics, shaving supplies, or a mirror.
- Two-person preparation: One user reaches across the other's basin because the stations sit too close together.
- Side-by-side charging: Phones, electric toothbrushes, hair tools, and other accessories compete for the remaining landing space.
- Lower storage: Drain locations and trap assemblies often interrupt the drawers homeowners expected to use for toiletries.
At 72 inches, the center zone can reach about 36 inches, creating room for a genuine drawer stack and a more comfortable separation between users, according to this double vanity design guide. That doesn't make every 72-inch bathroom spacious, but it changes the decision from “can we force it?” to “does this support how we live?”
Practical rule: If the second sink eliminates the storage and landing space that make the vanity useful, choose one larger basin instead.
A single wide vanity often performs better in a compact powder room or a bathroom below roughly 50 square feet, where the double-sink footprint can consume most of the available wall. Two sinks make sense when simultaneous use is the priority and the room can support the full vanity, circulation, and plumbing plan.
Measuring Your Bathroom Before Anything Else
Measure the room before opening a vanity catalog. A product page can show a beautiful 60-inch cabinet, but it can't tell you whether the door hits the drawers, the window casing interrupts the countertop, or the existing drain lands inside a divider.
Start with the finished wall width. Measure between the actual finished surfaces, then record trim, baseboard, casing, and any bump-out separately. A wall that appears to meet the 60-inch minimum may lose usable width once casing or a return wall enters the footprint. If the clear run is closer to 72 inches, mark that separately as your full double-use option rather than treating every extra inch as decoration.
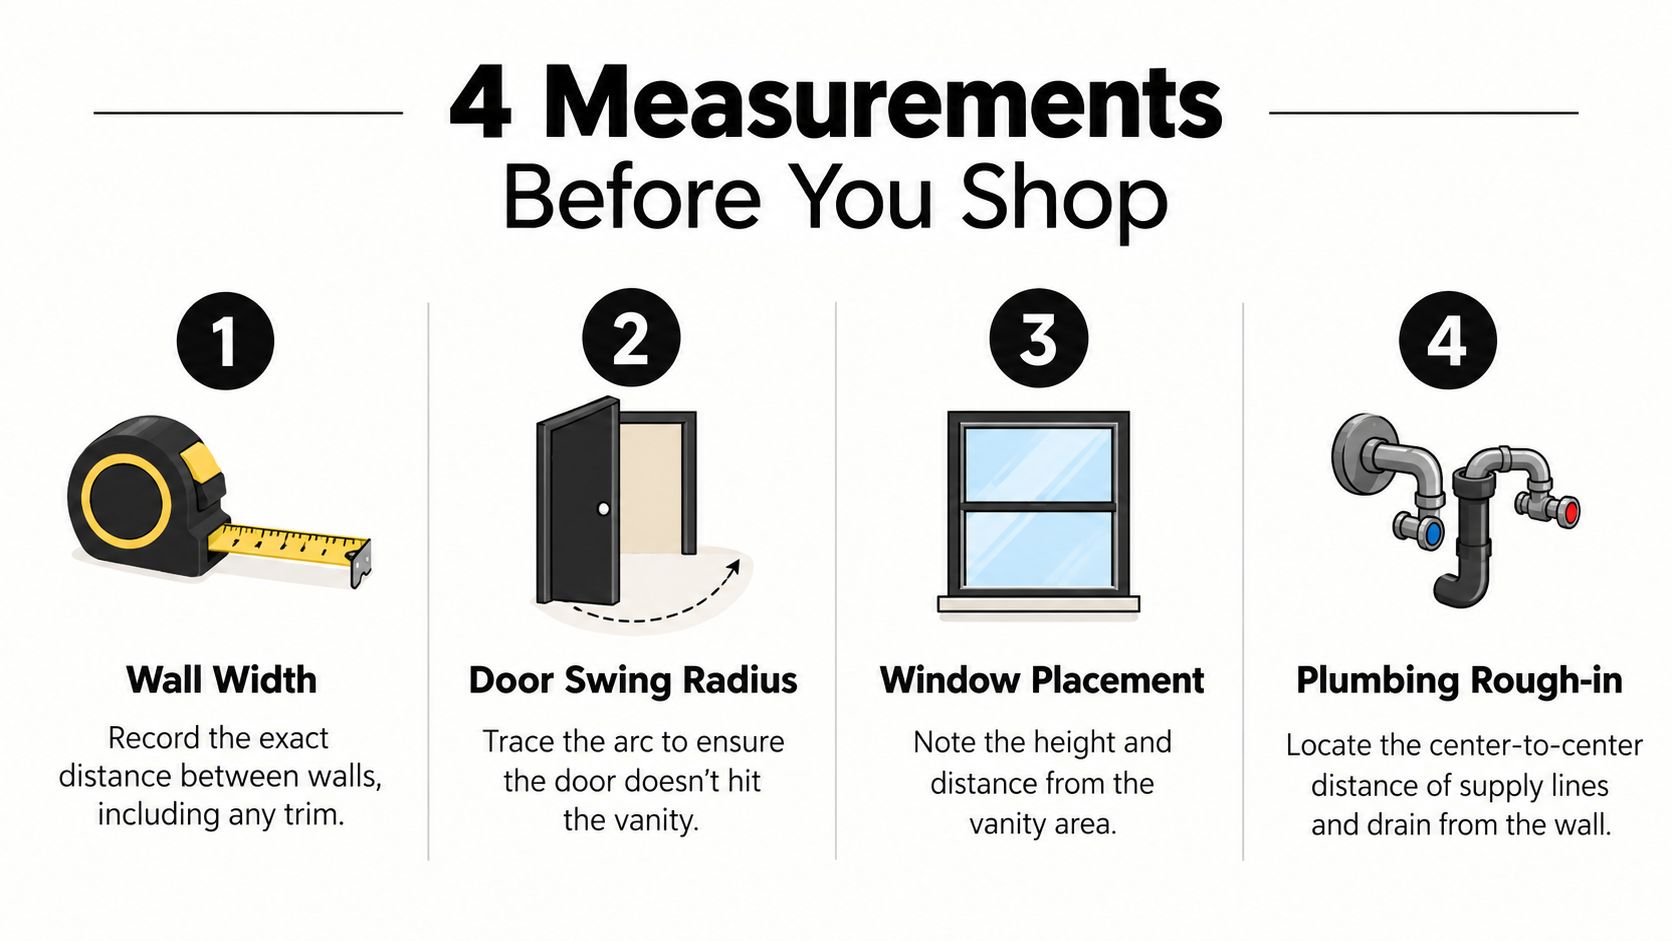
Four measurements control the decision
Wall width: Record the exact distance across the proposed vanity wall, including obstructions. Note whether the wall can accept a freestanding cabinet, a wall-hung unit, or only a shorter custom piece.
Door swing: Trace the door arc on the floor with painter's tape. The vanity may technically fit while the door still collides with a drawer pull or blocks the 30-inch clear floor zone recommended for comfortable use, as described in this bathroom sink dimension guide.
Window placement: Measure the window's width, sill height, casing, and distance from both corners. A casing can remove several inches of usable wall, forcing a shorter vanity or an off-center sink. Don't assume a mirror can cover the opening without changing the lighting plan.
Plumbing rough-in: Locate the wet wall, supply lines, drain center, vent path, and cleanout. An off-center drain can change which cabinet drawers survive, while a vent stack can consume a lower corner.
Mark the proposed cabinet and countertop footprint with tape, then leave it in place for a day. Have two people stand at the stations, reach for the toilet, open the door, and simulate brushing teeth. This test exposes conflicts that a floor plan can hide.
A short measurement checklist is enough to begin:
- Wall: Finished width, trim, casing, and side returns.
- Door: Swing arc and clearance to the vanity face.
- Window: Width, sill, casing, and centerline.
- Plumbing: Drain, supplies, vent, wet wall, and cleanout locations.
For cabinet construction ideas that account for these constraints, review this bathroom vanity cabinet design resource.
Vanity and Sink Configurations That Actually Work
Catalog photos reward symmetry. Real bathrooms reward landing space, accessible drawers, clear mirrors, and enough separation for two users to move without collision. These four configurations cover most workable approaches.
Compare the daily-use trade-offs
| Configuration | Min. Wall Width | Counter Landing | Drawer Storage | Best For |
|---|---|---|---|---|
| Two separate troughs on one vanity | 60 inches | Limited between bowls | Shallow drawer space behind each basin | Homeowners prioritizing visual symmetry |
| Undermount pair | 72 inches | Stronger center zone | Real center drawer stack possible | Primary baths with genuine simultaneous use |
| Single-basin wide vanity | Qualitatively shorter than a double-sink layout | Broad, flexible counter | Better uninterrupted storage | Small rooms where function matters more than symmetry |
| Compact workaround with secondary basin or makeup station | About 48 inches for the main run | Split between stations | Main vanity keeps useful storage | Tight bathrooms needing separate task zones |
Two separate troughs on a 60-inch vanity can look clean, but the bowls leave little room for a meaningful center drawer. Each user gets a station, yet the countertop often becomes a narrow strip around the basins. This layout works best when the owners accept limited storage and use wall cabinets for overflow.
An undermount pair on a 72-inch vanity is the stronger double-sink solution. The extra width creates a real center zone, better mirror coverage, and room to separate drawer storage from the plumbing. It still needs 30 inches of clear space in front, so the room's depth matters as much as the wall length.
The alternatives deserve serious consideration
A single large basin on a wide vanity is often the better answer for a small bathroom. It preserves a broad counter, gives drawers more freedom, and still allows two people to use the room for some routines. The compromise is obvious, one person can't claim a dedicated bowl, but the room may feel much less congested.
A compact workaround uses a smaller main vanity with a separate wall-mounted basin, makeup ledge, or grooming station elsewhere in the room. It doesn't pretend to be a conventional double vanity, and that honesty is its advantage. One station can hold the sink and main storage while the second supports makeup, hair, or handwashing without sacrificing the entire cabinet run.
Use this bathroom vanity selection guide to compare cabinet construction and sink placement together, not as separate purchases. The countertop, mirror, plumbing, and drawer plan need to be resolved as one system.
Plumbing Layouts That Save Storage Space
A double vanity can lose its storage before the cabinet arrives. The culprit is usually not the sink bowl, but the drain, trap, vent, and supply layout hidden inside the cabinet.
A centered single drain on a compact vanity may look efficient, yet it can force the cabinetmaker to notch or divide the drawers on both sides. Offset drains can preserve one drawer bank while compromising the other. Moving the wet wall can create a cleaner cabinet interior, but it adds demolition, rough plumbing, and inspection work.
Four plumbing arrangements
| Configuration | Min. Vanity Width | Drawer Space Lost | Best Use Case |
|---|---|---|---|
| Centered shared drain | 48 inches | Interrupts storage on both sides | Compact single-basin or tightly grouped fixtures |
| Offset drains | 60 inches | Preserves one drawer bank, restricts the other | Existing plumbing that can't move far |
| Wet-wall relocation | 60 inches or wider | Can free a full drawer zone | Remodels where storage is a higher priority |
| Back-to-back P-traps | Depends on cabinet and rough-in | Lower corners and framing become restricted | Carefully coordinated custom cabinetry |
The centered arrangement can steal roughly 6 inches of horizontal drawer width on both sides of a 48-inch vanity, based on the supplied layout guidance. That loss is easy to miss on a plan because the countertop still appears generous. The drawer box tells the truth.
With offset drains on a 60-inch unit, one full drawer bank may remain usable while the opposite side becomes a false front, shallow drawer, or cabinet door. That can be a sensible choice when the existing wet wall is fixed, especially if the restricted side stores taller bottles rather than daily essentials.
Decide whether moving the wet wall earns its keep
Relocating the wet wall by 12 inches can free a full 18-inch-deep drawer, according to the supplied planning data. Whether that work is justified depends on the wall construction, access from the adjoining room, vent routing, and the value of the storage gained. A plumber should confirm the route before the vanity is ordered.
Trap-wraps and vent stacks also consume corners that look available on a showroom drawing. Ask for a cabinet elevation showing every trap, supply line, shutoff, and framing member. For future fixture changes, specify durable backing where accessories or plumbing supports may be relocated, and have a qualified professional review the installation. Homeowners comparing service options can use reliable plumbing by Total Plumbing Hot Water as a reference point for the kind of plumbing coordination the project requires.
Storage and Lighting for Tight Double Vanities
A six-foot vanity can function well for two adults only when storage is assigned before the cabinet is built. Sink placement is the visible decision. Drawer geometry, outlets, mirrors, and light positions determine whether the room works at 7 a.m.
Start by separating daily-use storage from backup supplies. Top drawers should hold toothbrushes, cosmetics, razors, and other small items. Deeper drawers can take hair tools, spare toiletries, and bulk products, but only if the plumbing doesn't occupy the entire cabinet center.
Give each station a job
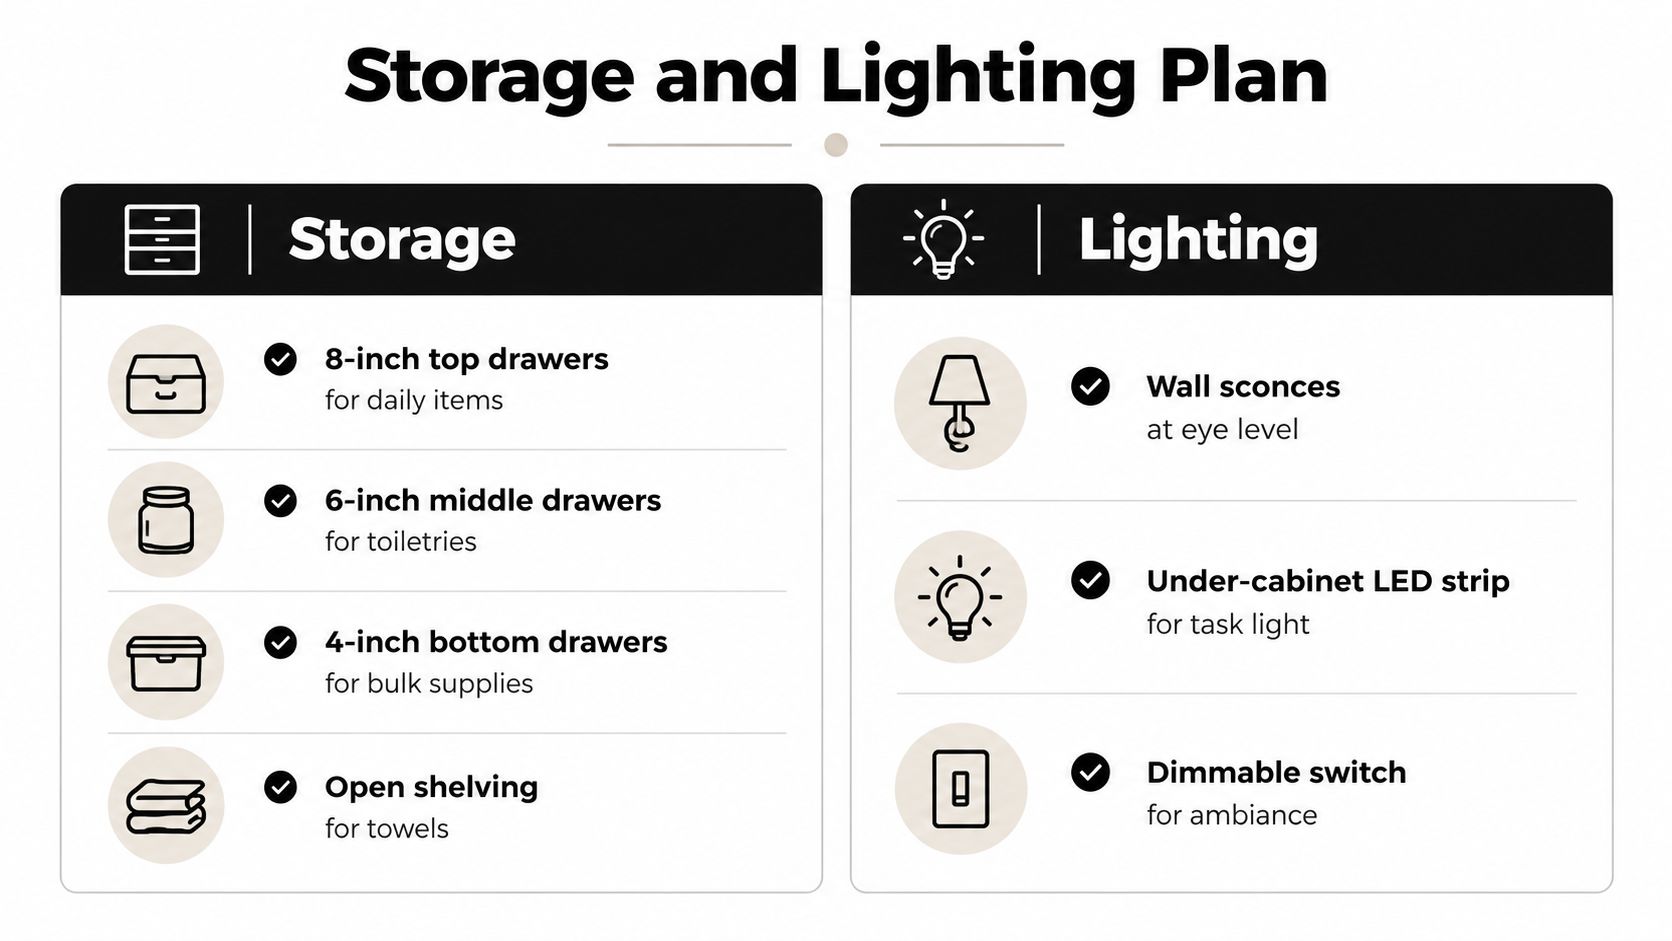
- Top drawers: An 8-inch top drawer suits daily items and keeps small products visible without a deep, disorganized box.
- Middle storage: A 6-inch drawer can handle toiletries and flatter containers where a shallow compartment improves access.
- Base storage: A 4-inch bottom drawer works for bulk supplies when the cabinet layout allows it, although large hair tools may need a taller compartment.
- Vertical storage: A 16-inch tower cabinet can add capacity on a 72-inch wall, provided it doesn't crowd the mirror or reduce the counter landing area.
- Mirror depth: A mirror cabinet can provide about 4 extra inches of depth compared with a frameless mirror, useful for medicines and small grooming items.
Each sink should retain a 24-inch minimum landing zone, as specified in the supplied planning guidance. That space might hold a soap dispenser, a styling tool, or a cup without forcing one user into the other's station. If the countertop can't provide that comfortably, move some functions to a wall cabinet or reconsider the second basin.
Layer the light instead of flooding the ceiling
Use 3000K sconces beside each mirror, mounted at about 60 inches where the user's face receives even task light. A 4-inch recessed downlight centered ahead of the vanity can support general illumination, while an LED strip beneath the toe-kick provides a low-level nightlight.
Place GFCI receptacles inside the second drawer at each station only when the cabinet manufacturer and electrician approve the assembly, ventilation, cord path, and access. The arrangement keeps counters clear, but it must remain serviceable and code-compliant.
For cabinet layouts that coordinate drawers, outlets, and sink cutouts, review these bathroom vanity storage solutions. Two users need enough standing width to groom without colliding elbows, so the 30-inch front clearance remains a planning requirement even after the storage is optimized.
Budget, Timeline, and Permit Reality in South Jersey
A small double-sink remodel in South Jersey becomes expensive when the design is finalized before plumbing and permit questions are answered. Homeowners in Camden, Burlington, Gloucester, and Atlantic counties should treat the vanity, wet wall, electrical work, tile, and inspection sequence as one project rather than as separate purchases.
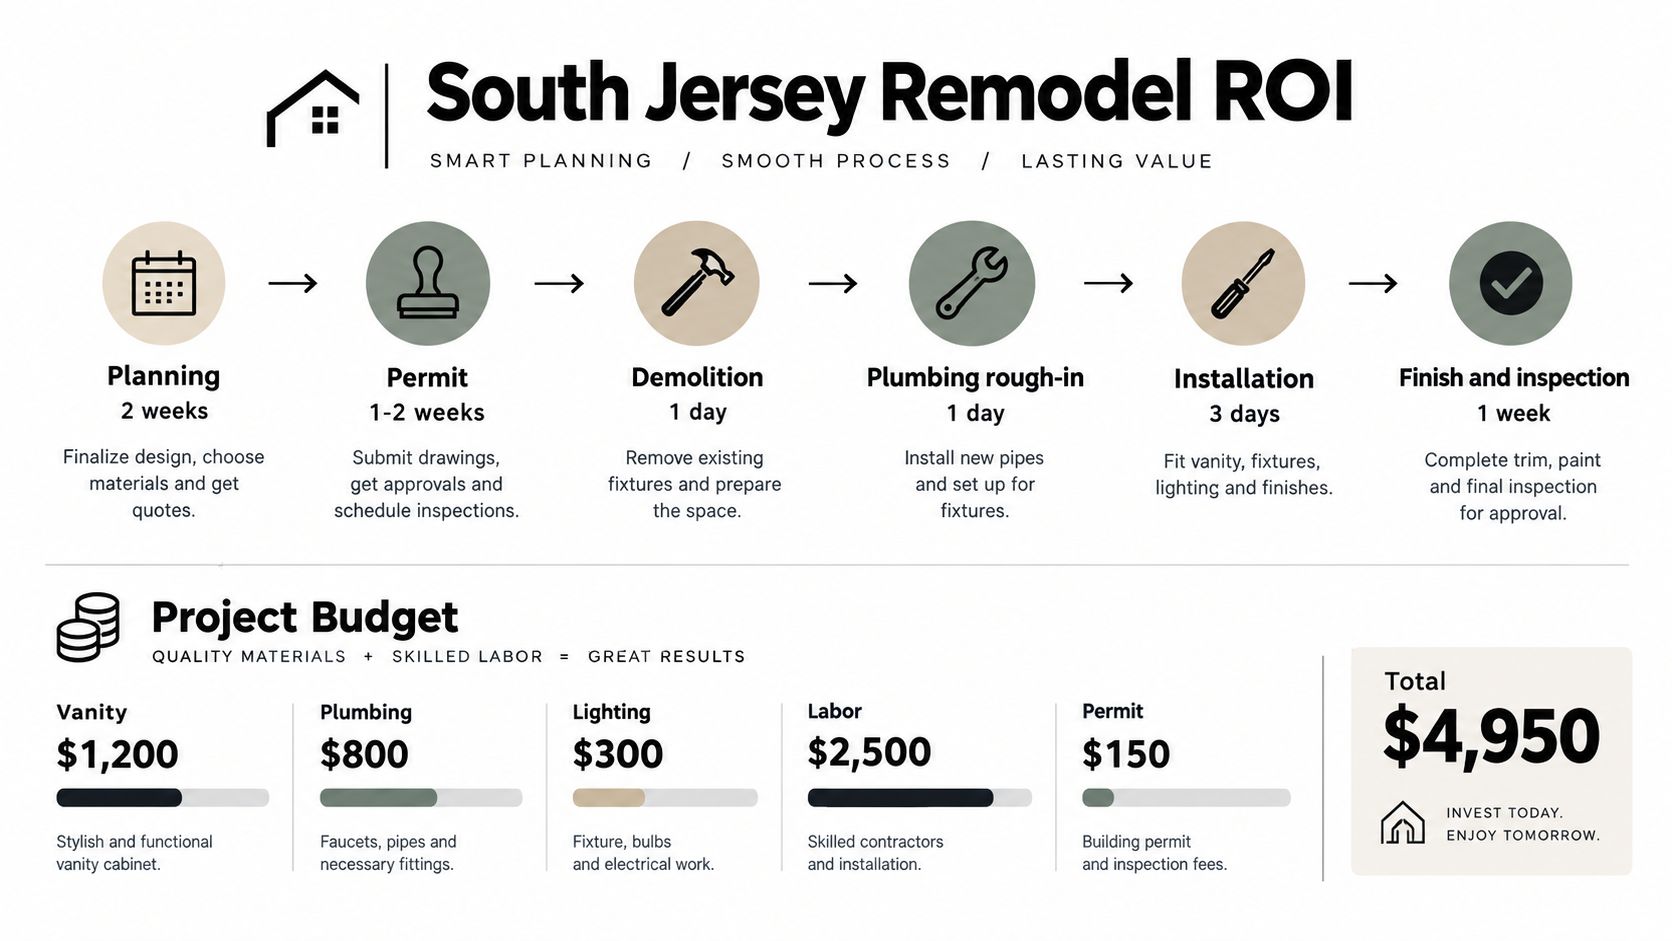
For a typical 60-inch double-vanity project, the supplied planning range is $6,000 to $14,000, with small bathroom renovation cost guidance useful for comparing how tile, labor, and fixture choices influence the overall scope. Wet-wall relocation, structural header work, and tile replacement are the items most likely to push a bid beyond the initial expectation.
Sequence the work around the rough-in
A practical sequence is:
- Demolition: Remove the existing vanity, finishes, and fixtures while protecting areas that will remain.
- Rough plumbing: Set drain, supply, trap, and vent locations before cabinet fabrication is locked.
- Electrical: Add or move circuits, outlets, switches, and lighting boxes.
- Drywall: Close and repair walls after inspections or required approvals.
- Tile: Complete wall and floor surfaces before the vanity covers access.
- Vanity installation: Set the cabinet, countertop, sinks, faucets, and hardware.
- Finishing: Install mirrors, lighting, accessories, caulk, and final trim.
The supplied schedule places a project of this type in a 4 to 7 week construction window, while the vanity itself may carry a 2 to 4 week lead time. Order timing matters because a delayed cabinet can stop countertop templating, plumbing connections, mirror sizing, and final inspection.
Permit questions need answers before demolition
A township may require a permit for a drain relocation, wet-wall move, or new electrical circuit. A pure fixture swap may follow a simpler path, but local requirements vary, so ask the municipality or your licensed contractor before work begins. Rough-in inspection generally needs to happen before walls close, followed by final inspection after fixtures and finishes are complete.
Use this bathroom remodel planning guide to organize selections, trade coordination, and approvals. A written scope should identify which plumbing stays, which walls open, who pulls permits, and what happens if the existing rough-in differs from the drawing.
When to Bring in a Mobile Showroom and Remodeler
A 1950s ranch with a 54-inch alcove is a good example of a room that shouldn't receive an artificial double vanity. Two bowls may fit on paper only by sacrificing the storage and elbow room that made the remodel worthwhile. A single basin with a well-designed cabinet is the more honest solution.
A newer townhome may meet the 60-inch threshold and still fail in use. If the door swing blocks a standard 30-inch cabinet, the vanity must be shallower, the door must change direction, or the layout needs a different configuration. Measuring the wall alone won't reveal that conflict.
A primary suite with a 72-inch run is different. The extra width can support two undermount sinks, a real center drawer zone, separate mirrors, and more credible two-person grooming. The room still needs the required circulation and a plumbing plan, but the design has enough capacity to work rather than merely resemble a Pinterest image.
What professional coordination changes
A mobile showroom visit can bring cabinet, countertop, tile, hardware, and lighting samples into the home while the designer checks the actual walls and rough-in. That's different from choosing a vanity at a big-box store and discovering afterward that the drain lands behind a drawer divider or the window casing cuts into the cabinet run.
Homeowners seeking broader remodelling project help should still ask every provider for concrete deliverables, not just a mood board. The first visit should produce a scaled layout sketch, a plumbing-preserving vanity shortlist, an itemized rough budget, and a realistic six-to-ten-week schedule, as specified in the project brief.
Save this checklist before the appointment:
- Wall run: Confirm the finished width and whether it supports the 60-inch or 72-inch decision gate.
- Wet wall: Locate the drain, vent, supply lines, and cleanout.
- Door clearance: Test the swing against the vanity depth and drawer pulls.
- Window: Record casing, sill, and centerline constraints.
- Storage: Mark which drawer zones must remain usable.
- Permits: Ask who will confirm requirements and pull permits.
- Lead times: Verify the chosen vanity line before demolition.
- Deliverables: Request a scaled plan, shortlist, rough budget, and schedule.
The Cabinet Coach brings a mobile cabinet showroom to South Jersey homeowners and coordinates cabinetry, countertops, hardware, tile, design development, and project planning around the existing bathroom conditions. Visit The Cabinet Coach to request a complimentary video consultation and start with measurements that can prove whether your small double sink bathroom will work.