
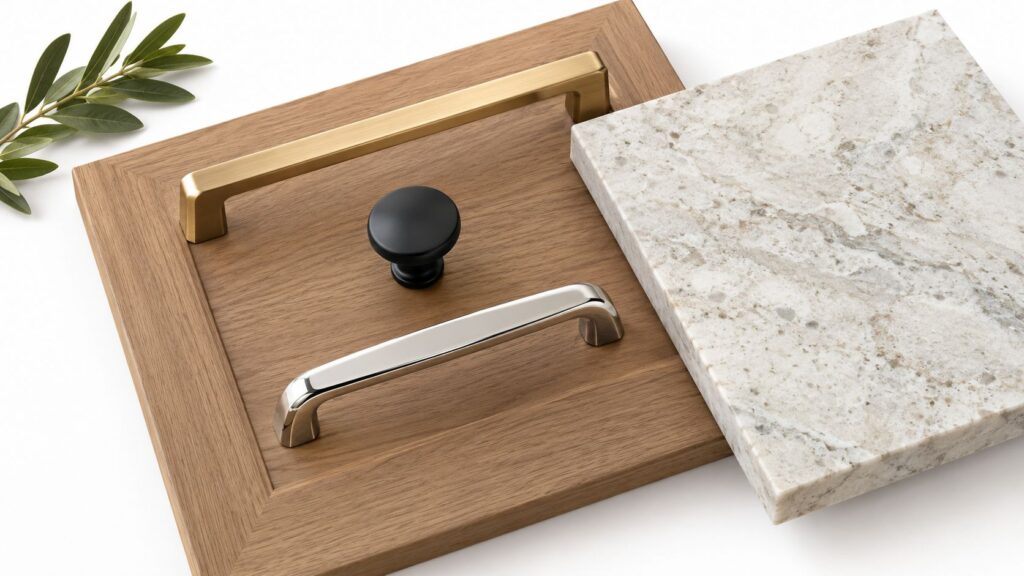
You're standing in a nearly finished Cherry Hill kitchen with cabinet doors installed, countertops templated, and a faucet still sitting in its box. On the worktable, brushed brass, matte black, and polished nickel samples look perfectly reasonable by themselves, yet together they raise the question every homeowner asks: Will these metals clash once everything is installed?
They won't, provided each finish has a job. Mixed metal cabinet hardware isn't a free-for-all. It's a coordination exercise involving cabinet color, countertop movement, backsplash undertones, plumbing, lighting, and the way your family uses the kitchen. In South Jersey homes, where a remodel may combine existing appliances, new LED lighting, and products sourced from several suppliers, that coordination matters more than following a rigid showroom rule.
Table of Contents
- Standing in a Cherry Hill Kitchen With Three Metal Swatches
- What Mixed Metal Cabinet Hardware Actually Means
- The Two Plus One Framework for Mixing Finishes
- Pairing Hardware With Cabinets, Counters, Tile, and Light
- A Step-by-Step Workflow for Choosing Your Finishes
- Durability, Corrosion, and Care in a Working Kitchen
- Local Sourcing and Working With a South Jersey Cabinet Coach
- Your Mixed Metal Hardware Checklist Before You Order
Standing in a Cherry Hill Kitchen With Three Metal Swatches
The cabinet door is propped against a quartzite sample in a Cherry Hill kitchen under construction. Beside it sit three metal swatches, and the homeowner keeps moving the brass farther away from the black as if physical distance will solve the design problem.
The room already gives us useful information. The perimeter cabinets are a mid-tone oak, the island will carry honed quartzite, and the two under-cabinet lights cast a warm glow across the work surface. A pendant is already selected, and the planned faucet will sit directly beside the sink, where it'll become one of the most visible and frequently used metal elements in the room.
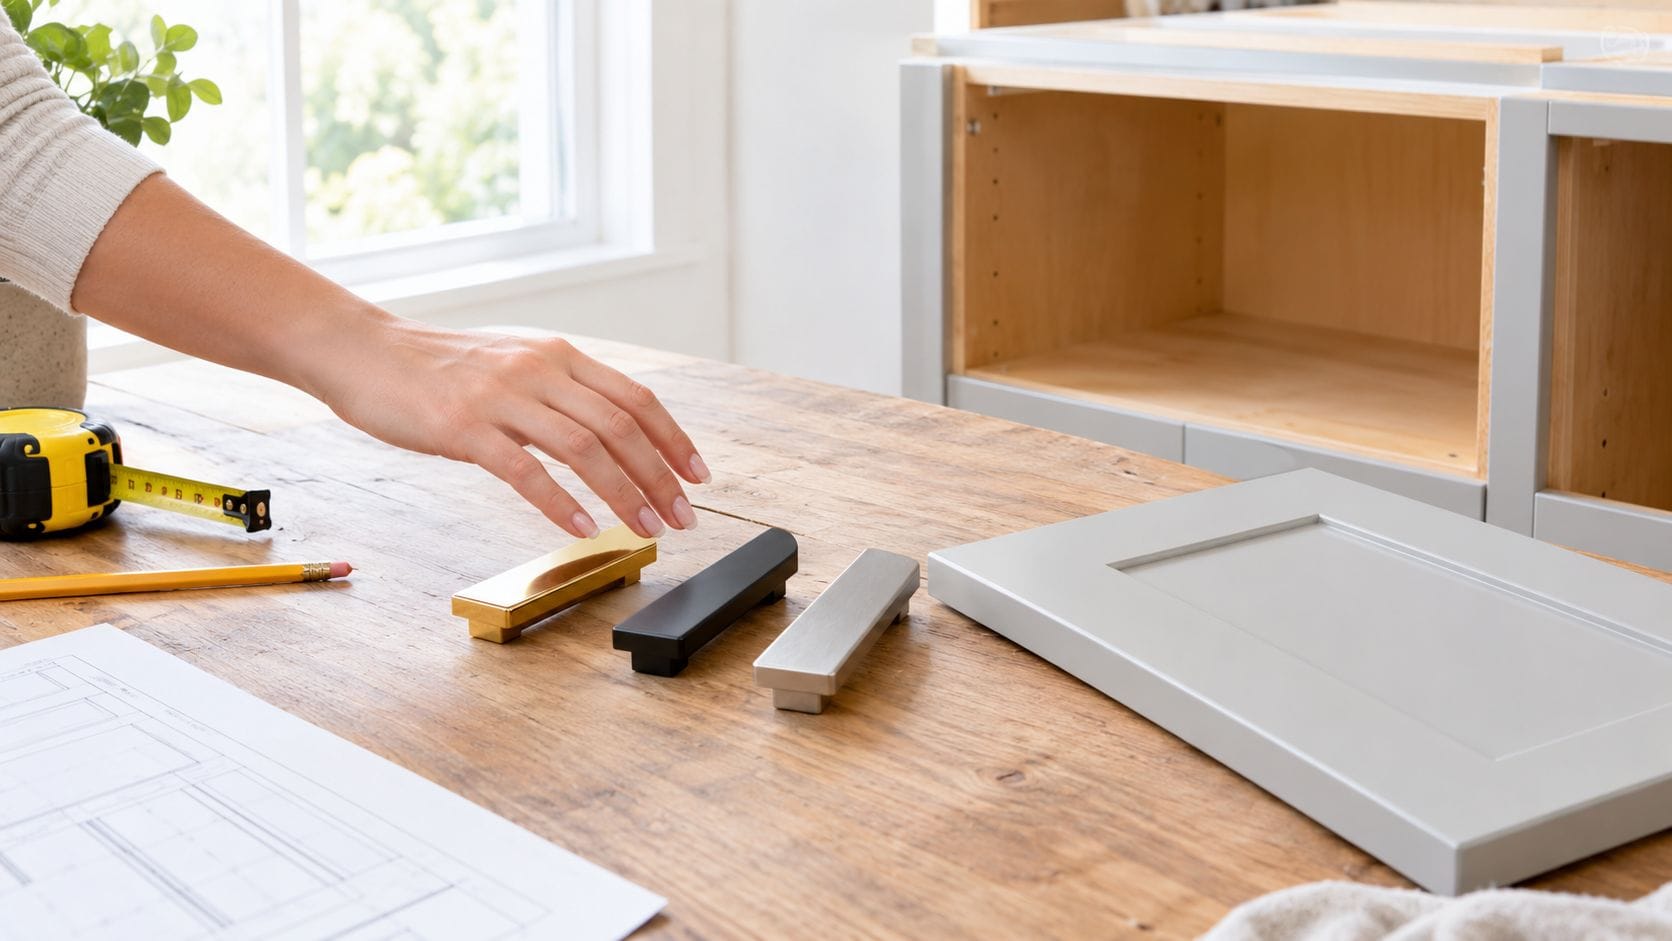
I don't start by asking which finish the homeowner likes best. I check the cabinet stain, then the quartz veining, then the existing pendant, then the faucet. Oak and warm lighting already support a warmer metal. The black can add definition, but it shouldn't compete with the faucet or turn every cabinet face into a graphic outline.
Give every finish a role
The brass might lead on the faucet and island pendant. Matte black could handle the cabinet pulls and knobs. A small chrome detail might repeat an existing appliance or appear on a switch plate, but it doesn't need to spread across the room.
That's the distinction homeowners miss. Harmony doesn't require identical finishes. It requires visual repetition, controlled contrast, and sensible placement.
Practical rule: If you can explain where each metal belongs before anything is drilled, the combination will usually feel intentional.
A working kitchen also needs more than a beautiful sample board. Pulls must feel comfortable on drawers, the faucet must be easy to clean, and the finish at the sink needs to tolerate splashes. In Cherry Hill and throughout South Jersey, I want to see the samples in the actual room, under the lights that will remain after installation.
What Mixed Metal Cabinet Hardware Actually Means
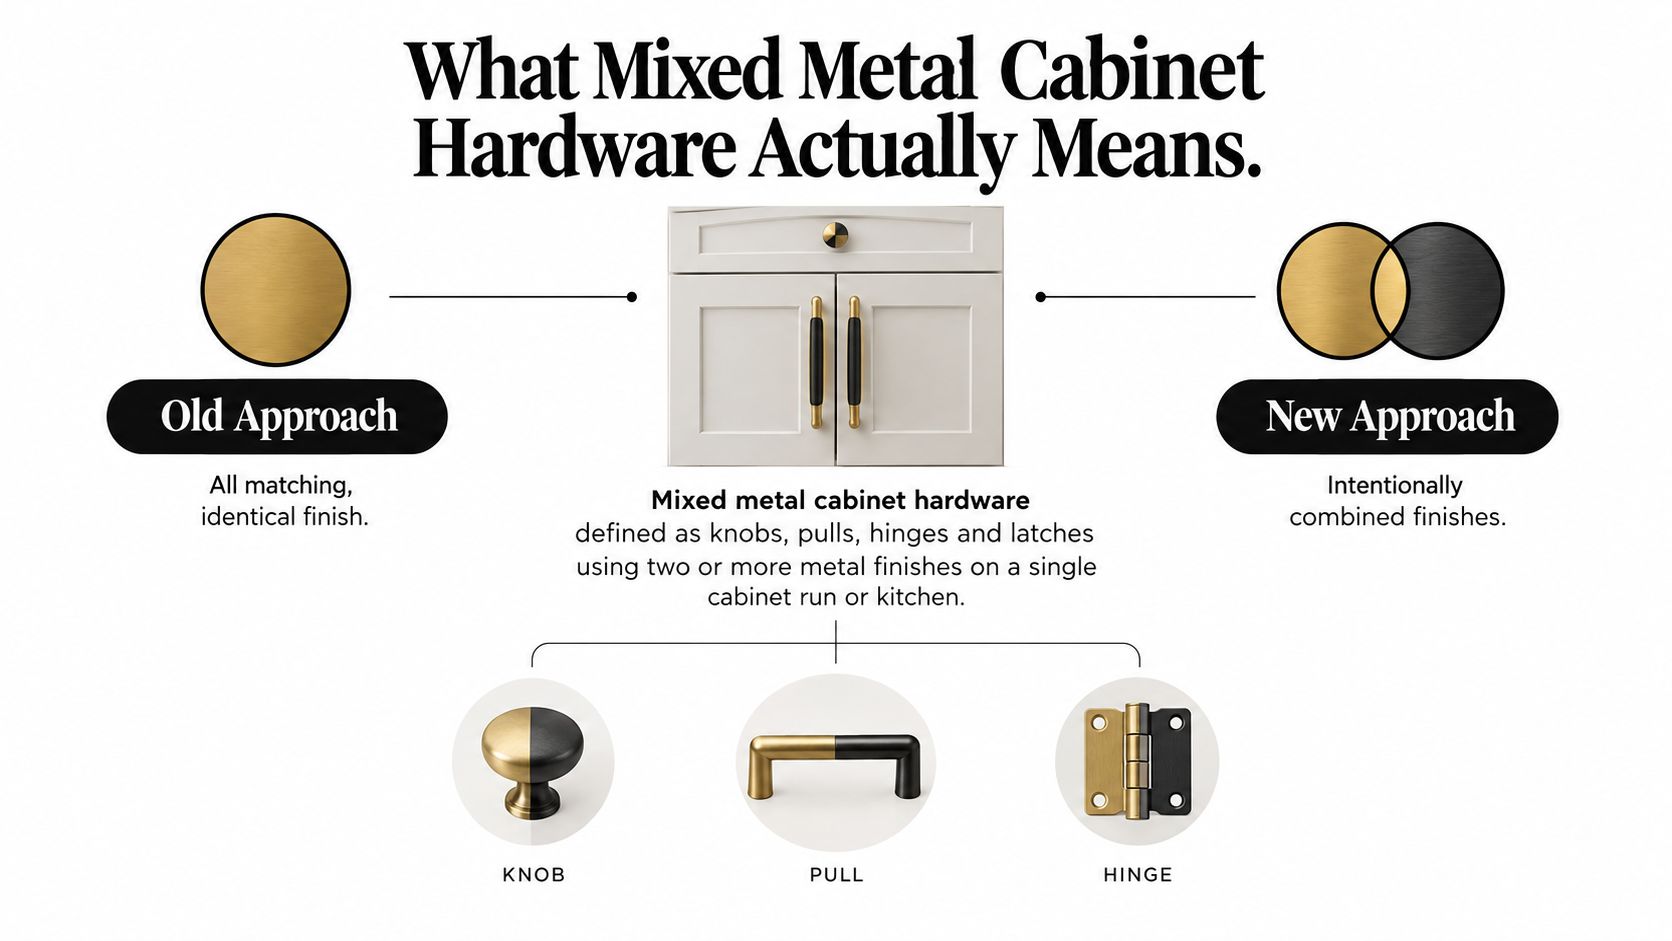
Mixed metal cabinet hardware means using knobs, pulls, hinges, latches, or appliance pulls in two or more metal tones across one cabinet run or kitchen. The finishes may appear on the cabinetry itself, the faucet, the lighting, or selected architectural details, but the room still needs a clear hierarchy.
The older approach was simple: make every visible metal match. That rule worked when hardware was treated as a background utility and when kitchens were specified from one coordinated product line. It feels less useful now because modern kitchens often combine plumbing, lighting, appliances, cabinet hardware, and decorative accents from different manufacturers.
The shift isn't permission to collect every finish that catches your eye. It's a move from matching everything to coordinating the room. Current design coverage describes two finishes as the strongest base, with a third used as a restrained accent. The broader decorative cabinet hardware market also reflects the category's move toward design-led products. One industry report valued the global decorative cabinet hardware market at USD 8.65 billion in 2022 and projects USD 17.2 billion by 2030, a projection outlined in this cabinet hardware market overview.
Know what you're actually buying
A brass-colored pull may be solid brass, plated zinc, or another base metal with a decorative coating. PVD-coated stainless steel is a different construction from a thin plated finish, and unlacquered brass is designed to change as it's handled and exposed to air.
Cabinet hardware should coordinate with plumbing and lighting, but those categories don't have to match exactly. A polished nickel faucet can live comfortably with brass cabinet pulls if the lighting, cabinet color, and countertop support the relationship. For a practical primer on the cabinetry itself, review this painting kitchen cabinets guide before you commit to a finish palette, and use this cabinet hardware selection guide when you're comparing shapes and sizes.
Most homeowners are choosing among brushed brass, polished nickel, matte black, and chrome. The right pair depends less on the label and more on the surrounding surfaces.
The Two Plus One Framework for Mixing Finishes
The most reliable starting point is two finishes plus one accent. Two finishes carry the visible metal in the room. The third appears selectively, usually on one small category rather than everywhere.
Assign the primary finishes
Start with the largest or most permanent fixtures. A faucet, range hood detail, pendant frame, or appliance trim has more visual weight than a small knob. Let those elements establish the dominant tone, then select cabinet hardware that either repeats that tone or creates a deliberate counterpoint.
For example, brushed brass on the faucet and main pendant can establish warmth. Matte black pulls can supply contrast across the cabinets. Chrome might appear only on a small bar detail or existing appliance-related element. Another workable combination reverses the emphasis: polished nickel on the faucet and lighting, brushed brass on most cabinet hardware, and matte black reserved for a small accent.
The finish used on the greatest number of cabinet pieces isn't automatically the dominant finish. Scale matters. A large pendant or prominent faucet can lead the eye even when the cabinets carry another metal across more individual pieces.
Match undertones before colors
Warm finishes, including brushed brass and many bronze tones, generally sit comfortably with cream paint, oak, stained maple, and warm quartz. Matte black is flexible because it behaves more like a strong neutral, but its surrounding materials still determine whether it feels crisp or heavy.
Polished nickel and chrome tend to suit gray cabinetry, cooler stone, and stainless-adjacent appliances. That doesn't mean warm and cool finishes can't coexist. It means the transition needs a reason, such as a repeated light fixture, a dark island, or a countertop vein that connects both sides.
Keep the accent contained
An accent works when it has a clear boundary. Use it on an island pendant, a beverage station, a single appliance pull, or a small group of switch plates. If the accent appears randomly on cabinet doors, plumbing, sconces, and furniture, it stops reading as an accent and starts competing with the primary finishes.
The cleanest mixed-metal kitchens don't distribute every finish evenly. They distribute them intentionally.
Two finishes can feel calm and polished. Three can feel layered when one is clearly subordinate. More than that usually requires a stronger architectural reason, not another trip to the hardware showroom.
Pairing Hardware With Cabinets, Counters, Tile, and Light
Choose a finish beside the surface it must live with, not from an isolated online photograph. A white cabinet, gray-veined counter, handmade tile, and warm LED bulb can change the appearance of the same pull dramatically.
White or warm-cream cabinets can make brushed nickel and polished chrome look crisp. Walnut, oak, and stained maple tend to welcome champagne bronze, antique brass, or oil-rubbed bronze. Gray-veined quartz can support cool stainless tones, while honed black granite or soapstone often benefits from the contrast of a warmer brass.
Tile creates another variable. Standard subway tile may read as a neutral backdrop, but patterned cement tile and handmade zellige can carry noticeable undertones. Put the hardware against a real tile sample, not a phone image. The same rule applies to counters. A useful companion resource is this guide to countertop and cabinet combinations.
| Cabinet / Counter / Tile | Primary Hardware Finish | Accent Finish | Lighting Note |
|---|---|---|---|
| Warm oak with creamy quartz | Brushed brass | Matte black | Warm lighting reinforces the wood and brass |
| White shaker cabinets with cool gray quartz | Polished nickel | Matte black | Cooler lighting keeps nickel clean and restrained |
| Navy island with pale stone | Satin brass | Chrome | Repeat chrome on pendant details or appliance trim |
| Walnut cabinets with honed black stone | Oil-rubbed bronze | Brushed brass | Warm light supports depth without making the room look shiny |
| Soft gray cabinets with neutral subway tile | Chrome | Brushed brass | Test the tile and metal together to avoid a flat palette |
Lighting controls the final reading. Warm bulbs can soften a cool nickel toward gray, while a neutral warm setting keeps brushed brass looking more distinctly gold. You don't need to choose a bulb temperature from a catalog alone. Bring the samples into the kitchen after the lights are installed.
A navy island with satin brass pulls and a chrome faucet can look deliberate when chrome reappears in the pendant hardware. The metals don't match, but the room gives each one a repeat point. That's coordination. A brass faucet, black pulls, chrome sconces, and stainless accents with no connection is just accumulation.
A Step-by-Step Workflow for Choosing Your Finishes
Don't order hardware after browsing a few inspiration photos. Make the decision in the same sequence a kitchen gets built, starting with surfaces that are difficult or expensive to change.
Start with the fixed materials
First, lock the cabinet door style and color. Painted Shaker doors, natural oak, walnut veneer, and stained maple all change how a metal reads. If the cabinet color changes later, your original finish decision may no longer work.
Next, finalize the countertop and slab. Look at the actual material, including its veining and edge, because the counter often connects the cabinet run to the faucet and backsplash.
Then, select backsplash tile and grout. Place each hardware sample against an actual tile section. A small sample board gives you a more honest reading than a digital rendering.
Use plumbing as the anchor
Choose the faucet before cabinet hardware. Faucets often have more limited availability, longer ordering timelines, and stricter return conditions than pulls or knobs. Once the faucet is selected, align the cabinet hardware to it instead of trying to make the faucet conform to a hardware order that already exists.
Lighting comes next. Check the finish of the pendant frame, canopy, socket details, chain, and sconces. A light fixture can carry more visual presence than dozens of small pulls, so it belongs in the decision before the final accent is assigned.
Build a portable sample board
Use a 12 by 18 inch foam-core board with a cabinet door chip, countertop offcut, tile, grout sample, faucet card, lighting finish, and hardware. Keep the board portable so you can carry it between the showroom, fabricator, tile installer, and jobsite.
Photograph it in the kitchen during the day and again at night. Cherry Hill kitchens often read warmer after sunset, especially under under-cabinet lights. Order the hardware last, and verify that the exact reference numbers match the samples you approved.
Don't approve a finish from a screen when the real decision can be tested on the actual cabinet, counter, tile, and light.
Durability, Corrosion, and Care in a Working Kitchen
A finish can be beautiful and still be the wrong choice for a wet, high-touch location. The practical issue is often not whether two metals look good together, but whether they touch under conditions that allow corrosion to develop.
When dissimilar metals meet in the presence of moisture, galvanic corrosion can accelerate at the contact point. Technical guidance explains that zinc alloys are anodic relative to stainless steel and brass. If plating wears through, a scratch exposes the base metal, or an uninsulated fastener bridges the materials, localized corrosion can spread beneath the finish and cause lifting or blistering. This technical discussion of galvanic corrosion in metal finishing is particularly relevant around sinks, wet bars, and frequently wiped cabinet hardware.
Place durable materials where hands and water meet
Use the most corrosion-resistant material at the highest-touch, moisture-exposed interfaces. Stainless steel is a strong practical choice near sinks and wet prep areas. Solid brass can hold up well when properly finished, but an unlacquered or living brass surface will change with handling by design.
For high-use mixed-metal systems, a hard substrate paired with powder coating or PVD generally offers better abrasion and cleaning resistance than thin decorative plating. Technical guidance identifies powder-coated matte black and PVD-coated finishes among the more durable options for mixed-metal kitchen hardware, while plated finishes on zinc bases can wear through with years of use. Review the material and coating construction, not just the color name, in this comparison of zinc die-cast and stainless-steel hardware.
Avoid placing dissimilar metals in direct contact when moisture is likely. Use insulating washers or gaskets where the design permits, and don't mix zinc-plated and brass components in a wet drawer bank without checking how the manufacturer isolates them.
Clean without attacking the coating
Use mild, pH-neutral soap and a microfiber cloth. Skip abrasive pads, acidic sprays, harsh degreasers, and aggressive polishing unless the manufacturer specifically approves them. Dry splashes near the sink rather than letting moisture sit around fasteners or seams.
A living finish such as oil-rubbed bronze or unlacquered brass will patina. That change is part of the product's character, not a defect. For a closer look at a practical cool-toned option, compare the care expectations in this guide to brushed nickel hardware.
Local Sourcing and Working With a South Jersey Cabinet Coach
A finish decision becomes easier when the samples travel to the kitchen instead of the homeowner traveling from showroom to showroom with incomplete information. For a Cherry Hill remodel, pull samples from showrooms around Marlton, Mount Laurel, and the Route 70 corridor, then compare them beside the actual cabinet door, countertop, tile, faucet, and installed LED lighting.
Check pull lengths on the cabinet doors before ordering. Hold knobs against the drawer fronts and confirm that the proportion feels comfortable, not merely attractive in a product photograph. Warm brass and cool chrome can look distinct under showroom lighting and much closer under the LEDs already installed in your home.
Coordinate the people as well as the products
A hardware coordinator can verify screw spacing, track regional distributor availability, and prevent an order from moving forward with the wrong finish. That coordination matters when the plumber has one faucet delivery, the electrician has another lighting schedule, and the cabinet installer needs hardware on site at the right stage.
The Cabinet Coach provides a mobile cabinet showroom and can bring cabinetry, countertop, hardware, and tile samples into a homeowner's South Jersey space. The company can also coordinate selections with architects and trades, while a homeowner can begin with a free in-home kitchen design consultation.
The value isn't choosing more metals. It's reducing disconnected decisions. When the tile installer, countertop fabricator, plumber, electrician, and cabinet team work from one approved finish board, the kitchen has a better chance of looking intentional when it goes live.
Your Mixed Metal Hardware Checklist Before You Order
Before the purchase order is cut, review the room as a working system rather than a collection of attractive samples.
- Set the hierarchy: Choose one dominant warm or cool metal, then assign the secondary finish to a clear category.
- Limit the accent: Keep the third finish on one visual plane or one defined detail instead of scattering it across the room.
- Check undertones: Place every finish beside the cabinet stain, countertop, backsplash, grout, and faucet.
- Test the lighting: Photograph the sample board in the actual kitchen during morning light and after sunset.
- Confirm the construction: Check whether each piece is solid brass, stainless steel, powder coated, PVD coated, or plated over another base metal.
- Inspect the hardware fit: Verify screw spacing, pull length, knob diameter, and drawer clearance before ordering.
- Review care and warranty terms: Plated finishes need particular attention in high-touch areas, and the manufacturer's maintenance instructions should be available before installation.
Use the cabinet hardware placement guide to confirm position and scale before anyone drills the doors. The right mixed metal cabinet hardware palette should look good on the sample board, make sense beside the sink and range, and remain comfortable to use every day.
The Cabinet Coach brings a mobile showroom experience to Cherry Hill and surrounding South Jersey homes, with coordinated cabinetry, countertops, tile, hardware, and finish guidance brought into your actual space. Visit The Cabinet Coach to schedule a consultation and review your mixed metal selections before the order is placed.