
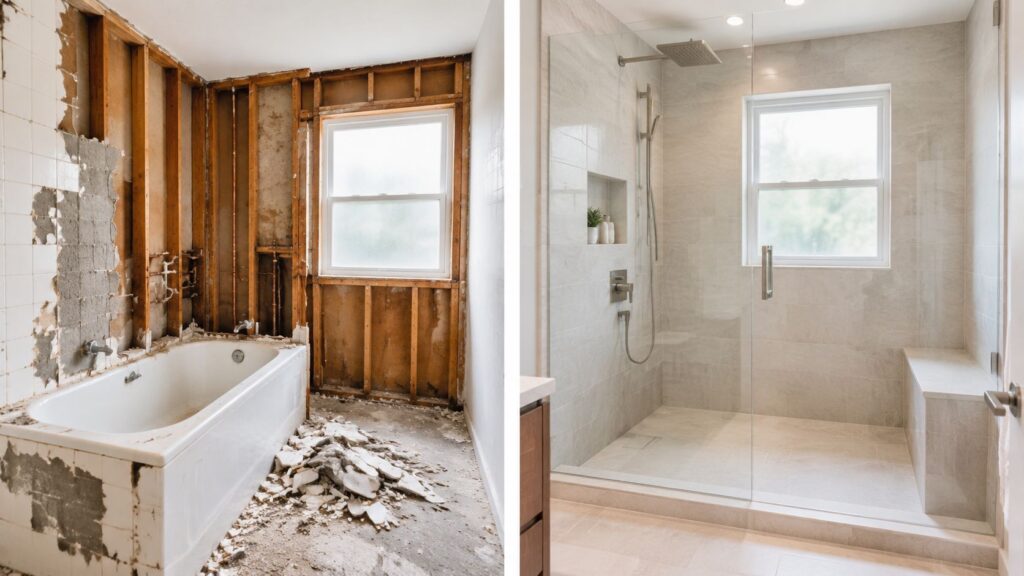
You're standing in the bathroom, looking at a tub that hasn't been used in years. It takes up the room's most valuable floor area, the curtain makes the space feel cramped, and stepping over the side is getting less comfortable every year. A tub-to-shower conversion can solve all three problems, but only if you choose the right layout for your household and don't sacrifice the home's resale appeal by removing the last bathtub.
A smart bathroom remodel tub to shower project starts with a decision, not demolition. You need to weigh daily convenience, future mobility, waterproofing, plumbing, budget, permits, and the buyers who may eventually judge the finished bathroom. The recommendations below are designed for South Jersey homeowners who want a useful shower without getting burned by a rushed scope or an incomplete bid.
Table of Contents
- Why a Tub to Shower Conversion Belongs on Your Radar
- When Removing the Tub Is the Wrong Call
- What a Tub to Shower Conversion Really Costs
- From Demo to First Shower
- Choosing the Right Shower Layout for Your Home
- Permits Timelines and Working With the Right Contractor
- Your Decision Checklist Before Work Begins
Why a Tub to Shower Conversion Belongs on Your Radar
The primary bathtub has become optional in many renovated bathrooms because homeowners use the shower every day and the tub far less often. Houzz reported that 27% of homeowners removed their master bathtub during a 2017 bathroom renovation, and 91% of those homeowners removed it to create a larger shower. The same research found that 78% already had another bathtub elsewhere in the home, which explains why many households see the conversion as a practical exchange rather than the loss of bathing function. Houzz's bathroom research documents that shift.
The pattern continued in later Houzz research. Among homeowners who removed a tub, 78% enlarged the shower, and 40% of those enlargements made the shower at least 25% larger than before. By 2020, Houzz reported that half of homeowners renovating their master bathrooms were choosing not to include a tub. The message is clear: in many primary bathrooms, the shower has become the daily-use centerpiece while the tub has become a secondary feature.
Start with how the room works
A shower-first layout usually improves the morning routine. It can provide a wider entry, a hand shower, a built-in niche, a bench, and better lighting without forcing those features into the narrow footprint of a tub enclosure. It can also make the room feel visually calmer when clear glass replaces a heavy curtain.
Accessibility deserves equal weight. A high tub wall creates a step-over hazard, while a low-threshold or curbless shower can make entry easier for an older homeowner, someone recovering from an injury, or a guest with limited mobility. If aging in place matters, plan blocking for grab bars before the walls close. Retrofitting support later costs more and often produces a less attractive result.
Practical rule: Design for the next decade of use, not just the way your knees feel today.
The financial question matters too. Angi reports an average tub-to-shower conversion cost of about $3,000, with a typical range of $1,200 to $8,000 and high-end work reaching $15,000, depending on materials and plumbing complexity. Its reported average return on investment is 60%, with mid-range conversions returning as much as 74% and upscale work around 45%. A broader bathroom remodel return-on-investment guide can help you judge the conversion as part of the entire renovation rather than as an isolated fixture swap.
The rest of the decision comes down to fit. You'll need to decide whether removing the tub hurts resale, what budget tier matches your expectations, whether the existing drain can stay, how much accessibility you need, and which contractor can prove that waterproofing and inspections are part of the work.
When Removing the Tub Is the Wrong Call
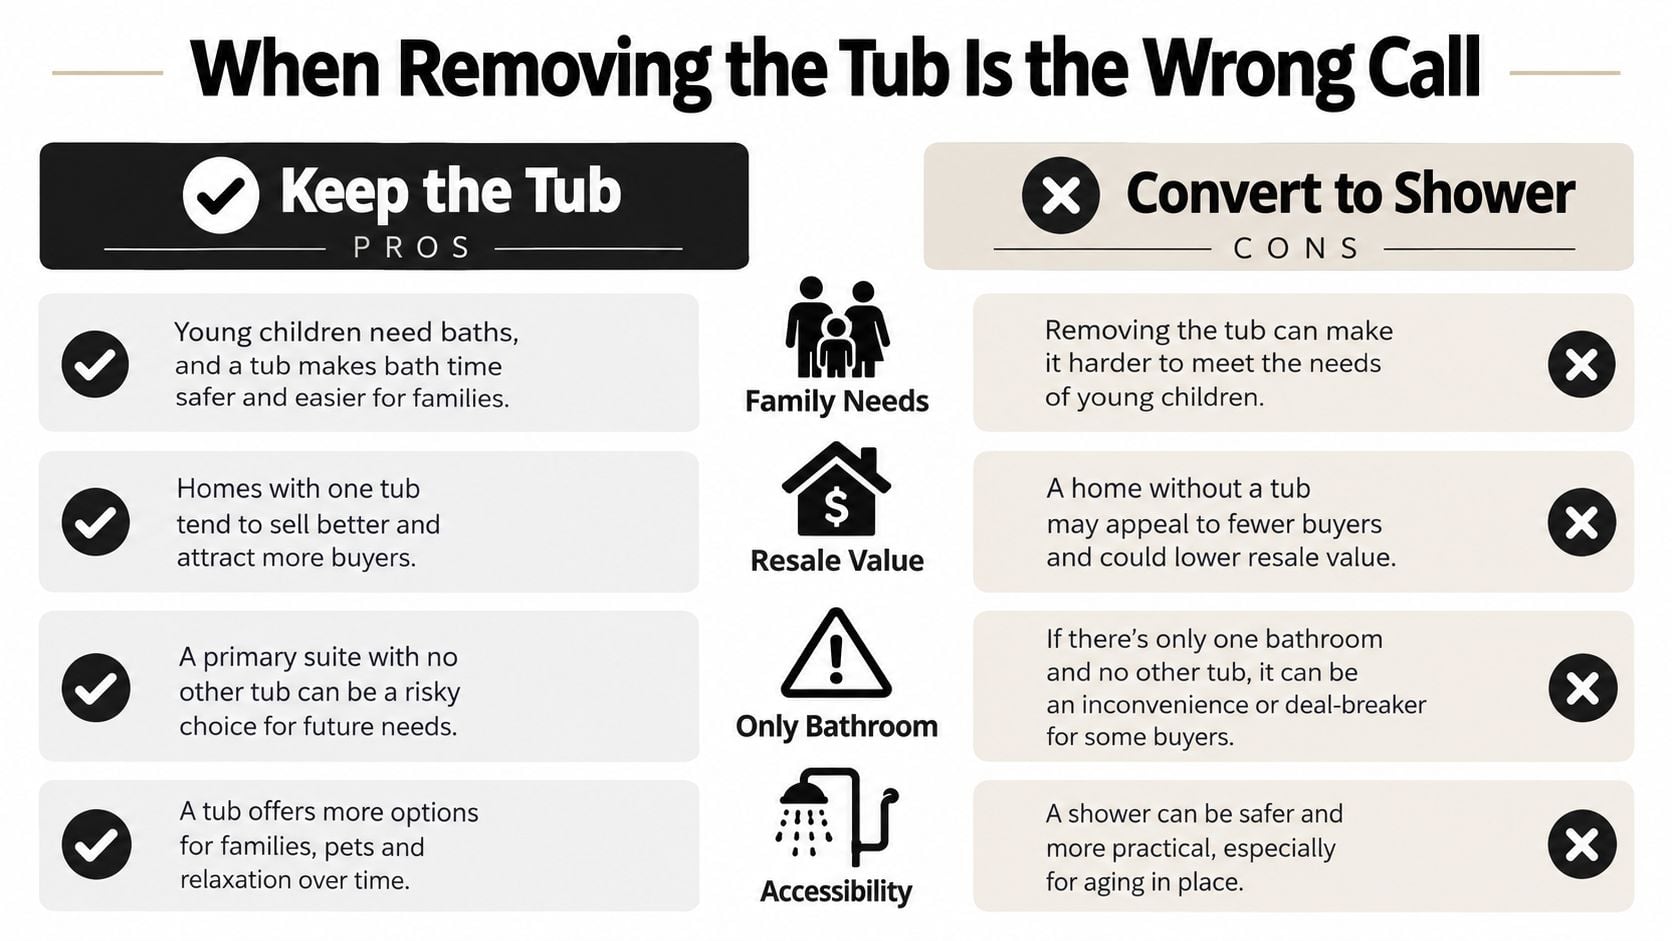
Not every bathroom should lose its bathtub. If your home has only one full bathroom and that room contains the only tub, converting it to a shower can narrow your future buyer pool. Families with young children often want a tub for bathing, and buyers may not view a shower-only primary bathroom as an equal substitute.
That concern becomes stronger in a family-oriented South Jersey neighborhood. A buyer may appreciate a beautiful walk-in shower, but still ask where children will bathe. A tub in a basement or rarely used guest bathroom can help, but it won't always replace the convenience of a tub near the bedrooms. Removing the only tub can turn a lifestyle upgrade into a resale compromise.
Use the whole house as the test
Look at every bathroom before approving the design. If another full bathroom has a functional tub, the risk drops substantially. If the only remaining tub is damaged, awkwardly located, or already scheduled for removal, the project needs a different conversation.
Houzz's trend data shows that tub removal is common, but it also confirms that preferences haven't disappeared. In coverage cited by Baths by Spicer Bros., more than 55% of homeowners prioritized a larger shower over keeping a bathtub in the primary bathroom, while Houzz data showed freestanding tub popularity falling from 55% in 2023 to 42% in 2024 and alcove tubs rising to 39% in 2024. Those figures support shower-led design, not a blanket rule that every tub should go. The dimensions of a tub-shower combination can help you evaluate whether keeping an alcove tub is feasible.
Keep the tub if any of these conditions apply:
- One full bath: Your home has no other practical bathtub.
- Young children: Children visit frequently or live in the home.
- Near-term resale: You expect to list the property within five years.
- Special uses: You wash pets, soak after injuries, or host multigenerational guests.
- Buyer expectations: Comparable homes in your area commonly retain at least one tub.
Listing photos and buyer conversations often make the missing tub noticeable, especially when the house offers only one full bathroom. Don't assume a polished shower automatically wins every comparison. If your household never uses the tub and another one remains elsewhere, remove it confidently. If not, preserve at least one tub before chasing a larger shower.
What a Tub to Shower Conversion Really Costs
A realistic South Jersey budget starts with the scope, not the tile color. Angi places a typical conversion between $1,200 and $8,000, with an average of about $3,000. High-end projects can reach $15,000 when materials, plumbing, or layout complexity increase. Accessibility-focused estimates place a basic conversion around $4,000 to $10,000, a custom tiled shower with a bench around $8,000 to $18,000, and a broader aging-in-place remodel around $15,000 to $30,000. These figures come from Angi's conversion cost and ROI guidance and accessibility bathroom remodel estimates. Use this bathroom remodel cost breakdown to separate the conversion itself from related work.
| Project Tier | Scope of Work | Typical Cost Range |
|---|---|---|
| Basic conversion | Tub removal, standard shower base, wall surround, limited plumbing changes | $1,200 to $4,000 |
| Mid-range conversion | New waterproofing, tile or quality panels, updated valve, fixtures, glass, finish work | $4,000 to $8,000 |
| Curbless or custom shower | Reworked pan, detailed waterproofing, custom tile, glass, bench, accessibility features | $8,000 to $18,000 |
| Broader aging-in-place remodel | Shower conversion plus doorway, vanity, and other accessibility modifications | $15,000 to $30,000 |
Know what drives the bid
Demolition only exposes the work. Your contractor may need to repair the subfloor, replace damaged framing, reroute the drain, move the valve to shower height, waterproof the walls, install a pan, set tile, fabricate glass, and reconnect the trim. A bid that says only “remove tub and install shower” leaves too much out.
The existing 60 by 30 inch tub footprint is often the most code-efficient starting point. The IRC minimum for a shower is 900 square inches of finished interior area with at least 30 inches in any direction, while design guidance commonly treats 36 by 48 inches or larger as a more comfortable target. Walk-in shower dimensions guidance explains why keeping the existing footprint often limits construction changes.
Drain relocation causes many budget increases. A new location may require access through the subfloor, a changed slope, or more extensive plumbing work. Curbless construction adds another layer because the shower floor must drain without a raised threshold. A bench, grab bars, anti-scald valve, hand shower, and reinforced framing add cost, but they also make the room safer and more useful later.
Choose materials honestly
An acrylic walk-in kit usually installs faster and cleans more easily because it has fewer grout joints. A stick-built tiled shower provides more flexibility for niches, benches, unusual dimensions, and visual character, but it requires disciplined substrate preparation and waterproofing.
Choose the kit for a quick, low-maintenance conversion. Choose custom tile when the layout, accessibility features, or resale finish justify the added work. Do not pay for custom tile if your priority is simplicity, and do not choose a basic surround if you expect a fully custom, furniture-grade bathroom.
From Demo to First Shower
The crew begins by protecting the route from the entry door to the bathroom, containing dust, and removing the existing tub, surround, trim, and flooring that obstructs the new work. Demolition should expose the studs, subfloor, valve, drain, and surrounding framing. At this stage, hidden rot, old repairs, cracked mortar, or a weakened subfloor becomes visible.
The inspection after demo matters more than the demolition itself. The contractor should confirm that the framing can support niches and grab bars, that the subfloor can carry the new pan, and that the drain route makes sense for the selected layout. If the floor is soft or the framing is compromised, repair it before the waterproofing system goes in.

Plumbing comes before pretty surfaces
The plumber sets the shower valve at a usable height, adjusts supply lines, and modifies the drain if the new pan requires it. A licensed plumber should handle changes to water or drain lines, and the rough-in should be inspected before the walls close. Take photos of the open walls at this stage. They're useful for future repairs and for proving where blocking and plumbing were installed.
Waterproofing is the project's most important invisible work. Common approaches include cement board with a properly applied liquid membrane or a bonded system such as Schluter Kerdi. The pan, corners, niches, penetrations, and transitions must work as one continuous water-management system.
Never approve drywall over an untested shower pan. The pan must be flood-tested before the finish surfaces hide the work.
The floor then receives the correct slope toward the drain, whether the design uses a prefabricated base or a site-built pan. Wall tile, floor tile, or waterproof wall panels follow only after the substrate is ready. If you're considering stone, plan maintenance before selecting it. A resource on marble finish maintenance in India offers useful background on caring for polished marble surfaces, even though the project itself is in South Jersey.
After the tile cures and grout is complete, the glass company measures the finished opening. The final phase includes the enclosure, showerhead, hand shower, controls, drain cover, accessories, caulking, paint touch-ups, and fixture testing. A homeowner can handle limited demolition or painting, but stop and call licensed trades for plumbing, electrical changes, waterproofing, and tile-paning work where an error can put the entire bathroom at risk. For planning the bathroom renovation timeline, build inspection and cure time into the schedule instead of treating them as delays.
Choosing the Right Shower Layout for Your Home
The shower layout determines more than appearance. It controls how easily someone enters, where water lands, how much glass you need, and whether the floor or drain structure must change. Choose the household first, then choose the enclosure.
| Layout | Accessibility Level | Typical Cost Premium | Best For | Key Structural Note |
|---|---|---|---|---|
| Low-threshold enclosed stall | Basic improvement | Lower | Resale-focused owners and everyday shower users | Keeps the footprint and contains spray well |
| Partial-glass walk-in | Moderate | Moderate | Homeowners wanting an open, larger-feeling shower | Needs careful glass placement and splash control |
| Fully curbless shower | High | Higher | Aging-in-place planning and modern open layouts | Requires accurate slope, waterproofing, and floor coordination |
| Roll-in or zero-barrier shower | Highest | Highest | Wheelchair users or transfer-bench users | May need greater depth, wider entry, and structural changes |
Match the layout to the household
A single-story retiree should usually choose a curbless shower with a handheld fixture, blocking for grab bars, a built-in or fold-down seat, and slip-resistant flooring. A fully roll-in design makes sense when a wheelchair or transfer bench must enter without a threshold. It needs more than a stylish open panel. The entry, clear floor area, seat position, and drainage must work together.
A family with young children may be better served by a low-threshold enclosed shower if another bathtub remains in the house. Full glass can look clean, but an enclosed arrangement contains spray and handles busy daily use more reliably. If the bathroom is the only full bath, reconsider removing the tub before selecting any shower layout.
A resale-focused seller should preserve the existing footprint, limit unusual structural changes, and choose a broadly appealing low-threshold design. An open shower can photograph well, but excessive customization may not return its cost in a sale.
Curbless designs need accurate slope and waterproofing discipline. They may require recessing the drain, lowering the subfloor, coordinating the toilet clearance, or adjusting the bathroom floor so water stays inside the shower zone. A rendering can make the floor look continuous. Only a properly built pan keeps it dry.
Because moisture problems often start at failed seams or wet drywall outside the shower, review practical mold remediation tips from Restore Heroes before approving an open layout. The right answer isn't the most dramatic option. It's the one that gives your household the needed access while containing water reliably.
Permits Timelines and Working With the Right Contractor
A tub-to-shower conversion usually crosses the line from cosmetic work into regulated plumbing work when the drain or valve moves. Ask the local building department which permits apply before demolition, and get the answer in writing. Structural changes, electrical work, and major waterproofing alterations may trigger additional requirements depending on the municipality and the scope.
Skipping permits can create trouble during an insurance claim, a future sale, or a buyer's inspection. Inspections create checkpoints for rough plumbing, electrical work where applicable, and the shower pan before the walls hide the installation. A contractor who says permits are unnecessary without checking the scope is giving you a warning sign.
Build the schedule around dependencies
A typical conversion with a stable footprint can involve several weeks of active work, but the calendar stretches when the project needs special-order materials, inspections, or a custom glass enclosure. The work has to proceed in order. Plumbing rough-in comes before wall closure, waterproofing comes before tile, and finished tile comes before glass measurement.
Potential delays include:
- Inspection scheduling: A failed or postponed inspection can stop the next trade.
- Glass fabrication: The enclosure can't be measured accurately until the tile is finished.
- Specialty products: Linear drains, custom panels, and unusual fixtures may arrive after demolition.
- Hidden conditions: Rot, damaged subfloor, and outdated plumbing can change the scope.
- Cure time: Waterproofing, mortar, grout, and caulk need appropriate setting time.
Vet the person holding the schedule
Ask for a written, itemized bid that separates demolition, plumbing, waterproofing, tile, glass, fixtures, permits, and allowances. Verify the contractor's license and insurance, request references for completed tub-to-shower conversions, and confirm who pulls each permit. A general remodeling reference isn't enough. You want to hear from homeowners who had a shower pan, drain, glass enclosure, and final inspection handled by the same team.
Avoid a contractor who asks for a large upfront deposit without tying payments to completed work and inspection milestones. Establish weekly check-ins, require written change orders, and keep a running list of decisions. The contractor management guidance from The Cabinet Coach provides a useful framework for keeping communication and scope under control.
At the final walkthrough, test the shower valve, hand spray, drain, glass doors, caulk lines, exhaust fan, and accessories. Check that doors swing freely, water stays inside, and every promised item appears on the punch list. Don't release the final payment until the agreed corrections and required inspections are complete.
Your Decision Checklist Before Work Begins
A successful conversion starts with household fit, not a Pinterest image. Confirm that the shower will serve your daily routine, your future mobility, and your resale plans before you select tile or glass.

Confirm the room can support the plan
- Check the bathtub inventory: Verify that at least one practical full bathtub remains elsewhere if resale protection matters.
- Measure the existing alcove: Confirm the finished footprint, drain position, wall depth, entry width, and toilet clearance.
- Choose the accessibility level: Decide between a low threshold, partial-glass walk-in, curbless, or roll-in layout.
- Inspect the plumbing path: Ask whether the existing drain and valve can remain or need relocation.
- Check permits first: Contact the local authority before removing the tub or opening walls.
Put the finished room in writing
Your contract should identify the shower base or pan, wall material, tile pattern, grout, niche location, bench, glass or curtain, drain finish, fixtures, grab bars, and curb details. It should also state who supplies each item, what happens when hidden damage appears, how waterproofing is tested, and which inspections are included.
Get three written bids, proof of license and insurance, and references from South Jersey conversion projects. Tie payments to completed scope and inspection milestones, not arbitrary calendar dates. A sound bid makes it possible to compare contractors by waterproofing method and workmanship, not just by the lowest total.
The Cabinet Coach offers guided bathroom planning, material selections, cabinetry, countertops, hardware, tile coordination, and project guidance for homeowners in and around Cherry Hill. If you want help evaluating the tub decision before construction, visit The Cabinet Coach to schedule a consultation and discuss a bathroom plan built around your household, budget, and resale priorities.