
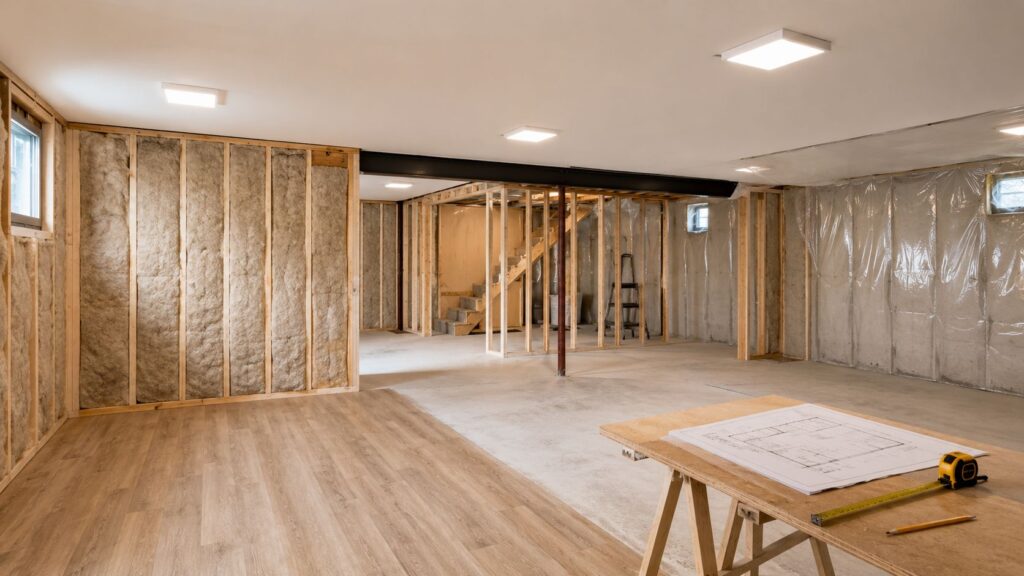
A practical basement finishing budget starts around $32,000 nationally, with most projects landing between $15,000 and $75,000. Basic finishing often runs about $7 to $23 per square foot, but the cheapest path is testing for leaks and stabilizing the basement before spending on flooring, trim, or tile.
A homeowner in Cherry Hill or Voorhees usually starts with a simpler question: “How can I make this dark, unfinished space usable without turning the project into a second mortgage?” The tempting answer is cheap flooring, painted walls, and a weekend of framing. That answer works only when the basement is already dry and the hidden systems are sound.
Most budget basement disasters begin when someone finishes around moisture instead of dealing with it. White efflorescence on the foundation wall, a musty smell after rain, damp slab edges, or a sump pump that runs constantly can turn a fresh renovation into a tear-out. Basement finishing on a budget is primarily a sequencing problem, not a flooring-shopping exercise.
Table of Contents
- Why the Cheapest Finish Is Rarely the Cheapest Basement
- What a Real Budget Basement Actually Costs in 2026
- Sequencing the Build From Slab to Paint
- DIY vs Contractor by Trade
- Phasing the Project When the Budget Won't Stretch
- Storage and Built-Ins That Pay You Back at Resale
- Putting It All Together Without Going Over Budget
Why the Cheapest Finish Is Rarely the Cheapest Basement
The cheapest finish isn't automatically the cheapest basement. A low-cost surface installed over an unstable foundation can become the most expensive choice in the room.
Consider a common South Jersey scenario. A homeowner installs inexpensive laminate over a slab that feels dry during a short inspection but absorbs moisture after heavy rain. The planks begin to cup, the room develops a stale smell, and mold appears behind the baseboard. The homeowner hasn't just lost the flooring. They may also need to remove trim, open walls, discard insulation, treat affected materials, and rebuild portions of the room.
The specific flooring price is rarely the controlling variable. Moisture determines whether the rest of the budget survives. HomeAdvisor places the national average for basement finishing at about $32,000, with projects commonly ranging from $15,000 to $75,000, and basic work often costing about $7 to $23 per square foot (HomeAdvisor's basement cost guide). Those ranges become meaningless if the finished assembly fails because water was ignored.
The order that protects the budget
A durable low-cost build follows a plain order:
- Diagnose water. Look for active leaks, foundation cracks, staining, efflorescence, damp corners, and slab moisture.
- Stabilize the envelope. Correct drainage, sump, crack, grading, or waterproofing problems before enclosing walls.
- Control humidity. Provide reliable dehumidification and confirm that the space stays comfortable through changing weather.
- Build the assembly. Insulate, frame, rough in mechanicals, and install moisture-tolerant wall materials.
- Add visible finishes. Flooring, paint, trim, cabinetry, and decorative lighting come last.
Practical rule: Never use flooring, drywall, or paint to hide a moisture problem. Those materials are the evidence, not the repair.
The hidden trap is paying for the same labor twice. A contractor who installs framing and drywall before waterproofing may need to remove those materials to reach a leaking wall. DIY work doesn't eliminate that risk. It can make the tear-out more painful because the homeowner has already invested weekends, tools, and materials.
That sequencing logic also applies to broader remodeling decisions. The seven remodeling mistakes homeowners should avoid includes the same underlying lesson: a finish can look good while the planning underneath is weak. In a basement, poor planning usually shows up as damp insulation, inaccessible shutoffs, undersized ventilation, or a room layout that fails inspection.
A budget basement works when the money goes first to the parts that are difficult to redo. Moisture mitigation, insulation, electrical planning, HVAC, and code requirements deserve protection. Decorative upgrades can wait.
What a Real Budget Basement Actually Costs in 2026
A basement can look inexpensive until moisture control, insulation, permits, and mechanical work enter the estimate. National cost data provides a starting point, not a South Jersey bid. One independent renovation source reports project totals from $15,000 to $75,000, while typical work often falls around $22,000 to $35,000 (Pro House Maintenance's basement renovation statistics). Treat those figures as planning bands. Cherry Hill and Voorhees costs can shift with access, existing utilities, inspection requirements, and the condition of the foundation.
The useful budget question is what must be completed before the visible finish. Waterproofing, dehumidification, insulation, electrical distribution, HVAC, and egress can consume more of the budget than flooring or paint. A low-cost finish does not compensate for damp walls, uncomfortable rooms, or work that fails inspection.
Use cost tiers as planning bands
The table below turns common project ranges into rough planning bands. It is not a contractor quote. Lower pricing assumes a simple layout and meaningful homeowner labor. Higher pricing reflects more trade coordination, plumbing, code work, or premium selections.
| Tier | 400 sq ft | 700 sq ft | 1,000 sq ft | 1,200 sq ft | Cost / sq ft |
|---|---|---|---|---|---|
| Basic or DIY-oriented | $15,000–$25,000 | $15,000–$25,000 | $15,000–$25,000 | $15,000–$25,000 | $7–$23 |
| Standard mixed scope | $22,000–$35,000 | $22,000–$35,000 | $22,000–$35,000 | $22,000–$35,000 | $25–$65 |
| Complex or premium scope | $37,500–$75,000+ | $37,500–$75,000+ | $37,500–$75,000+ | $37,500–$75,000+ | $25–$75+ |
Area alone does not determine the price. A 400-square-foot basement with a bathroom, new electrical distribution, or required egress may cost more per square foot than a 1,000-square-foot open recreation room. Plumbing, inspections, access, and HVAC decisions remain largely fixed even when the footprint is small.
Keep hidden work above the finish line
Create a separate allowance for moisture remediation rather than burying it in a general contingency. One cost source places average waterproofing for a 1,000-square-foot basement at about $13,640. The actual amount depends on whether the cause is drainage, foundation movement, floor-joint seepage, or another condition. The figure still shows why waterproofing and dehumidification belong near the top of the budget.
Hard costs include framing, insulation, wall materials, flooring, doors, lighting, outlets, and trim. Enabling costs include permits, inspections, egress, design decisions, mechanical coordination, and corrections required during review. A bathroom or wet bar adds plumbing, ventilation, waterproofing, and finish selections, so a small room can shift the project into a permit-heavy remodel. The bathroom remodel cost breakdown shows how quickly those components affect a compact space.
Before choosing finishes, estimate renovation costs with a line-item approach. Define whether the basement will serve as a recreation room, office, storage area, or code-compliant bedroom, then price the entire footprint. Protect the work that is difficult to redo. Defer decorative upgrades when the budget is tight.
Sequencing the Build From Slab to Paint
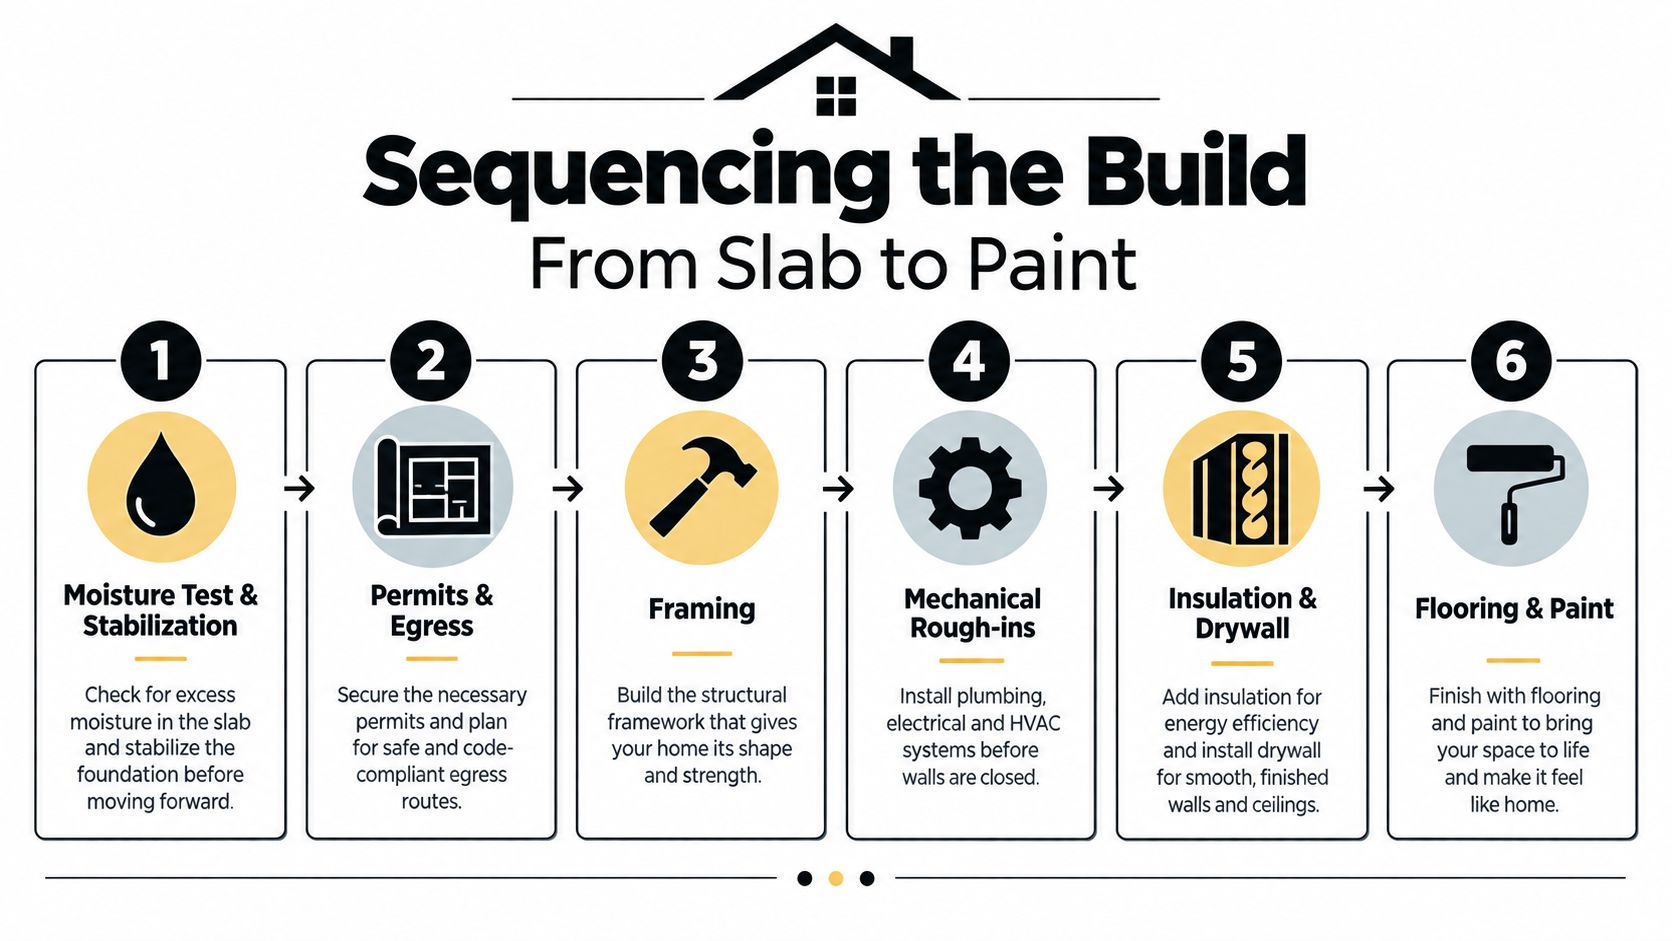
A basement can look dry on a sunny inspection day and still push moisture into new framing after the next storm. Start below the finished surface. Each step should protect the work that follows or satisfy a requirement that becomes expensive to address later.
Start with moisture and approvals
First, test and stabilize the basement. Inspect foundation walls and slab edges after rain, check the sump system, look for efflorescence, and locate musty areas before materials arrive. If water enters through cracks, walls, or floor joints, repair that source first. A dehumidifier controls indoor humidity, but it cannot replace drainage work or foundation repairs.
Second, settle permits and egress. South Jersey municipalities generally require a building permit when unfinished space becomes habitable. A bedroom needs an appropriate emergency escape and rescue opening, commonly called egress. New circuits typically require licensed electrical work and inspection. Confirm the rules with the specific municipality, whether the property is in Cherry Hill, Voorhees, Mount Laurel, or a neighboring community, before setting the room layout.
Frame around the work that must happen inside the walls
Third, frame the perimeter and partitions. Keep framing straight, preserve access to shutoffs and cleanouts, and avoid enclosing equipment behind permanent walls. An open recreation room usually costs less to build than a maze of small rooms because it requires fewer partitions, doors, and finish transitions.
Fourth, rough in mechanicals. Put electrical, HVAC, plumbing, data, and lighting locations into the wall and ceiling plan before insulation. Extending existing ductwork may cost less than adding a mini-split, while a mini-split may perform better if the current heating and cooling system is already overtaxed. Choose based on system capacity, room layout, headroom, and local code.
Fifth, insulate and control vapor. Rigid foam against the foundation can provide a practical assembly when seams, edges, rim joists, and vapor-control details are sealed correctly. Closed-cell spray foam suits some difficult areas but carries a higher installed cost. Standard fiberglass batts are not automatically the budget choice on a damp foundation wall. The assembly must keep interior finishes away from cold, wet masonry and leave the wall able to dry as designed.
Finish only after the assembly is protected
Sixth, close the walls and finish the room. Use moisture-resistant or paperless drywall where appropriate, then prime and paint. LVP works well below grade in many rooms. Carpet tile adds warmth and allows a damaged section to be replaced without removing the entire floor. Hold trim and decorative lighting until inspections and concealed work are complete.
Paint needs its own line items for surface preparation, primer, coats, access, and touch-ups. Exayard painting estimating software can help organize those costs instead of treating paint as a last-minute allowance. The sequencing principles in a kitchen renovation timeline apply here too. Rough work, inspections, wall closure, and finish work must follow an order that prevents rework.
A clean finish cannot compensate for a damp wall or inaccessible shutoff. For resale, permitted work, dry conditions, comfortable temperatures, and accessible systems often matter as much as the room's appearance. Keep records of permits, inspections, equipment locations, and concealed repairs so the finished basement can be explained clearly to a future buyer or appraiser.
DIY vs Contractor by Trade
Basement work shouldn't be treated as one giant DIY decision. Divide it by trade and ask three questions: Can you perform the work accurately, will an inspector accept it, and what happens if the work fails behind the finished wall?
Framing is usually a reasonable homeowner task when the foundation is dry and the layout is uncomplicated. Insulation can also be manageable if you understand the assembly and seal the rim joist carefully. Flooring installation, especially click-lock LVP or carpet tile, rewards patience and can save labor money without putting the structure at risk.
Drywall is different. Hanging boards is achievable, but taping, mudding, sanding, and finishing expose every uneven joint under basement lighting. A homeowner may save money by doing the hanging and hiring out the finishing, particularly when the room has low ceilings, soffits, or multiple inside corners.
| Trade | DIY | Hire Out | Why |
|---|---|---|---|
| Framing | Suitable for careful homeowners | Helpful for complex layouts | Errors affect doors, insulation, and finish alignment |
| Insulation | Possible with clear assembly details | Preferable around difficult rim joists | Gaps and poor sealing reduce performance and can invite moisture trouble |
| Drywall | Hanging may be manageable | Finishing often deserves a specialist | Taping and mudding are labor-intensive and visually unforgiving |
| Electrical | Limit to planning and low-risk tasks allowed locally | Use a licensed electrician | New circuits, subpanels, bedroom outlets, and inspections carry code and insurance consequences |
| Waterproofing | Not a good place to experiment | Use a qualified waterproofing contractor | A wrong diagnosis can leave water inside the finished wall |
| Plumbing | Avoid concealed rough-ins without experience | Hire a licensed plumber | Bathrooms and wet bars require layout, venting, drainage, and inspection coordination |
| Flooring | Strong DIY opportunity | Hire for difficult slabs or transitions | Mistakes are visible, but usually accessible for correction |
Keep high-consequence work professional
Electrical work almost always belongs with a licensed electrician in South Jersey when the project adds circuits, a subpanel, bedroom outlets, or dedicated equipment. Waterproofing and structural changes should also stay with experienced contractors. If the basement needs drainage work, crack repair, or structural opening changes, the cost of an incorrect fix can exceed the original labor savings.
Water removal deserves similar caution. Homeowners researching the risks of DIY water extraction should distinguish a small, clean spill from recurring foundation water or contaminated flooding. The latter can involve hidden moisture, damaged porous materials, and electrical hazards.
Use a written scope for every hired trade. The guide on how to manage contractors reinforces the practical basics: define who supplies materials, identify inspection responsibilities, document changes, and avoid approving upgrades verbally without a price attached.
Phasing the Project When the Budget Won't Stretch
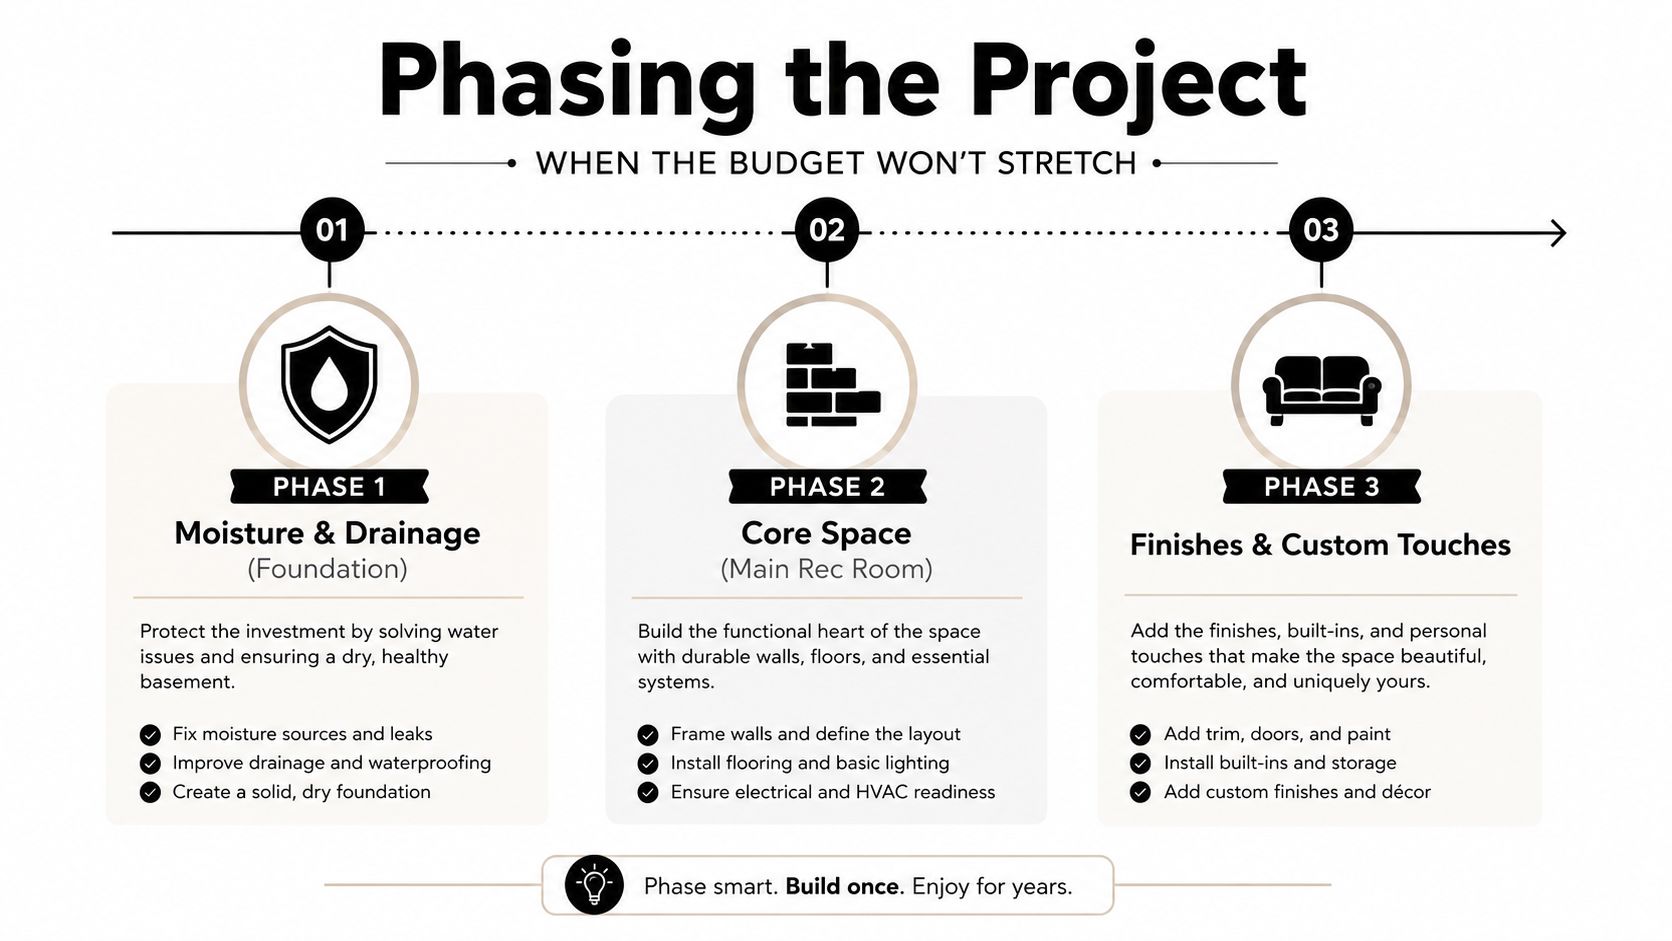
A basement doesn't have to become a finished house within a single construction push. Phasing works when the first phase protects the foundation and completes the work that would be expensive to reopen later.
Put infrastructure in the first wave
The first phase should cover moisture control, drainage corrections where necessary, slab preparation, exterior-wall framing, insulation, essential electrical rough-in, and a basic lighting circuit. Leave the room open if that makes inspection and access easier. A clean, durable open space is more useful than a collection of partially completed rooms.
Don't defer anything that must run under the slab or inside a closed wall. If a future bathroom needs a drain location, decide that before you seal the floor. If a bedroom may be added later, understand the egress requirement before framing a wall that blocks the only practical window location.
The second phase can create one defined room, such as a home office or rec room, with a partition, door, closet, and the required escape opening if the room will function as a legal bedroom. A code-compliant bedroom generally contributes more practical resale value than an elaborate theater that lacks useful storage or flexible circulation.
Defer cosmetics, not access
The third phase can add better flooring, finished trim, upgraded paint, built-in storage, and decorative lighting. A fourth phase can handle the bathroom, wet bar, or custom cabinetry once the main room is paid for and the homeowner has confirmed how the basement is used.
This approach protects finished work from later plumbing and electrical changes. It also lets the homeowner direct money toward the feature buyers can understand immediately, rather than scattering small upgrades across an unfinished footprint.
In Cherry Hill, Voorhees, Mount Laurel, and nearby communities, a buyer still expects the basics: dry walls, comfortable temperature, safe electrical work, legal room use, and practical storage. A phased plan should deliver those fundamentals before it spends on specialty amenities.
Storage and Built-Ins That Pay You Back at Resale
Storage is one of the easiest basement upgrades to undervalue because it isn't as dramatic as a bar or theater wall. Buyers notice it the moment they try to imagine where holiday bins, sports equipment, tools, luggage, and seasonal clothing will go.
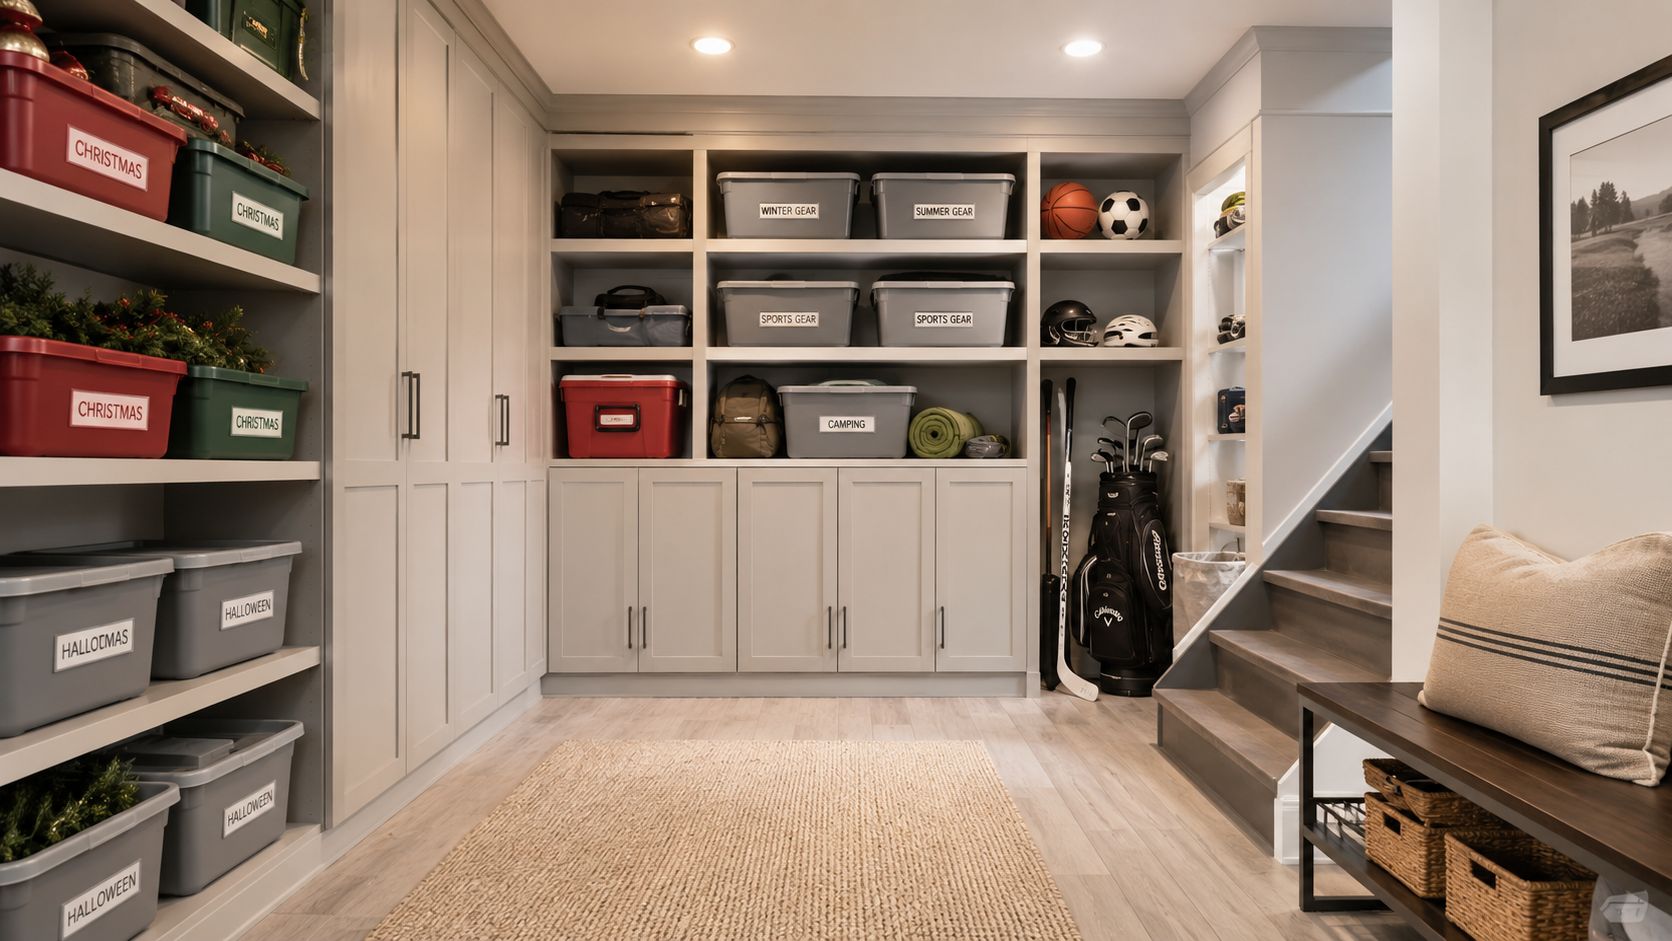
A finished basement with exposed utilities and boxes stacked in corners feels incomplete, even when the flooring and paint are attractive. A more convincing arrangement uses a closed mechanical room, a dedicated storage wall, and a drop zone near a walk-out or stair entry. The room looks intentional, and the homeowner hasn't sacrificed the entire floor plan to oversized built-ins.
Spend on the wall buyers can read
A single run of semi-custom cabinetry can do more work than scattered shelves. Use closed doors for items that create visual clutter, open shelving for baskets or frequently used equipment, and a durable counter for sorting, wrapping, or charging devices. Keep mechanical access panels visible and easy to remove. Never build a beautiful cabinet installation that prevents service technicians from reaching the furnace, water heater, sump, or electrical equipment.
Melamine closets and laminate shelving can create an orderly built-in appearance without the cost of fully site-built woodwork. The finish should match the use. In a utility zone, wipeable surfaces and adjustable shelves matter more than decorative end panels. In a mudroom-style entry, a bench, hooks, and closed shoe storage create a clearer purpose.
Buyers don't need every basement to look luxurious. They need it to feel usable, dry, organized, and easy to maintain.
South Jersey buyers often compare finished basements room by room, especially in Camden and Burlington County communities where lower-level living space is familiar. Storage gives them a practical reason to value the renovation. It also helps the basement function while you live there, which is a better return than installing a feature that only photographs well.
The custom closet organizing systems guide is useful for thinking through zones, vertical storage, and access before ordering cabinets. The budget move is to choose one focal wall and make it coherent. Repeating inexpensive shelves throughout the basement usually looks less finished than one well-planned storage run.
Putting It All Together Without Going Over Budget
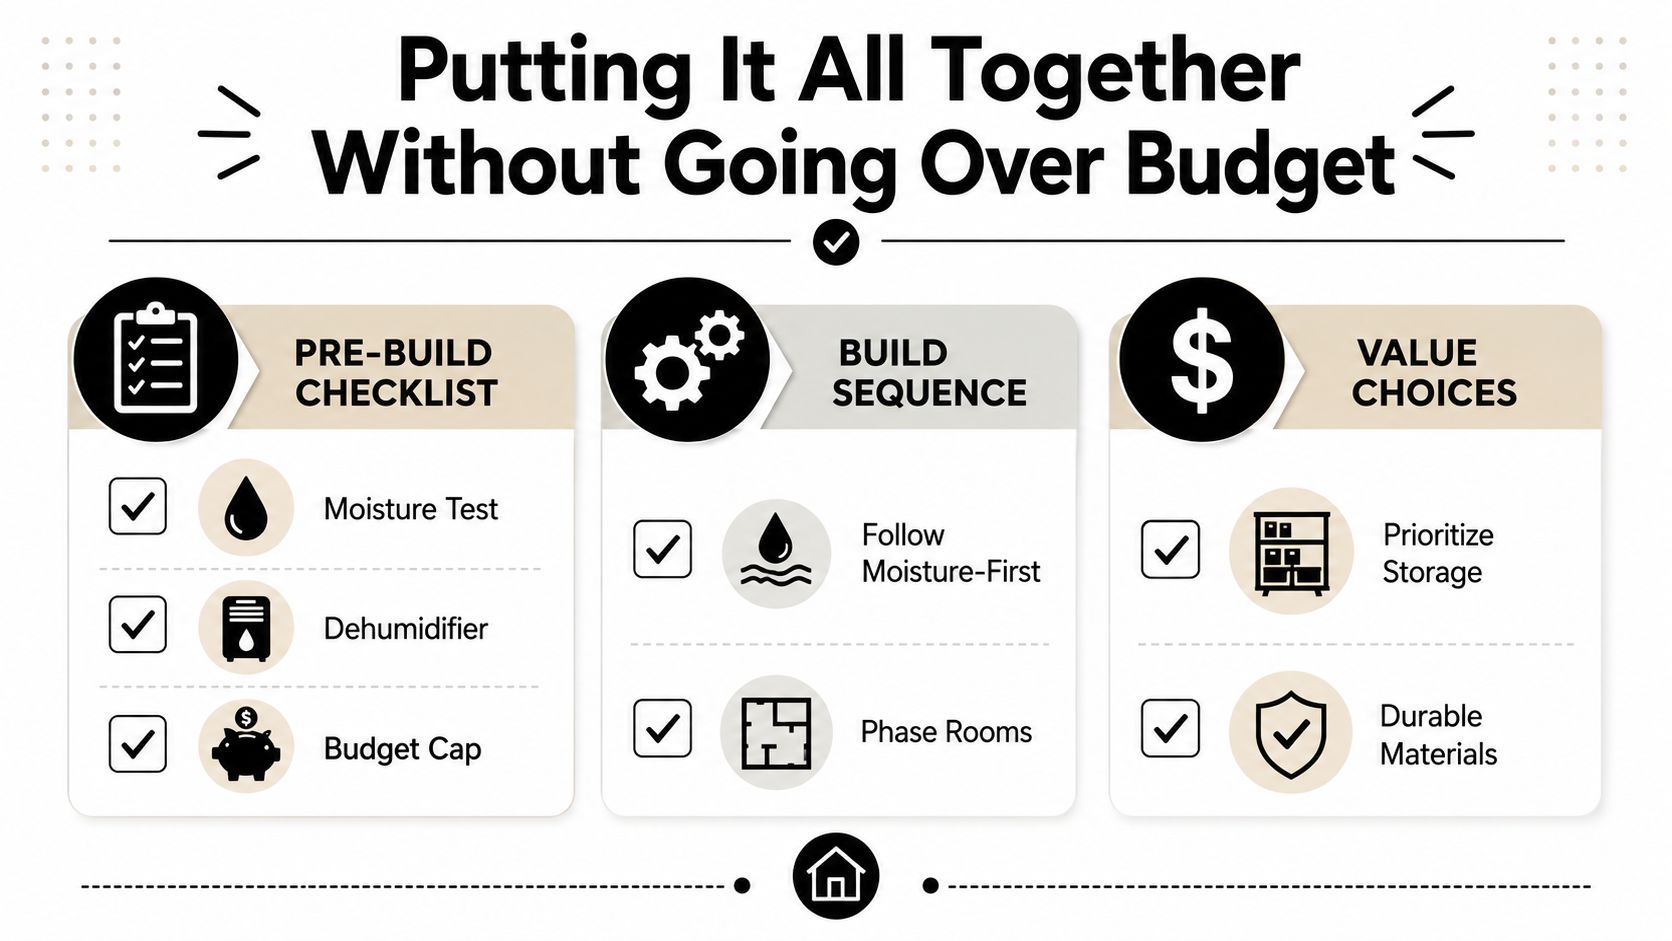
Start before demolition with a written plan. A 90-day pre-build checklist should include a moisture inspection, a dehumidification plan, a conversation with the local building department in Cherry Hill or Voorhees, and a line-item budget that separates required work from optional finishes.
Create a fixed budget sheet with rows for:
- Moisture and drainage: Include testing, repairs, sump or drainage improvements, and dehumidification.
- Code items: List permits, electrical inspection, egress requirements, smoke or safety equipment, and any required fire-rated assemblies.
- Core construction: Track framing, insulation, rough-ins, wall closure, flooring, paint, doors, and trim.
- Optional value work: Reserve a separate section for storage, cabinetry, upgraded lighting, a bathroom, or a wet bar.
A contingency row belongs in the spreadsheet. The brief planning target is 15%, but that figure should be treated as a budgeting allowance rather than a guarantee, and it must be connected to a cited source when presented as a quantified recommendation. The practical point is simple: don't allocate every dollar to selected finishes before the basement is opened and inspected.
A workable seven-hundred-square-foot sequence
For a 700-square-foot South Jersey basement, begin with the walkthrough and moisture decisions before ordering finish materials. Set a hard project cap using the verified national and 2026 ranges, then obtain trade quotes for the items that can change the scope, especially waterproofing, electrical, HVAC, plumbing, and egress.
During the early construction period, complete moisture work, permits, layout, and rough-ins. In the middle period, finish insulation, drywall or an approved alternative, and inspections. Only after those checkpoints should you order final flooring, trim, storage, and decorative fixtures.
Don't let these four overruns sneak past the budget:
- Efflorescence appears mid-project. Stop and investigate instead of sealing it behind drywall.
- Flooring gets upgraded after wall closure. Choose the floor before trim heights, transitions, and door clearances are finalized.
- A bathroom gets added without permitting. Plumbing changes can affect slab work, venting, electrical, and inspections.
- Egress gets measured at the end. Confirm window size, opening height, well conditions, and access before framing a bedroom.
A finished basement supports resale best when the work is documented and functional. Keep waterproofing records, permit approvals, product information, and inspection notes with the property files. A dry lower level with legal room use, accessible systems, durable finishes, and one strong storage wall usually makes a more credible impression than a collection of disconnected cosmetic upgrades.
The following walkthrough can help you visualize a disciplined construction plan before committing to materials.
If you're planning cabinetry, storage, or a coordinated bathroom as part of the basement, start with the layout and budget rather than a product list. The Cabinet Coach offers personalized design guidance, curated cabinetry, countertops, hardware, and tile through a mobile showroom experience for South Jersey homeowners. Visit The Cabinet Coach to discuss a practical storage or bathroom plan that fits your basement's sequencing, budget, and long-term use.