
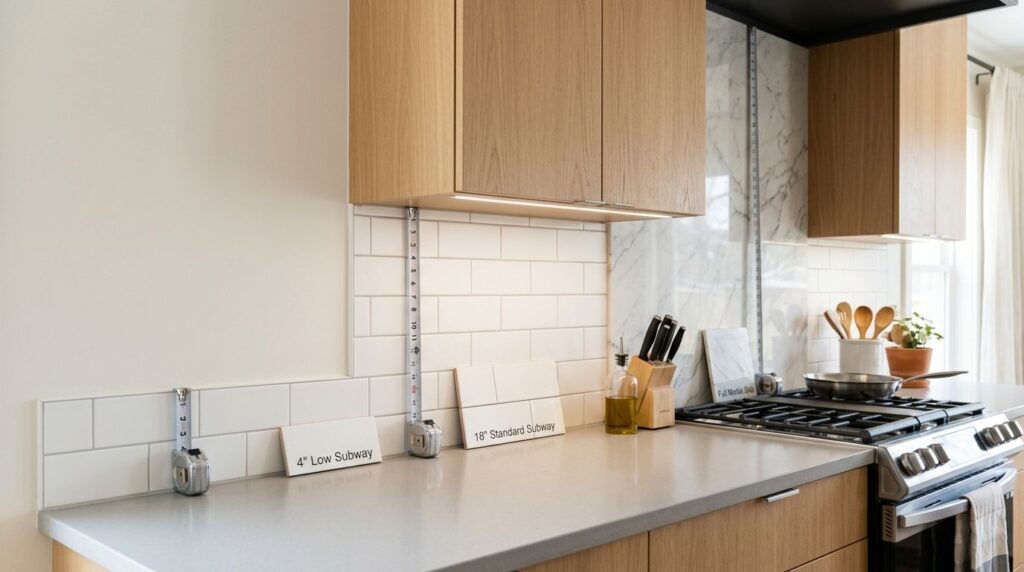
The traditional answer is a 4-inch backsplash lip, and the modern standard is usually 15 to 18 inches from the countertop to the bottom of the upper cabinets. If you're standing in your kitchen right now trying to decide where tile should stop, start there, but don't stop thinking there.
Most homeowners hit this decision at the same moment. The cabinets are chosen. The counters are coming. You can finally see the room taking shape, and then one question stalls everything: how high should the backsplash go?
In South Jersey, that question gets even trickier. Older homes in Cherry Hill, Haddonfield, Collingswood, and Audubon don't always give you neat, predictable cabinet spacing. Appliance garages, taller coffee makers, uneven soffits, and odd wall transitions can make a generic rule look sloppy fast. That's why I don't recommend choosing backsplash height by trend alone. I recommend choosing it by how you cook, what sits on your counters, and where your kitchen naturally wants the tile to begin and end.
A lot of design advice treats backsplash height kitchen decisions like a fixed formula. It isn't. A backsplash should protect the wall, finish the room, and look intentional from every angle. If it doesn't do all three, it's the wrong height.
Table of Contents
- Choosing Your Kitchen Backsplash Height
- Understanding Standard Backsplash Heights
- Advanced Options Full Height and Behind the Stove
- How to Measure Your Kitchen Backsplash Perfectly
- Matching Materials and Trim to Your Backsplash Height
- Avoiding Common Mistakes and Planning Your Project
Choosing Your Kitchen Backsplash Height
A homeowner recently described this phase perfectly. She said, "I can pick cabinet colors all day, but I have no idea where the backsplash is supposed to stop." That's normal. The wall looks simple until you notice the microwave, the stand mixer, the outlet line, the window trim, and the fact that one side of the room doesn't match the other.
That's why a backsplash height kitchen decision shouldn't start with Pinterest. It should start with your actual wall and your actual habits. If your espresso machine lives under the cabinets every day, a textbook-height backsplash that dies awkwardly behind it isn't a good design. If you're tall and prep close to the wall, a little more coverage may work better.
Practical rule: A backsplash should end at a place that looks deliberate. Cabinet edge, window casing, hood line, ceiling, or countertop end. Random stopping points look like mistakes.
For inspiration, it's useful to see how other designers approach kitchen planning as a whole, not just tile in isolation. This guide for Adelaide homeowners does a good job showing how layout, cabinetry, and finishes need to work together from the start.
You should also look at current kitchen backsplash trends with a little skepticism. Trends can show you what's current. They can't tell you whether a tall coffee maker is going to block half your tile or whether your upper cabinets sit at an odd height because your house was built in another era.
Your kitchen should decide the height
I like to ask homeowners three blunt questions before picking a backsplash height:
- Who cooks most often: If one person uses the kitchen most, their reach, sightline, and prep habits matter.
- What stays on the counter: Coffee makers, toasters, knife blocks, and mixers can either support the layout or wreck it visually.
- Where are the natural stopping points: Corners, cabinet ends, windows, and hoods should guide the tile line.
South Jersey homes rarely fit a generic rule cleanly
Older homes often have quirks. Newer homes often have builder-grade shortcuts. Both can make a standard answer feel off.
If the wall space is clean and consistent, standard heights work well. If the room has mismatched cabinet heights, deep window trim, or one open side with no upper cabinet to "catch" the tile, you need a more custom approach. That's not overthinking it. That's good design.
Understanding Standard Backsplash Heights
The industry still revolves around two common starting points. One is traditional. One is modern. Both can work. The mistake is assuming one of them is automatically right for every kitchen.
The old standard still exists for a reason
The 4-inch backsplash is still the historical standard and remains the most common baseline in traditional kitchens, with many solid surface countertops made with an integral 4-inch backsplash for an integrated appearance, as noted in this backsplash height guide from Apollo Tile.
That setup became standard because it was simple, affordable, and easy to fabricate with the countertop. In many homes, especially where the backsplash material matches the counter, it still looks clean enough.
However, in a lot of renovated kitchens, a 4-inch lip can feel incomplete. It protects the very bottom of the wall, but it leaves a band of painted drywall above the work surface. If you cook often, that's the part of the wall that starts showing wear.
The modern standard feels more finished
In more current kitchen design, the average backsplash height has shifted to about 15 inches, and many designers recommend 17 to 18 inches as a strong middle ground for protection and appearance, according to this expert backsplash height overview.
That range usually fills the wall area from countertop to upper cabinet. It looks complete because it uses the whole available space. It also gives you more practical wipeable surface where splatter happens.
If you're trying to choose between the two, use this as your starting screen.
| Feature | 4-Inch Backsplash | 18-Inch Backsplash |
|---|---|---|
| Typical look | Traditional, minimal | More current, more complete |
| Coverage | Basic wall protection | Better daily protection |
| Material use | Less material | More material |
| Best fit | Budget-focused or integrated countertop backs | Kitchens with upper cabinets and active cooking |
| Visual impact | Quiet | Stronger design presence |
| Countertop pairing | Often same as countertop material | Often tile, slab, or a deliberate feature material |
A lot of homeowners also get stuck on tile selection once they understand the height options. If that's you, this guide on how to select tile backsplash is a smart next step.
If your kitchen already has upper cabinets creating a clear band above the counter, filling that space usually looks more intentional than stopping at a short lip.
Advanced Options Full Height and Behind the Stove
Some walls deserve more than the standard answer. The area behind the stove is one of them. Full-height applications are another.
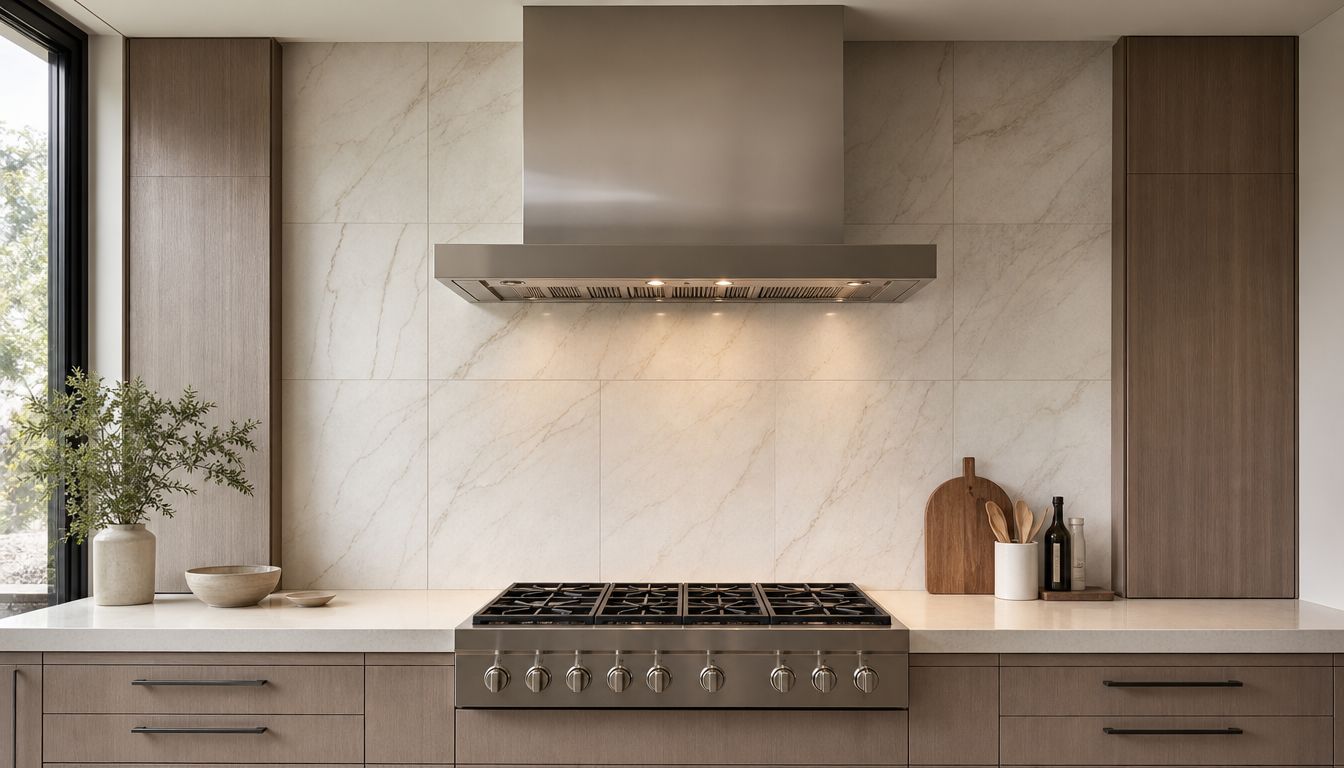
Behind the stove needs more protection
For the wall behind a cooking range, the benchmark changes. A backsplash behind the stove should run 30 to 36 inches, or continue up to the range hood, because that area takes the most heat, grease, and steam exposure, as explained in this guide to backsplash height behind the stove.
This isn't a decorative extra. It's a functional requirement if you want that wall to stay in good shape.
When homeowners keep the whole kitchen at one low backsplash height and do nothing special behind the range, they usually regret it. Frying sends grease upward. Boiling sends steam upward. Sauce splashes don't politely stay within a neat little strip above the countertop.
Full height isn't just a luxury move
A full-height backsplash runs from the countertop all the way to the ceiling, soffit, or another natural top line. It is often considered a premium style choice. I think that's only half the story.
The more practical argument is maintenance. Full-height tile costs more up front, but it also removes more painted wall from the mess zone. That's a big deal in busy kitchens. This discussion of backsplash heights and maintenance tradeoffs points out the overlooked advantage of reducing exposed painted wall in areas hit by grease, steam, and water.
Less painted wall means less fussy cleanup. If you cook often, that matters every single week.
Here's where full height makes the most sense:
- Behind a range wall: This is the clearest yes. It protects better and looks resolved.
- Around open shelving: Tile gives the shelves a finished backdrop instead of leaving patchy painted wall.
- In family kitchens: If the kitchen gets hard daily use, a larger wipeable surface is often worth it.
- On statement walls: If you're using a slab, zellige, handmade tile, or a bold stone, full height lets the material do its job.
If you like classic looks that won't feel dated fast, browsing timeless kitchen backsplash ideas can help you decide whether your material supports a standard band or deserves a bigger canvas.
My recommendation
Use one of these approaches:
- Standard field, taller range wall if you want balance.
- Full height on one focal wall if you want impact without tiling everything.
- Full height throughout if you want the easiest daily wipe-down and a more custom finish.
What I wouldn't do is treat the stove wall like every other section. It isn't.
How to Measure Your Kitchen Backsplash Perfectly
Most measuring mistakes don't happen because someone can't use a tape measure. They happen because someone measured the wall and forgot to measure the kitchen as it's used.
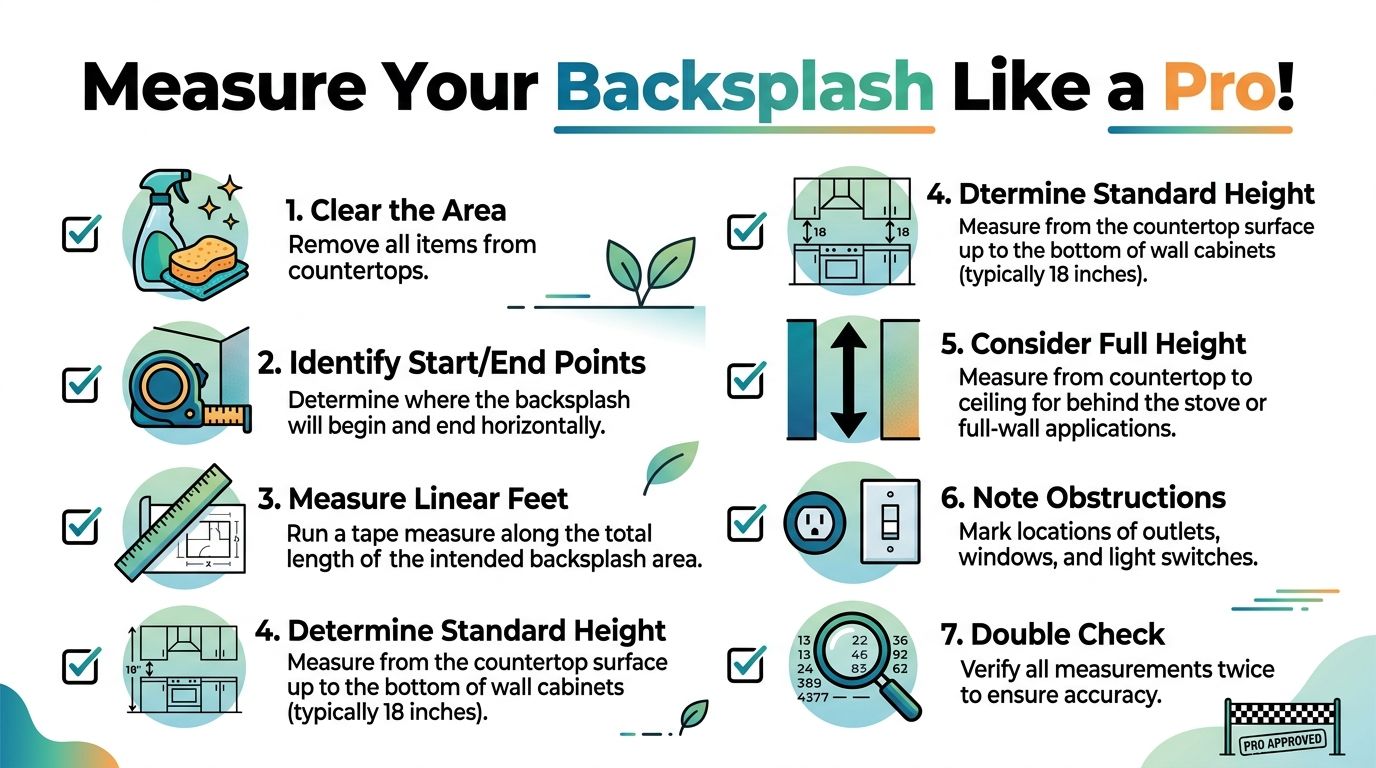
Start with the visual guide below, then apply it with your appliances in place.
Start with the wall, then measure the life happening in front of it
A common problem with backsplash planning is relying on the universal cabinet-gap rule and ignoring who uses the kitchen. This backsplash planning article highlights the gap clearly: one-size-fits-all advice often fails when appliance clearance and the primary cook's stature aren't considered.
That's exactly what happens in older South Jersey kitchens. The wall may say one thing. The appliances and daily routine say another.
Before you finalize tile height, put your real countertop items where they live. Set out the coffee maker. Put the stand mixer in its corner. Place the toaster oven where it sits. Then look at the height where the backsplash would end.
A backsplash that stops just above a bulky appliance can look clean. One that cuts awkwardly behind it usually looks accidental.
A simple measuring routine that prevents expensive mistakes
Use this order:
- Clear the counters first. You need a clean starting point, not measurements taken around clutter.
- Mark the horizontal run. Measure where tile begins and where it ends. Don't assume it should span every wall.
- Measure the vertical height. For a standard installation, measure from the countertop to the bottom of the upper cabinets.
- Measure special zones separately. Behind the stove, windows, and open walls should get their own measurements.
- Note every outlet and switch. These affect cuts, layout, and how centered the finished work feels.
- Subtract openings where needed. Windows and large interruptions change the order quantity and layout planning.
- Measure twice. Then check once more after appliances are in place.
For homeowners who want a stronger handle on renovation measurements overall, this walkthrough on how to measure kitchen cabinets is worth saving.
A quick video can help if you're more visual:
What to write down
Don't just write dimensions. Write decisions.
- Appliance locations: Especially anything tall.
- End points: Cabinet edge, window trim, corner, hood line.
- Material changes: Tile field, accent area, slab section.
- Trim needs: Open ends need a clean finish plan.
This is the difference between "we measured the wall" and "we planned the backsplash."
Matching Materials and Trim to Your Backsplash Height
Height affects more than coverage. It changes which materials look balanced, how busy the wall feels, and what kind of edge detail you need to make the installation look finished.
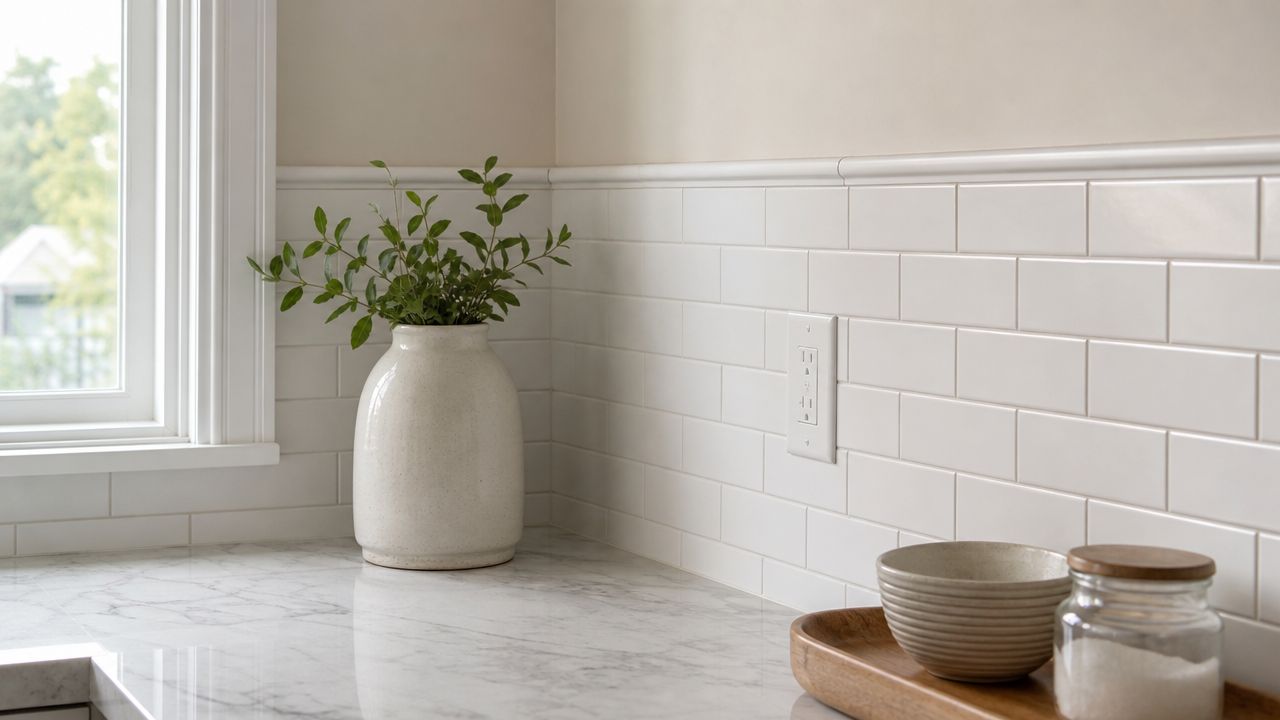
Material scale should match wall coverage
A short backsplash and a tall backsplash don't carry material the same way.
For a lower or standard-height backsplash, smaller-format tile often works beautifully. Subway tile, square tile, and restrained mosaics can give that band enough detail without making it feel overdesigned. In a tighter vertical space, these formats usually feel proportional.
For full-height applications, I generally prefer fewer interruptions. That means:
- Large-format tile if you want a cleaner, quieter field
- Stone or quartz slab if you want almost no visual breaks
- Simple handmade tile if you want texture without a chaotic pattern
Busy mosaics can work on a full wall, but you need discipline. If the tile pattern is loud and the wall is large, the kitchen can start feeling visually cramped. That's especially true in kitchens with multiple cabinet finishes, patterned counters, or a strong hood design.
Termination points matter more than most homeowners think
Most backsplash mistakes don't come from the center of the wall. They happen at the edges.
If tile dies into a cabinet side, corner, or window casing, the finish is usually easy because the edge feels naturally contained. If tile ends on an open painted wall, you need a deliberate trim strategy.
Here are the main finish options I recommend:
- Bullnose tile: Best when the manufacturer makes a matching edge piece and you want a traditional finished look.
- Pencil liner: Good when you want a more decorative border or a classic framed effect.
- Metal profile trim: Clean, sharp, and ideal for modern kitchens. Products like Schluter profiles are useful in this application.
- Caulked termination: Fine in very limited conditions, but only when the edge dies into something clean and intentional.
Open wall ending? Plan the edge before you pick the tile. Some tile lines don't offer matching trim, and that matters more than people expect.
Match the trim style to the kitchen style
I use a simple filter.
| Kitchen style | Better trim choice |
|---|---|
| Traditional | Bullnose or pencil liner |
| Transitional | Bullnose, slim metal, or a subtle stone edge |
| Modern | Metal profile or slab edge |
| Farmhouse | Simpler edge treatment, often with classic tile shapes |
One more opinion. If your backsplash ends a few inches past the upper cabinet for no clear reason, it will look wrong no matter how beautiful the tile is. Follow the architecture. End at cabinet lines, corners, windows, or another obvious stop.
Avoiding Common Mistakes and Planning Your Project
The easiest way to waste money on a backsplash is to treat it like a decorative afterthought. It isn't. It's part finish detail, part wall protection, part visual framing device. Small planning misses show up immediately once the tile is on the wall.
The mistakes that make a new backsplash look wrong
I see the same errors again and again:
- Stopping tile at an awkward point: If the backsplash ends mid-wall with no relation to a cabinet, window, or hood, it looks accidental.
- Ignoring outlet layout: Badly placed cuts around switches and receptacles can make even expensive tile look amateur.
- Choosing porous material without thinking about cleanup: Some surfaces need more care than homeowners expect in splash zones.
- Skipping trim planning: Open tile edges need a finish strategy from the start.
- Treating all walls the same: The sink wall, prep wall, and range wall don't take the same abuse.
And yes, budget matters. But don't reduce the choice to "less tile equals smarter spending." As noted earlier in this article, full-height coverage can reduce exposed painted wall, which makes cleanup simpler in active kitchens. That's a practical benefit, not just a design statement.
Plan the project like a designer, not like a last-minute shopper
Before ordering anything, confirm these decisions:
- Final height by wall section
- Exact stopping points
- Tile orientation and layout
- Outlet and switch plate locations
- Trim type
- Material suitability for the cooking zone
- Clearance requirements around the range and hood
That last point matters. If you're renovating in New Jersey, verify local code requirements for clearances near cooktops, hoods, and combustible materials. Don't assume a pretty inspiration photo follows your local rules.
If you're mapping the whole renovation at once, this resource on how to plan a kitchen remodel can help you connect backsplash decisions to cabinetry, counters, lighting, and scheduling.
Here's my direct recommendation. If your kitchen is straightforward, use the cabinet line to guide the backsplash and keep the ending points clean. If your kitchen has odd cabinet spacing, tall appliances, or an exposed stove wall, stop following generic internet rules and customize it. That's how you get a kitchen that looks finished instead of merely updated.
If you want help deciding the right backsplash height for your kitchen, The Cabinet Coach can help you sort it out without the guesswork. Their South Jersey team brings design guidance, cabinetry, countertops, hardware, and tile planning together so your backsplash height fits your home, your appliances, and the way you cook.