

You've picked the tile, saved a dozen inspiration photos, and started imagining the finished bathroom. Then demolition begins, the old tile comes down, and the “simple refresh” reveals a soft shower wall, an uneven floor, poor drainage, or a fan that never properly removes moisture. The tile was only the visible part of the problem.
A successful bathroom tile remodel starts beneath the surface. Substrate condition, waterproofing, slope, ventilation, cabinetry dimensions, plumbing, and installation sequence determine whether your new tile remains attractive and functional or becomes an expensive cover-up. The right design still matters, but it comes after the assembly is sound.
Table of Contents
- Why a Bathroom Tile Remodel Is More Than Picking Tile
- The Hidden Layers Beneath the Tile
- Tile Materials, Formats, and Finishes Compared
- Layout Patterns, Grout Choices, and Trim Details
- Budget Ranges, Line Items, and Cost Drivers
- Sequencing Tile Work With Cabinetry and Other Trades
- Accessibility, Ventilation, and Moisture Risk
- Hiring, Project Coordination, and a Practical Next Step
Why a Bathroom Tile Remodel Is More Than Picking Tile
A homeowner in Cherry Hill might begin with a familiar plan: replace dated beige tile, update the vanity, install a frameless shower door, and finish within a manageable schedule. That plan can change quickly when demolition exposes damaged backer board around the valve, a shower pan that doesn't drain correctly, or a subfloor that isn't flat enough for the selected format.
Those discoveries aren't unusual defects in the tile itself. They're failures or limitations in the layers supporting it. Tile needs a stable substrate, compatible setting materials, a continuous waterproofing strategy in wet areas, properly placed drains, and transitions that work with the rest of the room.
Practical rule: Choose the assembly first, then choose the finish.
The order of decisions matters. Confirm the room's dimensions and framing, locate plumbing and electrical work, inspect the subfloor and wall surfaces, plan waterproofing, and resolve drainage before finalizing tile. Cabinet depth, vanity height, countertop thickness, shower glass, and door swings also affect the layout. A tile setter shouldn't be asked to solve those conflicts after materials arrive.
A coordinated design process helps prevent the common situation where the tile looks right on a screen but doesn't work at the niche, curb, doorway, or vanity edge. The same principle applies to the rest of the room, because a compelling inspiration board can create conflicting finishes and proportions if nobody turns it into a coordinated specification. The truth about cohesive bathroom design is that individual selections need a shared plan.
Tile also has a supply dimension. A particular color, trim, mosaic, or production lot may not be available when replacement material is needed. Treat the remodel as a construction project with design decisions, not as a shopping trip with installation added later.
The Hidden Layers Beneath the Tile
A tiled wall is a stack of materials, and every layer has a job. The visible tile protects and decorates the surface, but it doesn't replace the structure or waterproofing behind it.
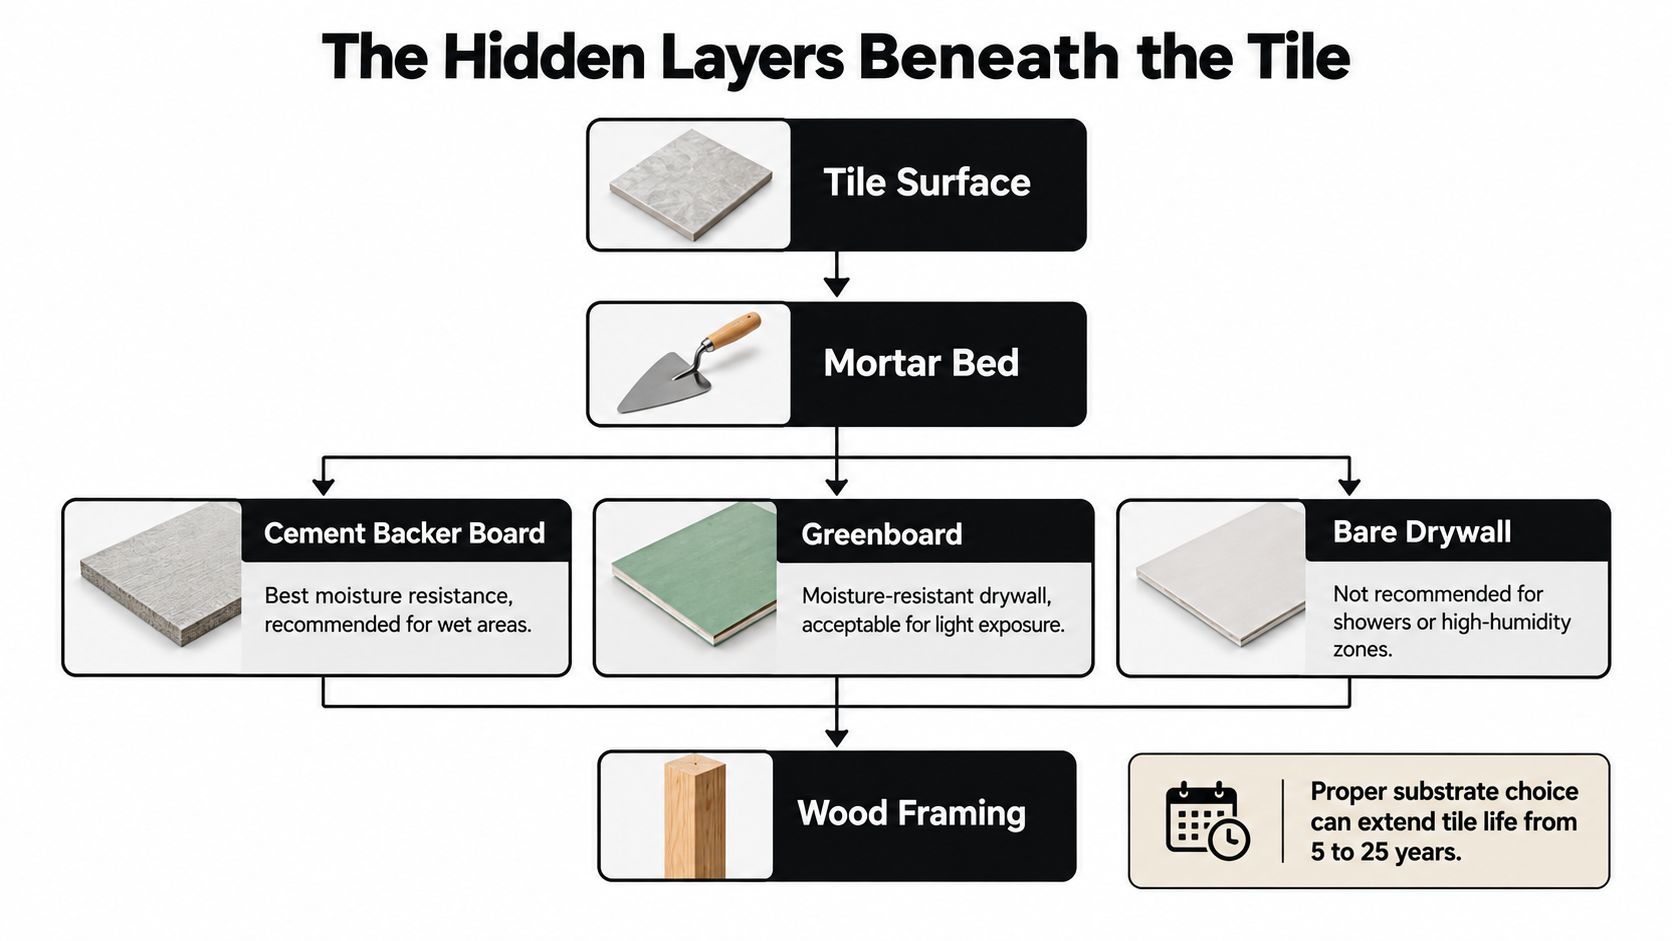
Build the wall from the framing outward
Start by checking whether the framing is sound, plumb, and adequately supported. A wall that bows or moves will make large-format tile difficult to align and can stress grout joints. The substrate then has to match the exposure:
- Cement backer board: A common choice for shower walls when installed with the required fasteners and joint treatment. It provides a durable tile substrate, but it isn't automatically waterproof.
- Foam backer panels: These can combine a tile-ready surface with a system-specific waterproofing approach. Follow the manufacturer's fasteners, sealants, and seam details.
- Greenboard: Moisture-resistant drywall may suit limited, non-wet exposure, but it shouldn't be treated as a shower waterproofing system.
- Bare drywall: Don't use it as the tile substrate in a shower or other routinely wet zone.
In wet areas, install a continuous membrane beneath the tile. A membrane meeting ANSI A118.10, where required by the chosen installation method, is intended to stop water before it reaches framing, backer materials, insulation, or nearby cabinetry. Cementitious grout is porous, and joints at corners, niches, benches, valves, and changes of plane need compatible waterproofing details.
Confirm the floor before selecting the pattern
A shower floor must direct water to the drain. The pan, drain connection, corners, penetrations, and curb or entry all need inspection before tile hides them. A flood test before finish installation provides a practical check that the pan assembly holds water as intended.
For level interior bathroom floors that may be walked on while wet, specify tile with a wet dynamic coefficient of friction of at least 0.42 under the applicable ANSI A137.1 classification, measured through the ANSI A326.3 method. This benchmark doesn't make a floor slip-proof. Soap, standing water, slope, footwear, wear, cleaning, tile texture, and format still affect traction, as explained in this guide to wet slip resistance.
Small mosaics can follow shower slopes more easily because their grout joints allow more changes in plane. That doesn't eliminate the need to verify the full assembly, drainage, cleaning requirements, and manufacturer's use guidance. For practical comparisons of drainage, maintenance, and appearance, review these shower floor options.
Tile Materials, Formats, and Finishes Compared
Once the substrate and waterproofing plan are settled, compare the surface materials by use rather than by appearance alone. Porcelain is dense and generally well suited to floors and wet areas. Ceramic offers broad color and pattern choices and is often easier to cut. Glass works well as an accent or decorative wall surface but requires careful substrate preparation and setting materials. Natural stone brings authentic variation but usually demands more maintenance.
| Material | Water Absorption | Maintenance | Typical Use | Price Band |
|---|---|---|---|---|
| Porcelain | Low, depending on product classification | Low to moderate | Floors, shower walls, shower floors when rated, large-format walls | Moderate to high |
| Ceramic | Varies by product, generally more porous than porcelain | Low to moderate | Wall tile, backsplashes, decorative areas, selected floors | Low to moderate |
| Glass | Nonporous surface, installation-sensitive | Low surface maintenance, grout still needs care | Accents, niches, backsplashes, feature walls | Moderate to high |
| Natural stone | Varies by stone and finish | Moderate to high, often needs sealing | Floors, walls, ledges, feature areas | Moderate to high |
Match format to the surface
A large-format porcelain wall can reduce grout density and create a calm, continuous appearance, but it demands flatter walls, careful handling, and an installer who understands lippage control. A subway tile is more forgiving visually and easier to replace, though its many joints create a busier surface. Plank tile can mimic wood, but the layout must account for room length, transitions, and the direction of the pattern.
Mosaics are often the better technical choice on shower floors because they adapt to slope and drainage. A polished finish may brighten a wall, but it can show water marks and isn't a sensible default for a wet walking surface. Matte and lightly textured finishes generally deserve closer consideration for floors, provided the product has the appropriate wet-use classification.
Stone needs a maintenance plan before installation. Ask how the specific material should be sealed, what cleaners are compatible, and whether heating is appropriate for the floor assembly. This sealing and heating advice for stone is useful background, but the tile and setting-material manufacturers' instructions control the actual specification.
The U.S. market also makes product planning important. Ceramic-tile consumption reached 3.11 billion square feet in 2021, declined to 2.70 billion square feet by 2024, and imports supplied roughly 71.5% of 2024 consumption, according to the U.S. ceramic-tile market update. That doesn't make imported tile a bad choice. It means you should order enough material, confirm trim availability, record the product and lot information, and keep spare pieces for future repairs. Use this bathroom tile selection guide to evaluate the design against the room's actual demands.
Layout Patterns, Grout Choices, and Trim Details
Tile layout determines how the room reads. A straight stack emphasizes order and can make a modern wall feel deliberate. A brick pattern softens the geometry and suits subway tile. Herringbone adds movement but creates more cuts around corners, niches, drains, and door openings. Large-format layouts minimize joints, though they leave less room to hide an uneven substrate.
Draw the layout before the mortar
Don't let the installer begin with the first full tile at the most convenient corner. Establish the visual centerline, identify the most visible wall, and decide where cuts will land. A niche should align with the field tile or use a deliberate accent. A shower curb or entry shouldn't end with a sliver that makes the entire installation look accidental.
Ask for a dry layout or scaled elevation before setting begins. Confirm:
- Starting points: Decide which wall or floor area receives the strongest visual emphasis.
- Cut locations: Keep narrow cuts away from focal areas and balance them across opposing edges.
- Niche alignment: Coordinate shelf height, grout lines, trim, and bottle clearance.
- Transitions: Resolve how floor tile meets hardwood, another tile, a threshold, or cabinetry.
- Drain relationship: Plan cuts around the drain rather than improvising them after the field is set.
Treat grout and trim as working details
Grout color changes the apparent scale of the room. A close match blends joints and quiets a pattern, while contrast makes every line more visible. Joint width needs to follow the tile's actual dimensional variation and the grout manufacturer's instructions. Cementitious grout is familiar and workable, while premixed or urethane products may offer different maintenance characteristics, but compatibility and cure requirements matter more than marketing language.
Trim protects exposed edges and gives the setter a clean stopping point. A metal profile works well at outside corners and can create a crisp contemporary line. Bullnose tile provides a softer, material-matched edge when available. Pencil trim suits framed accents and niche borders, but it should look intentional rather than serving as a patch for a poor layout.
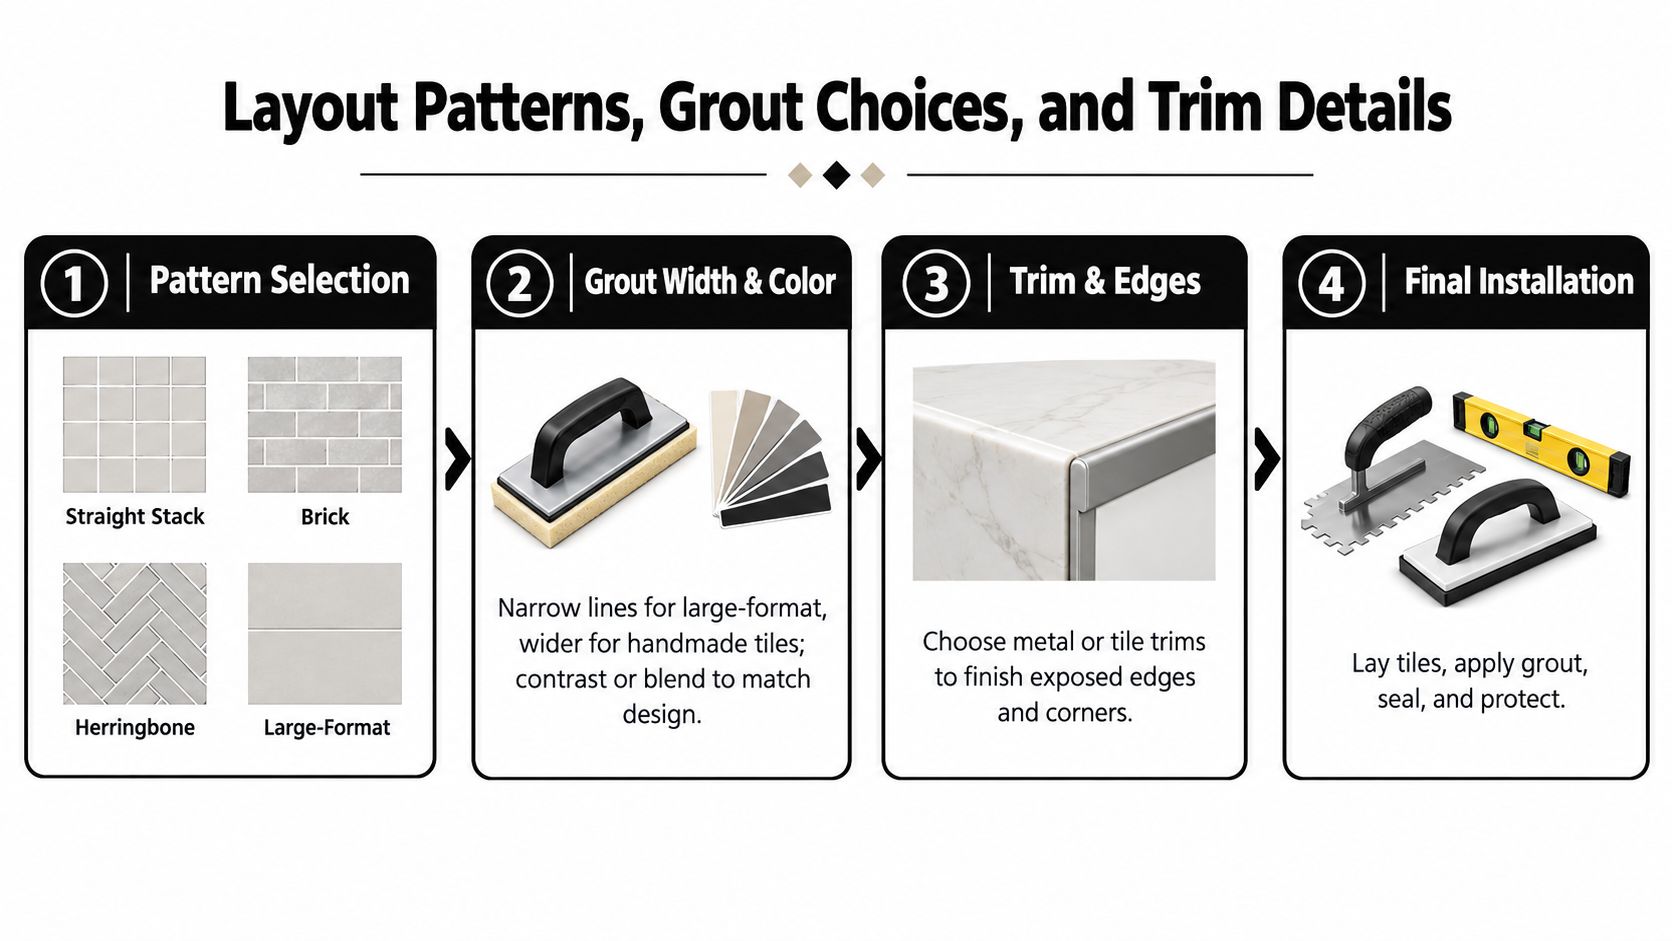
Decide these items before delivery. A tile setter shouldn't be waiting on a trim profile, grout color, or niche elevation while the rest of the project sits idle. If the tile continues into a vanity backsplash or another room, coordinate those terminations with cabinetry and countertop dimensions using this guide on selecting a tile backsplash.
Budget Ranges, Line Items, and Cost Drivers
A credible bathroom tile budget is a collection of line items, not a single price per square foot. The tile area may be modest, but the labor to prepare the room, protect waterproofing, make precise cuts, and coordinate trades can dominate the estimate.
Separate visible finishes from hidden work
A working proposal should identify demolition, disposal, substrate repair, waterproofing, setting materials, tile, grout, trim, installation labor, and final sealing where applicable. It should also state whether the price includes plumbing changes, electrical work, shower-pan construction, glass, painting, cabinetry modifications, countertop work, and permits or inspections.
Room size affects tile quantity and installation time, but it isn't the only driver. A small shower with a curbless entry, multiple niches, imported trim, a linear drain, and a complicated pattern can require more coordination than a larger, straightforward floor. A flat or damaged subfloor may add leveling or rebuilding work before the tile setter can begin.
Build the estimate around uncertainty
Use allowances carefully. An allowance for tile can help during early design, but it should identify the assumed material, format, trim, and setting requirements. Otherwise, a low allowance makes the initial proposal look attractive while shifting the actual cost into change orders.
Labor-heavy choices include herringbone, small mosaics, large-format panels, natural stone, numerous outside corners, and patterns that must align across adjacent walls. Plumbing rough-in for a new valve or relocated drain can also affect the schedule and the finished wall assembly. For a useful discussion of structuring plumbing estimates and avoiding hidden scope, review these UK plumbing job pricing tips, then ask your local contractor to adapt the same clarity to New Jersey conditions.
The supply chain deserves attention too. In 2019, U.S. ceramic-tile consumption totaled 2.9 billion square feet, while domestic production supplied 29.4% of the market, as documented in this U.S. ceramic-tile market history. Product variety often depends on international sourcing, so lead time, replacement availability, freight damage, and discontinued trim should appear in the planning conversation. A detailed bathroom remodel cost breakdown can help you compare bids by scope rather than by headline total.
Sequencing Tile Work With Cabinetry and Other Trades
A bathroom remodel runs better when each trade knows what must be finished before the next one arrives. The usual sequence begins with demolition, framing changes, rough plumbing, rough electrical work, and inspection requirements. Then the crew corrects the substrate, installs the backer and waterproofing system, confirms the shower pan, sets tile, grouts, and protects the finished surfaces.
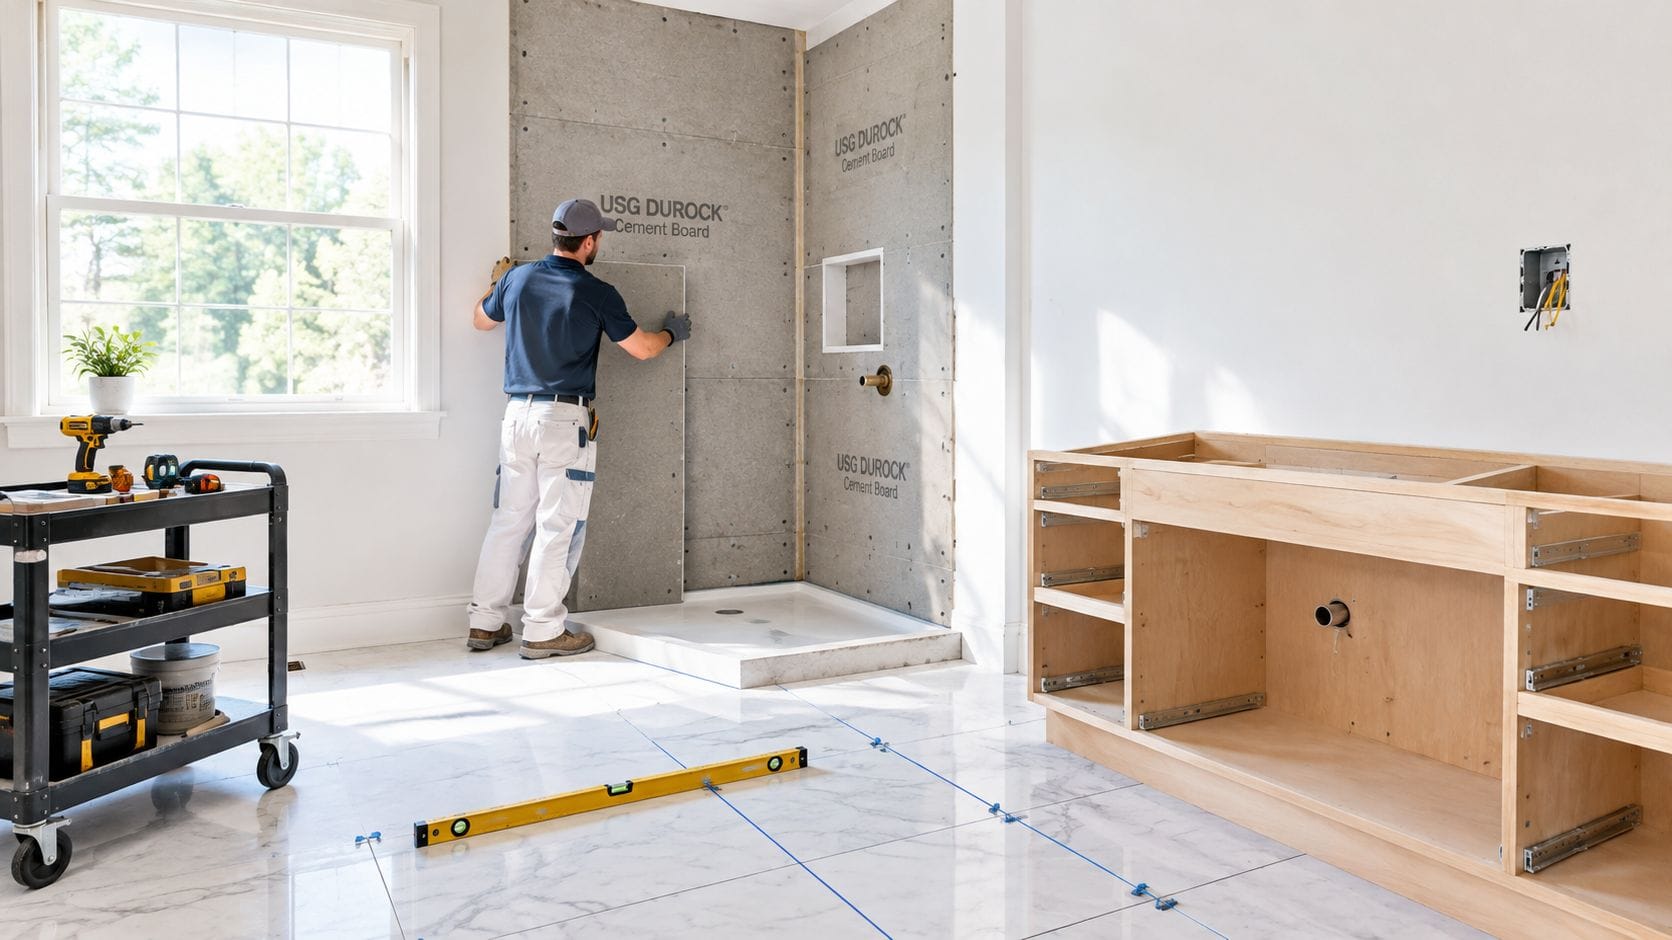
Tile selections should be substantially resolved before cabinetry dimensions are finalized. Floor height affects door clearances, vanity placement, toilet flange relationships, and transitions. Wall tile thickness affects trim, outlet extensions, mirror placement, and how a backsplash meets the countertop.
Keep the handoffs clear
After tile has cured and the appropriate surfaces are protected, the countertop fabricator can template the vanity. Shower glass usually waits until the finished opening exists, because the installer needs accurate dimensions rather than rough framing assumptions. Finish plumbing, electrical devices, hardware, mirrors, paint touch-ups, and accessories follow in a controlled order.
A practical handoff list includes:
- Before tile: Confirm rough plumbing, electrical boxes, framing, substrate flatness, shower slope, waterproofing details, and inspection requirements.
- During tile: Protect drains, preserve movement joints, verify layout lines, and keep grout and trim decisions documented.
- After tile: Allow required cure time, then template countertops, measure glass, install cabinetry and hardware, and complete finish connections.
The mistake to avoid is treating cabinetry, countertops, tile, and plumbing as independent purchases. In a tight bathroom, a vanity that is slightly deeper than planned can interfere with a door swing or reduce the usable transition at the shower. A coordinated mobile showroom can bring cabinet door samples, countertop selections, hardware, and tile into the same review, which makes conflicts easier to identify before ordering.
This short installation overview shows why the visible tile work depends on substantial preparation. Watch it after reviewing your contractor's scope, not as a substitute for a system-specific installation plan.
Ask every bidder to explain the sequence in writing. If the proposal has no clear point for waterproofing verification, shower-pan testing, countertop templating, or glass measurement, the schedule is incomplete.
Accessibility, Ventilation, and Moisture Risk
Accessibility isn't a decorative upgrade. It changes the shower entry, floor format, slope, reinforcement, lighting, controls, storage, and clearances. The 2025 U.S. Houzz Bathroom Trends Study, which surveyed 1,738 homeowners, found that 68% considered special needs in their remodels; low-curb showers appeared in 52% of projects, curbless showers in 28%, and nonslip flooring in 55% of aging-in-place projects, according to the Houzz bathroom trends report.
Large wall tile can provide a clean, low-maintenance appearance, while a smaller shower-floor mosaic can follow slopes and give walkers or bare feet more consistent contact points. That doesn't mean every small mosaic is safe or every textured tile is accessible. Heavy texture may complicate cleaning or interfere with mobility aids, so evaluate traction, grout density, drainage, and maneuverability together.
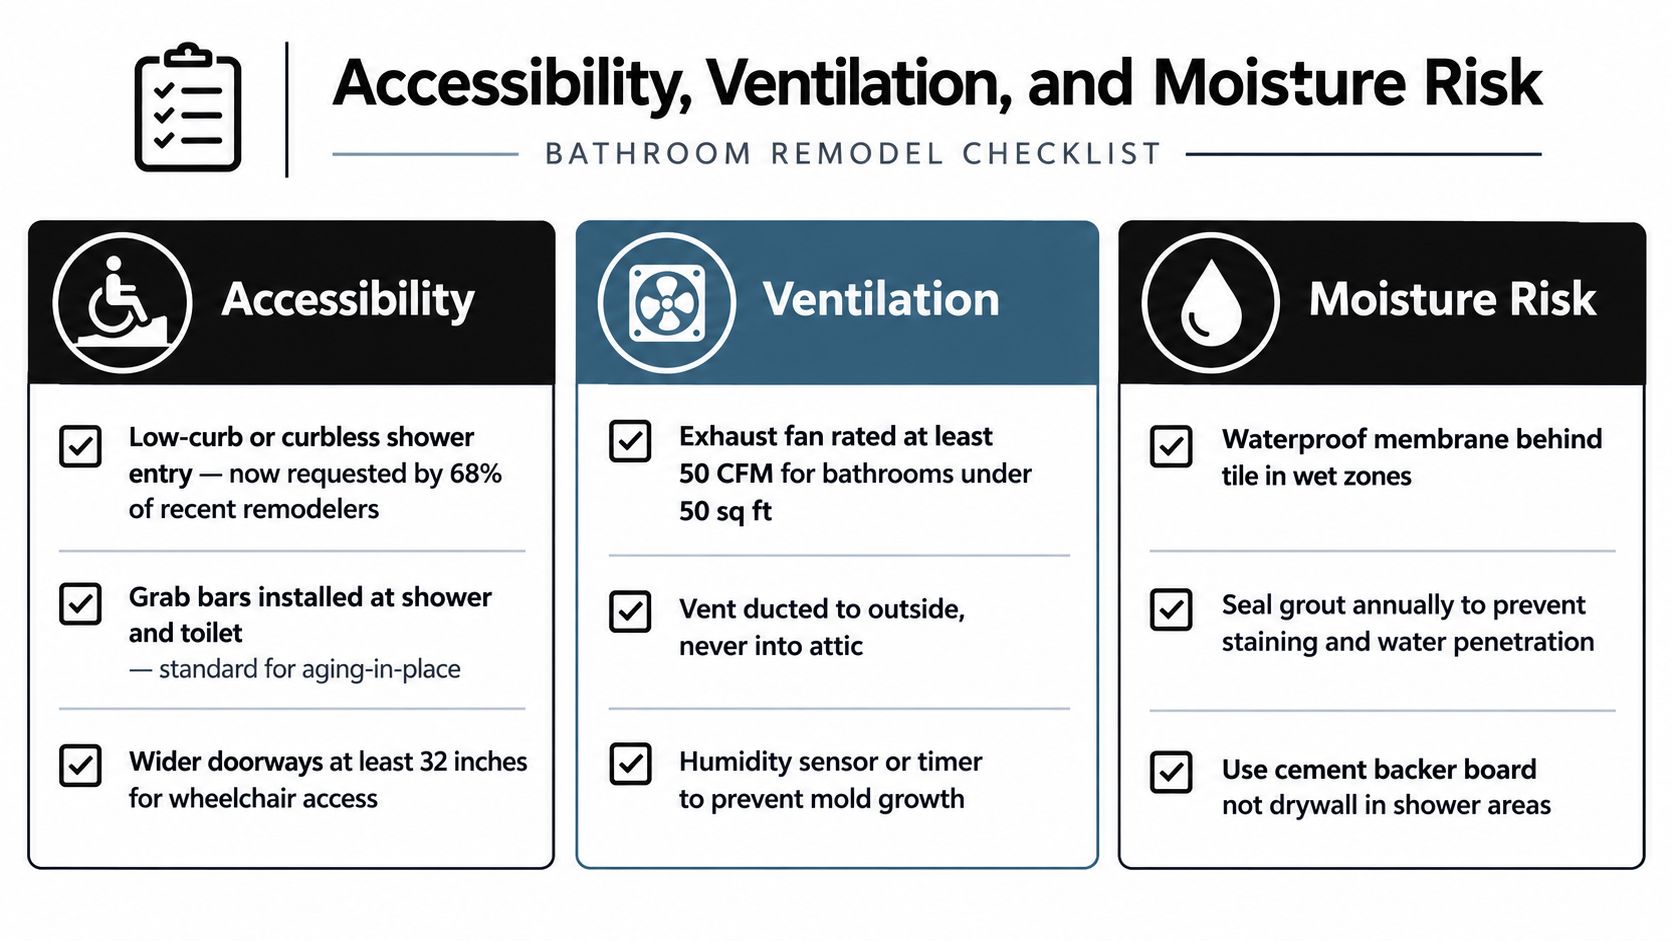
Inspect moisture risks before choosing finishes
Before demolition, identify where water and vapor can travel. Check the shower waterproofing concept, plumbing penetrations, exhaust-fan route, condensation patterns, substrate condition, and any staining or softness around the toilet, tub, vanity, and exterior walls.
The EPA identifies leaks, condensation, unsealed plumbing and electrical penetrations, and inadequate moisture management as renovation concerns. Its remodeling and indoor-air-quality guidance recommends sealing accessible penetrations and designing assemblies that allow moisture to escape rather than trapping it.
Ventilation should discharge to the exterior, not into an attic or wall cavity. Maintain indoor relative humidity between 30% and 60% to reduce conditions that support mold growth, and give routinely wet surfaces enough time to dry. A timer or humidity-controlled fan can help, but it cannot compensate for an unsealed shower assembly or a leak behind the wall.
Hiring, Project Coordination, and a Practical Next Step
Hire the tile contractor who can explain the hidden work, not only the tile pattern. Ask for photos of completed showers, a written waterproofing system, substrate preparation details, flood-test responsibility, movement-joint treatment, and the person responsible for coordinating plumbing, glass, cabinetry, and countertops.
The proposal should state what happens if demolition reveals damage. It should also identify tile quantities, trim, grout, setting materials, protection of completed work, cure times, and the process for approving changes. A low bid that excludes substrate repair or waterproofing verification isn't a bargain. It's an incomplete scope.
Questions to ask before signing
- Who owns the waterproofing detail? The answer should identify the system, seams, penetrations, corners, niches, benches, and transitions.
- When is the shower pan tested? Confirm that testing occurs before tile conceals the assembly.
- How will the layout be approved? Request elevations or a dry layout for niches, trims, borders, and exposed edges.
- How are cabinets and countertops coordinated? Confirm finished floor height, vanity dimensions, backsplash thickness, and countertop templating.
- What happens after demolition? Require a documented change-order process for hidden moisture, framing, plumbing, or subfloor conditions.
For homeowners in Cherry Hill, Camden County, and Burlington County, The Cabinet Coach's mobile showroom model brings cabinetry, countertops, hardware, and tile selections into a guided in-home design process. Its complimentary video consultation is a practical starting point if you want to review the room, priorities, product coordination, and likely construction questions before committing to a final scope.
Bring room measurements, photos of the existing bathroom, inspiration images, a list of accessibility needs, and any concerns about ventilation or prior leaks. The right first conversation should leave you with fewer disconnected decisions and a clearer sequence from demolition to final plumbing.
The Cabinet Coach helps South Jersey homeowners coordinate bathroom cabinetry, countertops, hardware, and tile with a guided mobile showroom experience and project planning support. Visit The Cabinet Coach to schedule a complimentary video consultation and start your bathroom tile remodel with the hidden layers, trade sequence, and finished design considered together.