

You've chosen the cabinets, countertop, backsplash, and appliances. Then the hardware samples arrive, and suddenly “gold” turns into a dozen different decisions: polished, brushed, champagne, antique, warm, bright, slim, oversized. In a Cherry Hill or Burlington County kitchen, the wrong pull can show every fingerprint, clash with the faucet, or leave you with holes that don't match the existing doors.
Gold cabinet pulls can work beautifully, but the finish and measurements matter more than the color name on the package. For a busy South Jersey kitchen, the practical questions are simple: How will the finish wear? What size will look balanced? Will the mounting holes line up? Can the hardware be cleaned without damaging the coating?
Table of Contents
- Why Gold Hardware Remains a Top Choice in South Jersey Kitchens
- Comparing Gold Finish Types for Durability and Style
- Sizing and Spacing Rules for Perfect Proportions
- Coordinating Gold Pulls with Faucets and Countertops
- Step-by-Step Installation and Maintenance Tips
- Final Checklist for Your Gold Hardware Upgrade
Why Gold Hardware Remains a Top Choice in South Jersey Kitchens
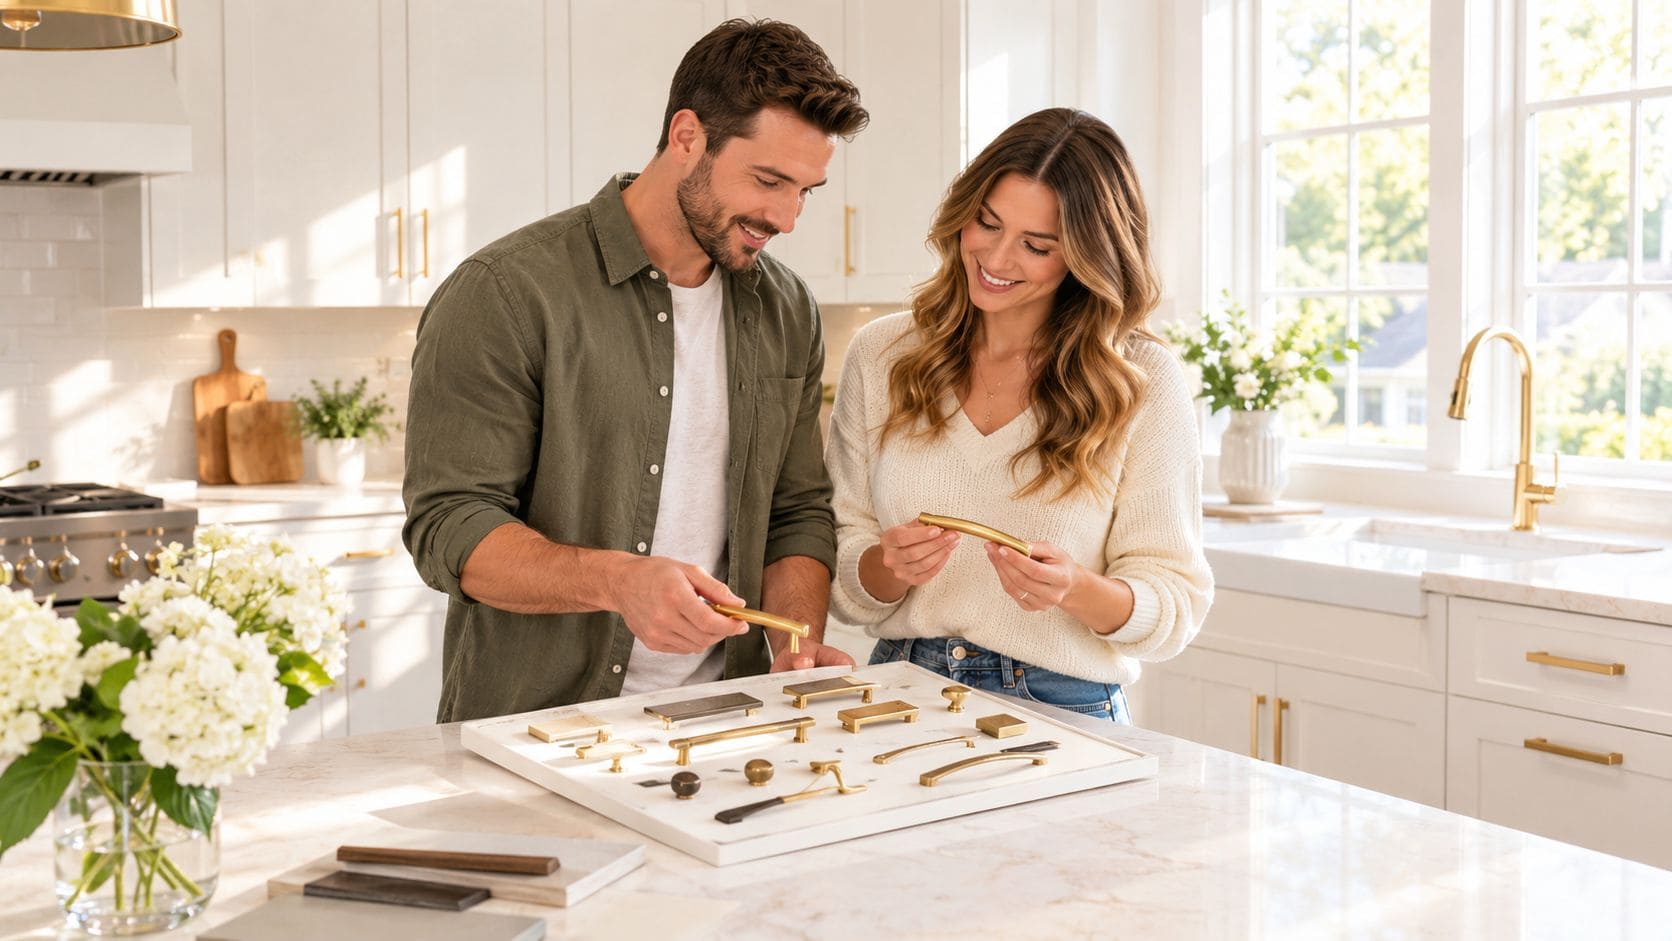
A homeowner remodeling a kitchen in Cherry Hill may begin with a straightforward plan: keep the layout, replace the cabinet fronts, update the counters, and add hardware that makes everything feel finished. The trouble starts at the sample board. One gold pull looks yellow and glossy, another looks muted and architectural, while a third has the darker character of aged brass.
That hesitation is reasonable. Cabinet pulls sit at hand level, receive constant contact, and are viewed alongside large surfaces such as quartz, painted cabinetry, wood flooring, and stainless appliances. Gold hardware isn't a detail you notice once and forget. You touch it every day, so the finish needs to suit both the room and the household.
Warmth without locking in a dated look
Brass is the material most closely associated with gold cabinet pulls. It has remained popular for more than a century because of its warm tone, corrosion resistance, and ability to work with many cabinet colors and countertop materials, as documented in this overview of cabinet hardware materials and finishes. Standard brass is commonly described as approximately 67% copper and 33% zinc, a composition that creates the warm golden color people associate with gold pulls.
That history explains why gold can suit both traditional Shaker cabinetry and modern slab doors. On a white Shaker kitchen, a softer brass pull adds warmth without making the room feel heavy. On natural wood, green, navy, or cream cabinetry, the same general family of finishes can create contrast while preserving an inviting feel.
Gold also has practical market relevance. Cabinet pulls account for 28.5% of the builders and cabinet hardware market, and a broader kitchen and bath hardware report estimates the market at USD 18,250.75 million in 2024, with a projection of USD 32,480.40 million by 2032 at a 7.2% CAGR from 2025 to 2032. Those figures appear in the kitchen and bath hardware market report, but market size alone shouldn't decide your purchase. The pull still has to feel good in your hand and hold up in your particular kitchen.
Practical rule: Choose the finish for the way your kitchen is used, then choose the shape for the way your cabinets are built.
Before ordering, compare samples in the actual room. Look at them beside the countertop, faucet, cabinet color, and under-cabinet lighting. A finish that looks refined in a showroom can appear too bright under cool lighting or too brown beside a warm wood tone. A reliable cabinet hardware selection guide can help organize those choices, but the final test should happen at home.
Comparing Gold Finish Types for Durability and Style
The word “gold” describes a color family, not one construction method. A polished gold pull, a brushed brass pull, lacquered brass, and unlacquered brass can age very differently. The attractive sample you hold in a showroom may not be the finish you want beside a sink, range, or frequently used pantry.
For most active kitchens, brushed or satin gold is the most forgiving choice. Its texture breaks up reflections, so ordinary smudges and water spots aren't as prominent as they are on a mirror-like surface. That doesn't make brushed hardware fingerprint-proof, and it doesn't make the coating immune to scratches. It gives daily wear less visual contrast.
Gold Finish Comparison Guide
| Finish Type | Maintenance Level | Durability & Wear | Best Suited For |
|---|---|---|---|
| Polished gold | Higher. Fingerprints and water marks stand out quickly. | The smooth, reflective surface can make scratches and surface marks more noticeable. | Low-traffic areas, formal designs, and homeowners who want a high-shine look. |
| Brushed or satin gold | Moderate. Routine wiping is usually straightforward. | The directional texture disguises ordinary handling better, but abrasive cleaning can still dull the surface. | Busy kitchens, Shaker cabinets, slab fronts, and warm contemporary interiors. |
| Lacquered brass | Moderate while the coating remains intact. | The lacquer can preserve a polished appearance, but it may wear, chip, or fail at exposed edges over time. | Homeowners who want bright color with less immediate patina. |
| Unlacquered brass | Variable. It requires acceptance of natural color change. | The brass gradually develops patina, moving from bright gold toward muted brown or bronze. | Vintage, traditional, and deliberately lived-in interiors. |
What the coating changes
Lacquered brass gives you a more stable initial appearance. The clear coating separates the metal from ordinary air and handling, which helps preserve a polished color until the coating wears or chips. Once that barrier starts failing, the pull may develop uneven areas that look less intentional than naturally aged brass.
Unlacquered brass takes the opposite approach. It gradually changes as it is handled and exposed to moisture, shifting from a bright gold appearance to a more subdued brown or bronze tone. Some homeowners choose it specifically because the hardware records the life of the kitchen. Others want every pull to retain a consistent contemporary finish and won't enjoy watching the color evolve.
Brushed finishes deserve a realistic description. They hide many everyday marks better than polished finishes, but they're not a license to use harsh products. Abrasive cleaners can dull plated surfaces, and aggressive scrubbing can disturb the texture that makes brushed gold attractive in the first place. For additional context on how brass hardware fits into cabinet design, review this brass cabinet hardware guide.
What works in a high-contact kitchen
Choose brushed gold when the kitchen has several users, frequent cooking, children opening drawers, or a sink positioned close to the cabinet run. Choose polished gold when the reflective appearance is central to the design and you're prepared to wipe the hardware more often. Choose unlacquered brass only after seeing a sample that has already begun to age, because the new-product color won't show you the entire ownership experience.
Sizing and Spacing Rules for Perfect Proportions
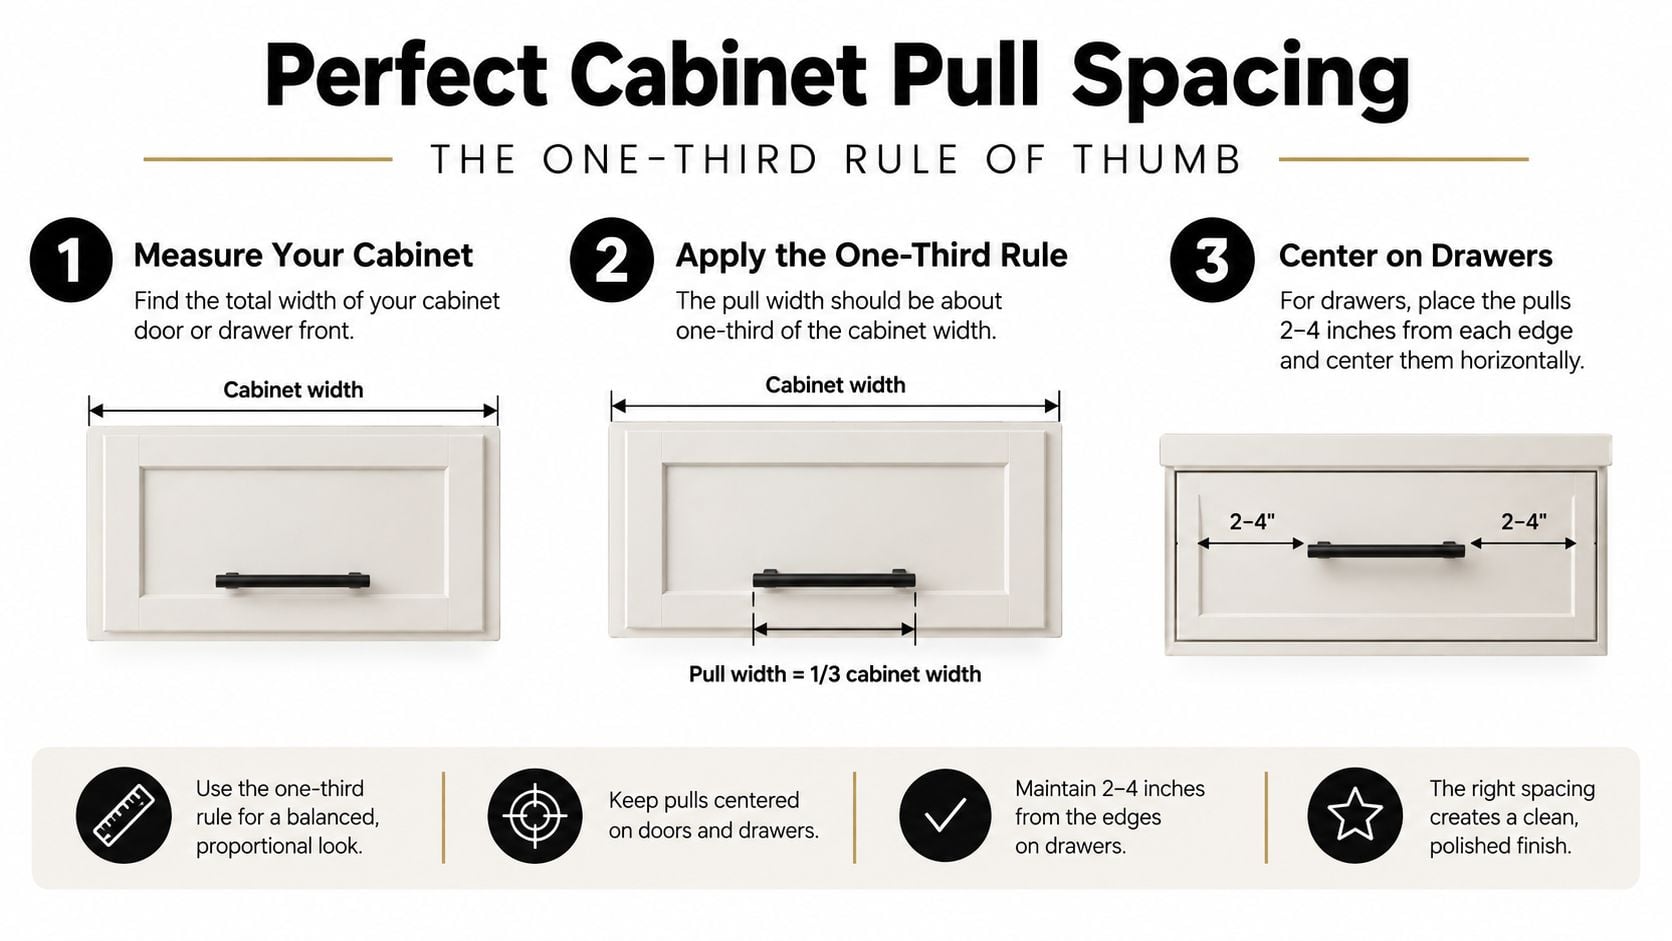
A pull can be beautiful on its own and still look wrong on a cabinet. The most dependable starting point is proportion: size the pull at roughly one-third of the drawer or door-front width. That rule keeps a small drawer from looking overwhelmed and gives a wide door enough visual weight.
Center-to-center spacing is a separate measurement. It's the distance from the center of one mounting hole to the center of the other, not the overall length of the pull. A common market standard is 3-3/4 inches, or 96 mm, while larger pulls are also widely sold at 192 mm and 320 mm spacing. A listed 320 mm gold pull, for example, measures 13-1/8 inches overall, with a 1-7/16-inch projection and 1/2-inch width, as shown in this Richelieu gold cabinet pull specification.
Measure before you shop
Use this process before placing an order:
Measure the visible front. Record the width of each drawer and the width and height of each door or pantry front. Measure the finished front, not the cabinet box behind it.
Apply the proportion rule. Start with a pull near one-third of the front width. Treat that as a design starting point, then check the pull's projection and grip. A narrow, tall door may need a vertical pull that follows its shape rather than a horizontal pull that looks undersized.
Separate overall length from center-to-center spacing. A pull can be much longer than the distance between its screw holes. Always record the manufacturer's center-to-center measurement before ordering.
Check the existing holes. Replacement work in older Camden County kitchens can become messy when the new pull doesn't match the old hole pattern. Measure from hole center to hole center and compare that measurement with the new hardware specification.
Test one location. Install one pull on a frequently used door or drawer. Open nearby doors, check corner clearance, and stand back to judge the proportion before drilling the rest.
For a new installation, consistency usually looks more intentional than using a different pull length on every cabinet. Larger drawers and tall pantry fronts can take longer architectural pulls, while smaller doors may need a shorter pull or knob. Mixing sizes can work, but it should follow a clear pattern based on cabinet function, not whatever hardware happened to be available.
The placement also affects comfort. On doors, common guidance places the pull 2 to 3 inches from the lower edge, while drawers generally receive centered hardware. Confirm the template against the actual stile and rail dimensions so the screws don't land too close to an edge.
For a visual walkthrough of pull placement, use the cabinet spacing video below.
A detailed cabinet hardware placement guide is useful when the kitchen includes mixed door sizes, tall utility cabinets, or existing holes that don't follow a consistent pattern.
Coordinating Gold Pulls with Faucets and Countertops
The strongest gold hardware installations don't always match every metal exactly. They coordinate finishes by repeating a visual temperature, shape, or level of sheen. A brushed gold pull can sit comfortably beside a matte black faucet, stainless appliance, or warm bronze light fixture when the combination looks deliberate.
The mistake is mixing metals randomly. If the faucet is a bright, reflective gold and the pulls are dark, aged brass, the difference may look accidental unless another element connects them. If the faucet is matte black, brushed gold pulls can create useful contrast without competing for attention. The same pairing can work with a black range hood, dark window hardware, or a restrained lighting fixture.
Let the countertop set the volume
Countertops with strong veining already create movement across the room. In that setting, a simple brushed gold bar pull often works better than a highly decorative or heavily textured design. The quieter shape lets the stone remain the focal point while the warm metal adds a controlled accent.
With a plain white quartz countertop, you have more room to use shape and scale. A slim gold pull can keep the kitchen restrained, while a longer pull can provide a stronger architectural line on a simple slab door. Natural wood and wood-look surfaces usually benefit from a softer gold or brass tone that repeats their warmth rather than introducing a sharp yellow contrast.
Cabinet color matters, but the sample should be viewed in context. White and cream cabinets can make bright gold appear more intense. Navy, forest green, and charcoal can absorb some of that brightness and make the hardware read as a stronger accent. Light gray may expose undertones that are hard to see in a store, especially if the pull has a pink, bronze, or brown cast.
A useful countertop and cabinet combination guide can help you assess the room as a whole instead of selecting the pulls in isolation.
Lighting can change the finish
Under-cabinet lighting affects how gold reads after installation. Warm lighting can make brushed brass look soft and inviting, while cool fluorescent lighting may emphasize yellow undertones or make a warm finish feel less integrated. Test the sample under the lights you use at night, not only beside a sunny showroom window.
Place the sample near the sink, range, and island. Those locations show whether the finish works against splashes, shadows, and the visual clutter of daily use. Also inspect the pull from standing height and from close range. A finish that looks balanced across the room may reveal too much shine when you're reaching for it.
The goal isn't perfect metal matching. It's a room where the hardware, faucet, lighting, appliances, countertop, and cabinet color appear to belong to the same design conversation.
Step-by-Step Installation and Maintenance Tips
Gold pulls are manageable for a careful homeowner, but accuracy matters more than speed. Gather a tape measure, pencil, screwdriver, drill, painter's tape, and a cabinet hardware template. A template is especially useful when several doors share the same dimensions because it keeps the hole locations consistent.
Install one pull before drilling the set
Mark the centerline of the drawer or door, then position the template so the mounting holes sit symmetrically. Hold the pull in place and open the cabinet fully. Check whether the projection strikes an adjacent door, wall, backsplash, or appliance handle.
For standard screws, installers commonly use a 3/16-inch drill bit, as described in this cabinet pull installation guidance. Put painter's tape over the drilling area if it helps prevent surface splintering, and support the back of the front when possible. Drill straight through the marked points rather than forcing the bit at an angle.
Installation checkpoint: Test one pull, verify clearance, and tighten the screws by hand before committing to the rest of the kitchen.
Insert the screws from the back of the cabinet front and start both sides before tightening either one fully. Hand-tightening gives you better control over the finish and reduces the chance of stripped screws. Stop when the pull is secure. Over-tightening can damage softer wood, compress the cabinet surface, or stress a plated finish around the mounting point.
Keep the finish clean without polishing it away
Routine maintenance should be gentle. Wipe brushed gold with a soft microfiber cloth, using mild soap and water when residue needs more than a dry wipe. Remove grease rather than scrubbing it across the surface.
Avoid abrasive powders, rough sponges, aggressive degreasers, and products intended to polish bare metal unless the manufacturer specifically approves them. These cleaners can dull plated surfaces and may change the sheen unevenly. Don't leave standing water around the base of pulls near the sink, either. Drying the area takes little time and reduces the amount of moisture sitting against the hardware and cabinet front.
If you selected unlacquered brass, cleaning decisions also affect how quickly the patina develops. If you selected lacquered or plated hardware, gentle handling protects the coating that controls the original appearance. In either case, the most effective routine is simple, consistent, and nonabrasive. More installation detail is available in this guide to installing cabinet hardware.
Final Checklist for Your Gold Hardware Upgrade
Before ordering kitchen cabinet pulls gold, review the project as an installation rather than a shopping decision.
Match finish to traffic. Brushed or satin gold is generally the practical choice for a busy kitchen because its texture is more forgiving of ordinary marks. Polished gold needs more visual upkeep, while unlacquered brass is a deliberate choice for natural patina.
Measure the cabinet fronts. Start with a pull that's roughly one-third of the drawer or door-front width. Then confirm the grip, projection, orientation, and overall proportion.
Confirm center-to-center spacing. Record the distance between existing screw holes before ordering replacements. New pulls must match the hole pattern, or you'll need to plan for repair and redrilling.
Test one location. Check corner clearance, neighboring doors, screw length, and the finish under your actual kitchen lighting.
Coordinate, don't obsess over matching. Brushed gold can work with black, stainless, bronze, wood, quartz, marble, and painted cabinetry when the sheen and visual weight are balanced.
Protect the surface. Use mild soap, water, and a microfiber cloth. Keep abrasive cleaners away from plated finishes.
If you're unsure about scale, finish undertones, or how the pulls will work with a planned countertop and faucet, get the samples into the room before committing to the full order. A local design professional can also review the cabinet layout, hardware placement, and related selections in the same visit.
The Cabinet Coach brings a mobile cabinet showroom to homeowners throughout Cherry Hill and South Jersey, with guidance on cabinetry, countertops, hardware, and tile for kitchen and bathroom renovations. For help comparing gold pull finishes, checking proportions, and coordinating the complete room, visit The Cabinet Coach and arrange a consultation.