
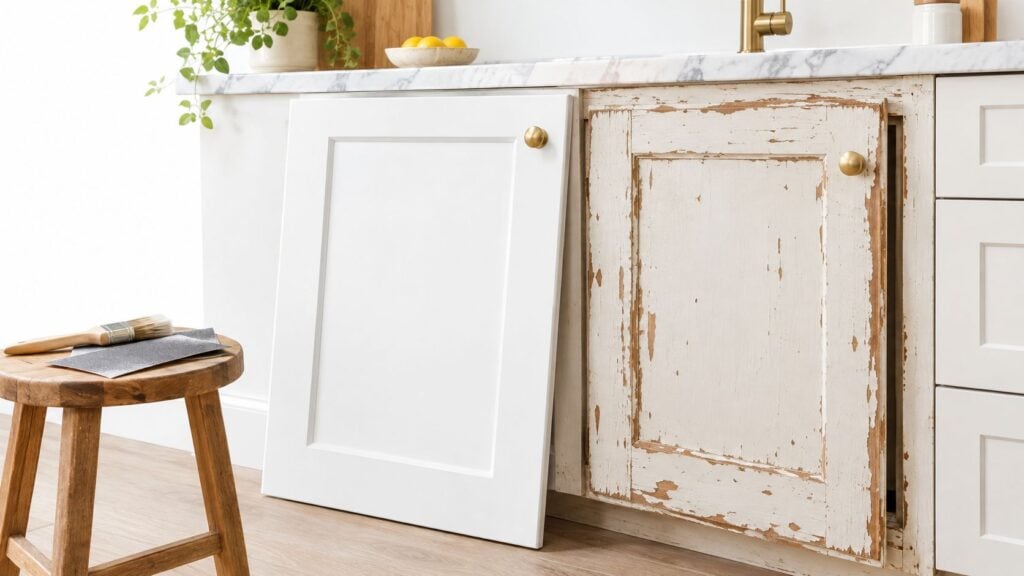
Your kitchen probably isn't a disaster. It's just tired. The cabinet boxes still stand straight, the doors still open, but the finish looks worn, the hardware dates the room, and every quote for a full remodel feels like it belongs to someone else's budget.
That's the exact spot where most South Jersey homeowners get stuck. They start searching how to make old kitchen cabinets look new, assume paint is the obvious fix, and end up choosing the wrong level of work. I wouldn't do that. If the boxes are solid, a smart cabinet refresh can absolutely change the room without ripping everything out. That matters because a full kitchen remodel is expensive, with the 2023 American Housing Survey reporting a median U.S. kitchen-remodel expenditure of about $8,000 for the 2021 to 2023 period, while builder survey data cited from the 2024 National Association of Home Builders put cabinets and countertops at $19,056 per new home, or 4.5% of total construction cost in that context, which helps explain why preserving sound cabinetry can be the strategic move when the layout still works (cabinet remodeling cost context).
Table of Contents
- The Four Paths to a New-Looking Kitchen
- Decide Whether to Refinish, Reface, or Replace
- The Substrate Prep That Makes Paint Actually Last
- Comparing Refinish, Reface, and Full Replacement
- Hardware, Doors, Drawers, and the Details Buyers Notice
- Cabinet Interiors and Storage Upgrades That Change Daily Life
- Booking a Mobile Showroom Consultation in South Jersey
The Four Paths to a New-Looking Kitchen
If you live in Cherry Hill, Haddonfield, Moorestown, or anywhere nearby, you've probably seen this movie before. Oak cabinets from another decade. Yellowed clear coat. Hinges that still function but don't feel good. A backsplash and countertop that may stay for now because the budget has to stretch.
The mistake is treating every kitchen like it needs the same answer. It doesn't. I look at cabinet projects in four escalating paths, and the right one depends on cabinet condition, layout, and how much disruption you can tolerate.
Clean and update
This is the first path, and people skip it too quickly. If the finish is dull but intact, start with a serious degreasing, better lighting, and new hardware. Add a backsplash, update the faucet, and stop pretending every kitchen needs paint to improve. Some practical budget kitchen refresh tips are useful here because they focus on visible change without jumping straight to a full cabinet project.
Refinish
Choose refinishing when the cabinet boxes are sound, the door style still works for you, and the problem is mostly cosmetic. Done right, refinishing preserves the existing layout and boxes while changing color, sheen, and hardware. A good overview of what a cabinet remodel can involve is in this guide on how to remodel cabinets.
Reface
Refacing is the sweet spot when the boxes are fine but the doors look dated. You keep the cabinet structure, then replace doors, drawer fronts, and exposed faces. It costs more than refinishing, but it can make an older kitchen read as completely different.
Replace
Replacement is for kitchens with structural issues, layout problems, or materials that shouldn't be saved. If the sink base is swollen, the boxes are loose, or the room functions badly, paint won't rescue it.
Practical rule: If your cabinets are ugly but solid, refresh or refinish. If they're solid but stylistically hopeless, reface. If they're damaged or the layout fights you every day, replace.
Decide Whether to Refinish, Reface, or Replace
Before you buy primer, do a blunt condition check. This takes less than half an hour, and it saves you from throwing time at the wrong solution.
What to inspect first
Walk the kitchen and check the parts homeowners usually ignore:
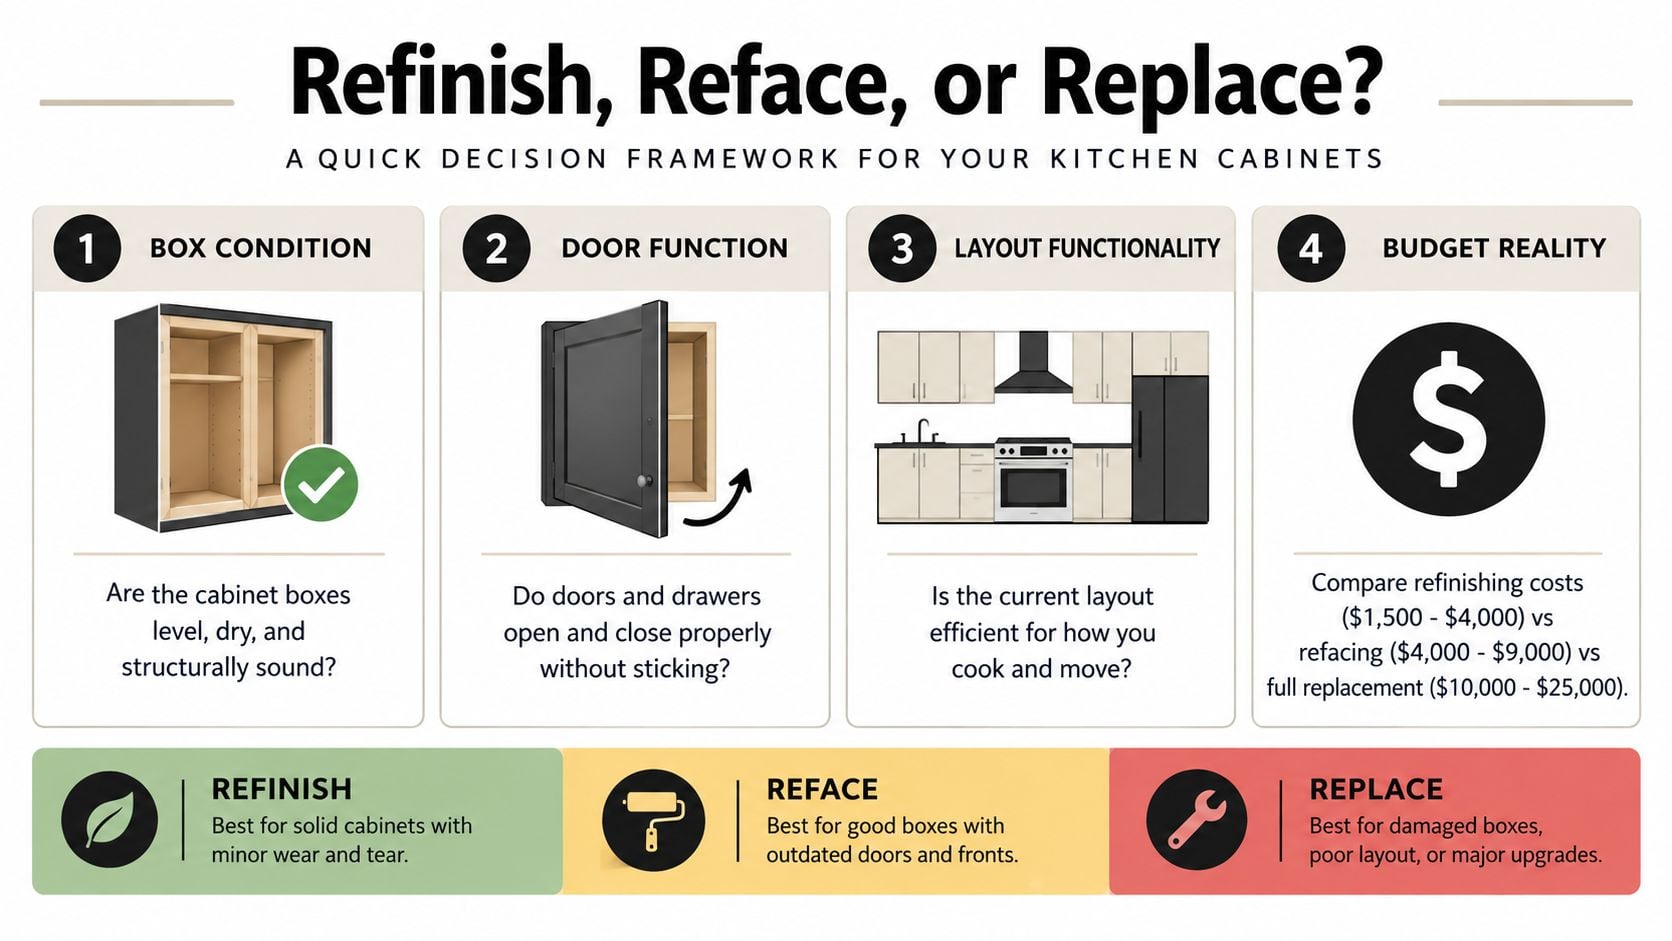
- Box condition. Look under the sink, beside the dishwasher, and along the toe-kick for swelling, softness, or water staining. Particleboard that has puffed up won't become healthy again with paint.
- Door and drawer function. Open everything. If doors sag, rub, or won't stay aligned, find out whether it's a hinge issue or a failing cabinet box.
- Veneer and surface stability. Delaminated veneer and failing thermofoil are warning signs. A surface can look paintable and still reject a new finish.
- Layout reality. If the room is awkward to cook in, the finish isn't the problem.
If you're weighing structural options, this side-by-side discussion of cabinet refacing vs replacement is worth reading because the wrong choice usually gets expensive twice.
Cosmetic wear versus real failure
Cosmetic wear looks like faded finish, scratches, dated color, minor edge wear, and old hardware. Structural failure looks like loose boxes, swollen bases, damaged substrate, persistent moisture issues, or doors attached to weak material.
The distinction matters. The EPA's guidance for DIY renovators is clear that homes built before 1978 need painted surfaces tested for lead-based paint or treated as if lead may be present, and it recommends lead-safe work practices or a certified contractor for affected renovation work (lead-safe renovation guidance for DIYers). If you have an older South Jersey home with unknown paint history, don't dry-sand first and ask questions later.
Old cabinets don't automatically mean risky cabinets. Old paint with unknown history does.
My rule for choosing the path
Use this simple decision line:
- Refinish when boxes are level, dry, functional, and the layout still serves you.
- Reface when the boxes are sound but the door style, profile, or exposed faces make the whole kitchen feel stuck in another era.
- Replace when moisture, movement, bad layout, or failing materials are the actual issue.
If you see peeling layers, chalky coatings, damaged bases, or unknown old finishes, stop calling it a paint job. It's a cabinet assessment.
The Substrate Prep That Makes Paint Actually Last
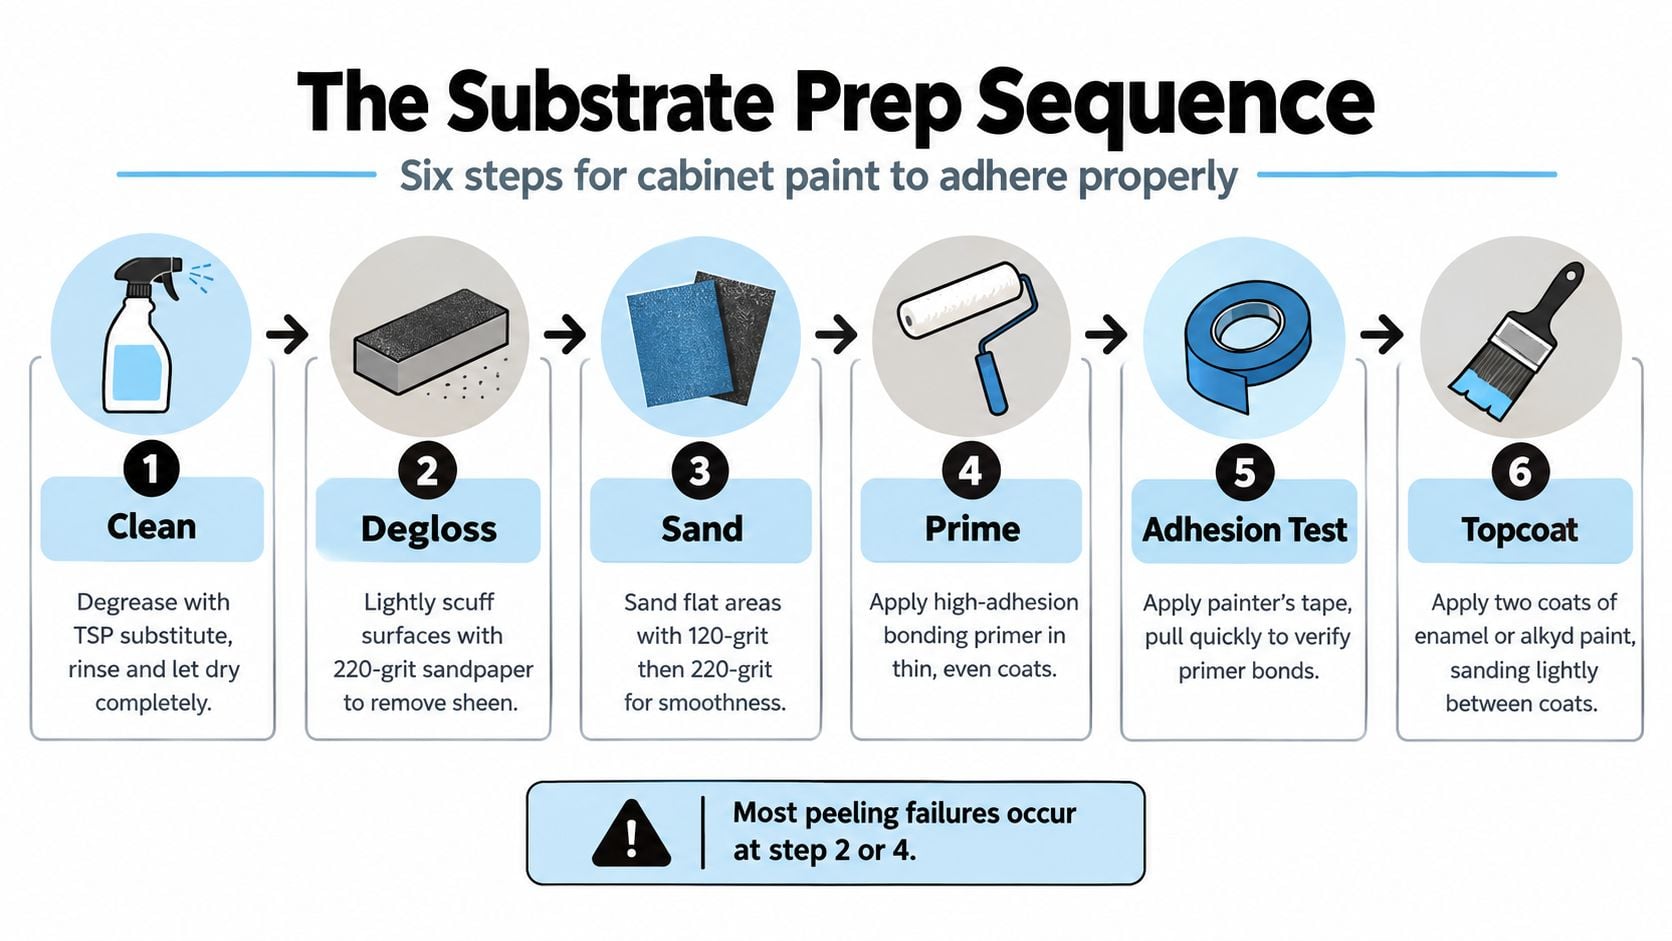
Most failed cabinet paint jobs aren't color problems. They're prep failures. Grease around pulls, dust in the film, skipped primer, rushed dry times. That's why I treat cabinet refinishing as substrate preparation first, painting second.
The sequence that actually matters
Rust-Oleum's technical guidance says surfaces need to be free of dust, grease, oil, stains, rust, wax, and other contaminants, and it recommends priming to improve adhesion. PPG similarly calls for removing contaminants, filling holes, caulking cracks, sanding glossy and patched areas, and priming knots or resinous spots (cabinet coating preparation guidance).
That sequence is the job:
- Remove doors, drawers, and hardware, then label everything.
- Wash every surface with a real degreaser until wax and cooking residue are gone.
- Abrade glossy areas and remove any loose or peeling finish.
- Vacuum dust and wipe with a lint-free cloth.
- Fill dents and seams, then sand repairs flush.
- Spot-prime problem areas, including knots, stains, and tannin-prone wood.
- Run a test panel before committing to the whole kitchen.
If you've ever looked at guides for repainting aluminium window frames, the same core lesson applies. The finish only performs as well as the surface you prepared underneath.
What failure looks like
Skipped prep leaves fingerprints all over the final job:
- Grease left near handles causes fisheyes and weak adhesion.
- Dust trapped in the film leaves a rough finish and weakens bond.
- Unprimed tannins or stains bleed through as yellow-brown discoloration.
- Painting over a weak old coating leads to peeling and early chipping.
Laminate and thermofoil need extra skepticism. A surface may look intact while the vinyl layer is already failing. That's when refinishing turns into a repeat job.
If a door fails a tape or cross-hatch adhesion test after the full cleaner, scuff, primer, and paint sequence, stop. The cabinet is telling you not to trust that system.
Ventilation is part of finish quality
The EPA identifies sanding, stripping, finishing, stains, topcoats, adhesives, and cleanup solvents as sources of volatile organic compounds and other hazardous air pollutants during wood-finishing work. It also says concentrations of many indoor VOCs are commonly 2 to 5 times higher indoors than outdoors, and paint-related emissions are strongest during drying and the first several days after application. EPA Indoor airPLUS guidance also calls for at least 90% of interior surface area covered by site-applied paints and coatings to use certified low- or no-VOC products, with ventilation continuing during application and for 2 to 3 days afterward, exhausting outdoors rather than into another room or attic (EPA wood-finishing and indoor-air guidance).
That's not just a health note. It affects cure quality. Thin compatible coats, proper recoat windows, and ventilation produce a harder, cleaner finish. If you want a service option rather than a DIY experiment, a cabinet painting company such as The Cabinet Coach's cabinet painting service handles the cleaning, repairs, priming, and finish process as a coordinated system.
Comparing Refinish, Reface, and Full Replacement
Homeowners usually need a straight answer. Refinishing is not the same as refacing, and both are very different from full replacement. The best option depends less on trend photos and more on whether your existing kitchen deserves to be saved.
Cabinet Refresh Options at a Glance
| Option | Typical Cost Range | Timeline | Disruption | Best When |
|---|---|---|---|---|
| Refinish | Lower than reface or replace | Shorter than major cabinet work | Moderate mess from prep and curing | Boxes and doors are sound, layout works, finish is the problem |
| Reface | Higher than refinishing, lower than full replacement in many cases | Moderate | Moderate, with door and surface replacement work | Boxes are solid, but door style and visible faces feel dated |
| Full replacement | Highest of the three | Longest | Highest, often affecting counters, backsplash, and daily kitchen use | Boxes are damaged, layout fails, or you want a fundamentally new kitchen |
Where each option wins
Refinishing wins when the bones are good. If the cabinet boxes are level, dry, and functional, keeping them is often the smartest move. You preserve the footprint, avoid unnecessary demolition, and focus spending where people see it.
Refacing wins when the kitchen is structurally fine but visually stuck. Flat doors can replace heavy raised-panel fronts. Exposed ends can be updated. The whole room reads newer without tearing apart the cabinet layout.
Replacement wins when you're solving more than appearance. If the sink base is compromised, the boxes are loose, or the room's workflow is annoying every day, replacement is cleaner than trying to rescue bad conditions in stages.
The trade-offs people miss
Online calculators usually ignore secondary costs. Real projects don't. When you switch door styles or overlays, you may need:
- New hinges to match the new drilling pattern
- New pulls or knobs, especially if hole spacing changes
- Finished end panels and fillers so the old cabinet sides don't give away the age
- Countertop or backsplash adjustments if cabinet dimensions shift during replacement
The cheapest path on day one isn't always the cheapest completed project.
The other big trade-off is disruption. Refinishing keeps your kitchen recognizable but demands patience during prep, drying, and curing. Refacing gives a bigger visual change, but it won't fix a bad layout. Replacement creates the most flexibility, but it also affects the most moving parts.
My opinion is simple. If your layout works and the boxes are healthy, don't rip out a kitchen just because the doors are ugly. If the room frustrates you every time you cook, stop sinking money into cosmetics and plan the bigger move.
Hardware, Doors, Drawers, and the Details Buyers Notice
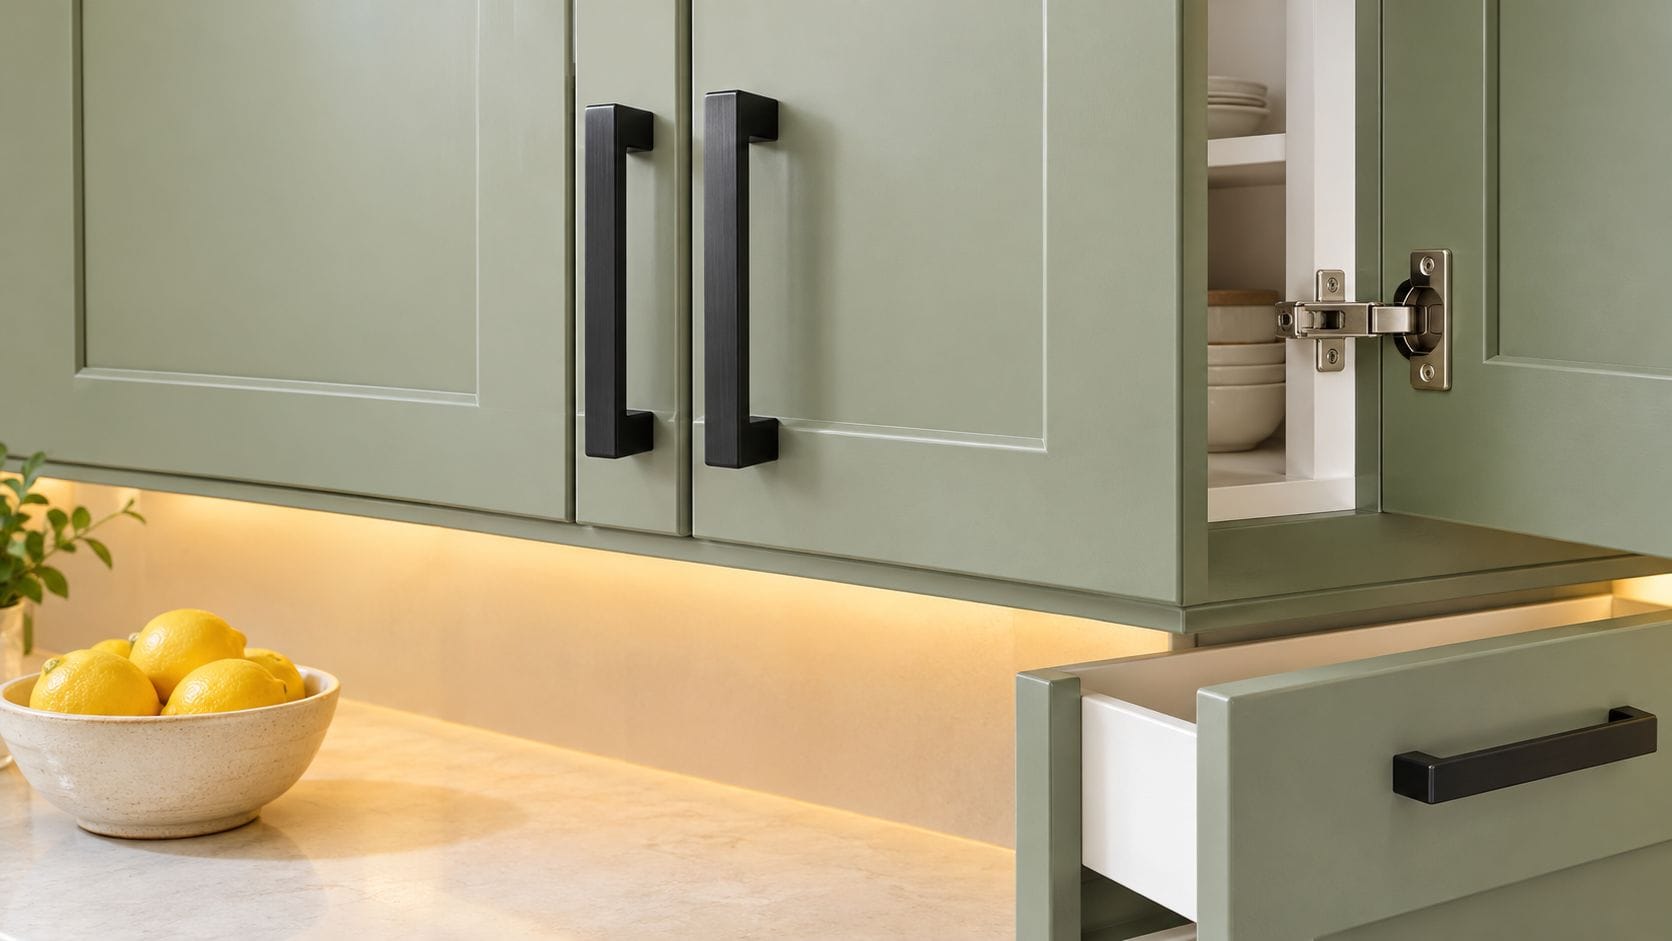
A kitchen rarely looks old because of cabinet color alone. It looks old because the details don't agree with each other. Shiny brass knobs on tired oak doors. Exposed hinges from another decade. A dark work surface with weak lighting underneath. Fix those details, and the room changes faster than you expect.
Start with hardware and lighting
If I'm trying to make old kitchen cabinets look new without overspending, I usually start here:
- Replace dated knobs and pulls with a finish that matches the room's other metals.
- Upgrade hinges if doors sag, bind, or don't close cleanly.
- Add under-cabinet lighting because it improves both appearance and function.
- Clean up the visual edges with fresh toe-kicks, finished end panels, or trim where needed.
Hardware selection matters more than homeowners think. Pull length, projection, finish, and hole spacing all affect whether the kitchen feels current or patched together. This guide on how to choose cabinet hardware is useful if you're trying to avoid buying pieces that look right online and wrong in the room.
When to replace only the doors and drawer fronts
This is one of the smartest mid-range moves. If the cabinet boxes are solid but the door profile dates the kitchen, replacing doors and drawer fronts can create the visual effect of a much larger renovation. It also lets you coordinate hinge style, finish, and hardware placement rather than forcing new hardware onto old drilling patterns.
What I'd avoid is spending real money on new hardware for doors you already know you hate. Sequence matters. Decide first whether the doors are staying.
A quick visual example helps if you're comparing finish styles, hardware placement, and how lighting changes the look of a painted cabinet set:
Small upgrades that punch above their cost
Glass inserts can lighten a heavy run of uppers. One or two open shelf conversions can break up a wall without turning the kitchen into a styling exercise. Soft-close hinges and drawer hardware won't impress anyone in a listing photo, but they absolutely change how the kitchen feels in daily use.
Buy hardware after you choose door style, finish, and hole strategy. Not before.
The best detail upgrades are coordinated, not random. A modest spend on pulls, hinges, lighting, and a few strategic panel fixes can outperform a repaint that leaves every dated detail untouched.
Cabinet Interiors and Storage Upgrades That Change Daily Life
Most cabinet articles obsess over the door color because that's what photographs well. Real kitchens don't work that way. You live inside the cabinets, not just in front of them.
That's why I push homeowners to look past the exterior. Houzz's 2025 U.S. Kitchen Trends Study found that 27% of renovating homeowners took on partial cabinet projects. Within that group, 55% chose exterior refinishing, while interior cabinet refinishing reached 17%, up four percentage points to its highest reported share (Houzz kitchen cabinet trends). That tracks with what people regret after a refresh. Fresh doors outside, dingy shelves inside.
The interior work that's worth doing
Focus on the upgrades that improve daily use:
- Repair shelf-edge swelling before it spreads or flakes further.
- Replace worn shelf pins so shelves sit level and feel secure.
- Clean interiors carefully, especially on laminate or veneer, so you don't damage the surface while removing grease and odor.
- Use liners selectively, only where they won't trap moisture.
- Upgrade drawer operation and storage access with pull-outs where they'll help.
Practical organization beats decorative spending. If a blind corner wastes space, solve that. If trash storage is awkward, fix that. If deep lower cabinets swallow cookware, add structure. For ideas on making bulky storage easier to use, this guide on how to organize deep kitchen cabinets is a solid reference.
What I'd skip
I wouldn't add every organizer sold online. A kitchen can get overbuilt fast. Fancy inserts for drawers you barely open are sunk cost. So are niche storage accessories that reduce usable space more than they improve it.
What's worth paying for is anything that removes friction from your routine. Better drawer movement. Easier access under the sink. A concealed trash solution. Interior surfaces that feel clean instead of sticky and tired.
A kitchen feels new when it works cleanly at 7 a.m. on a Tuesday, not just when the cabinet color looks good in afternoon light.
If you're already refreshing the exterior, don't ignore the interior. Mismatched insides make the whole room feel half-finished.
Booking a Mobile Showroom Consultation in South Jersey
Some kitchens are weekend projects. Others need a real plan before anyone touches a hinge. If you're unsure whether you should clean, refinish, reface, or replace, that's the moment a consultation earns its keep.
A mobile showroom model makes sense for busy South Jersey homeowners because the decisions happen in the actual room. In-person light, existing flooring, countertop undertones, and traffic patterns matter. Samples that looked fine on a screen can look completely wrong next to your backsplash or wall color.
What to have ready before the meeting
You don't need architectural drawings. You do need a few basics:
- Rough measurements of the kitchen and any problem walls
- Inspiration photos that show what you like, and what you hate
- A realistic budget range so recommendations stay grounded
- A wish list that separates must-haves from nice-to-haves
That makes the conversation sharper. Instead of talking in generalities, you can make actual decisions about whether your kitchen deserves refinishing, door replacement, or a full redesign.
What a guided process should clarify
A good consultation should narrow the scope, not inflate it. Ask direct questions:
- Are my cabinet boxes worth saving
- Will new doors require hinge or hardware changes
- What adjacent surfaces might need updates if we change cabinet height or style
- What work creates visible value now, and what can wait
For homeowners around Cherry Hill, Voorhees, Haddonfield, Moorestown, and nearby Camden and Burlington County towns, the mobile approach also saves you from showroom-hopping just to compare finishes and hardware in the abstract. You can look at options where they'll live, then move into discovery, site review, concept development, preliminary estimates, and final coordination with fewer surprises.
That's the value here. Not more ideas. A vetted path.
If your kitchen cabinets are worn but not beyond saving, The Cabinet Coach can help you sort out whether you need a clean-up, a serious refinishing plan, new doors, or a full cabinet replacement conversation. Start with a consultation, get clear on what your existing cabinets can realistically do, and make one smart move instead of three expensive half-measures.